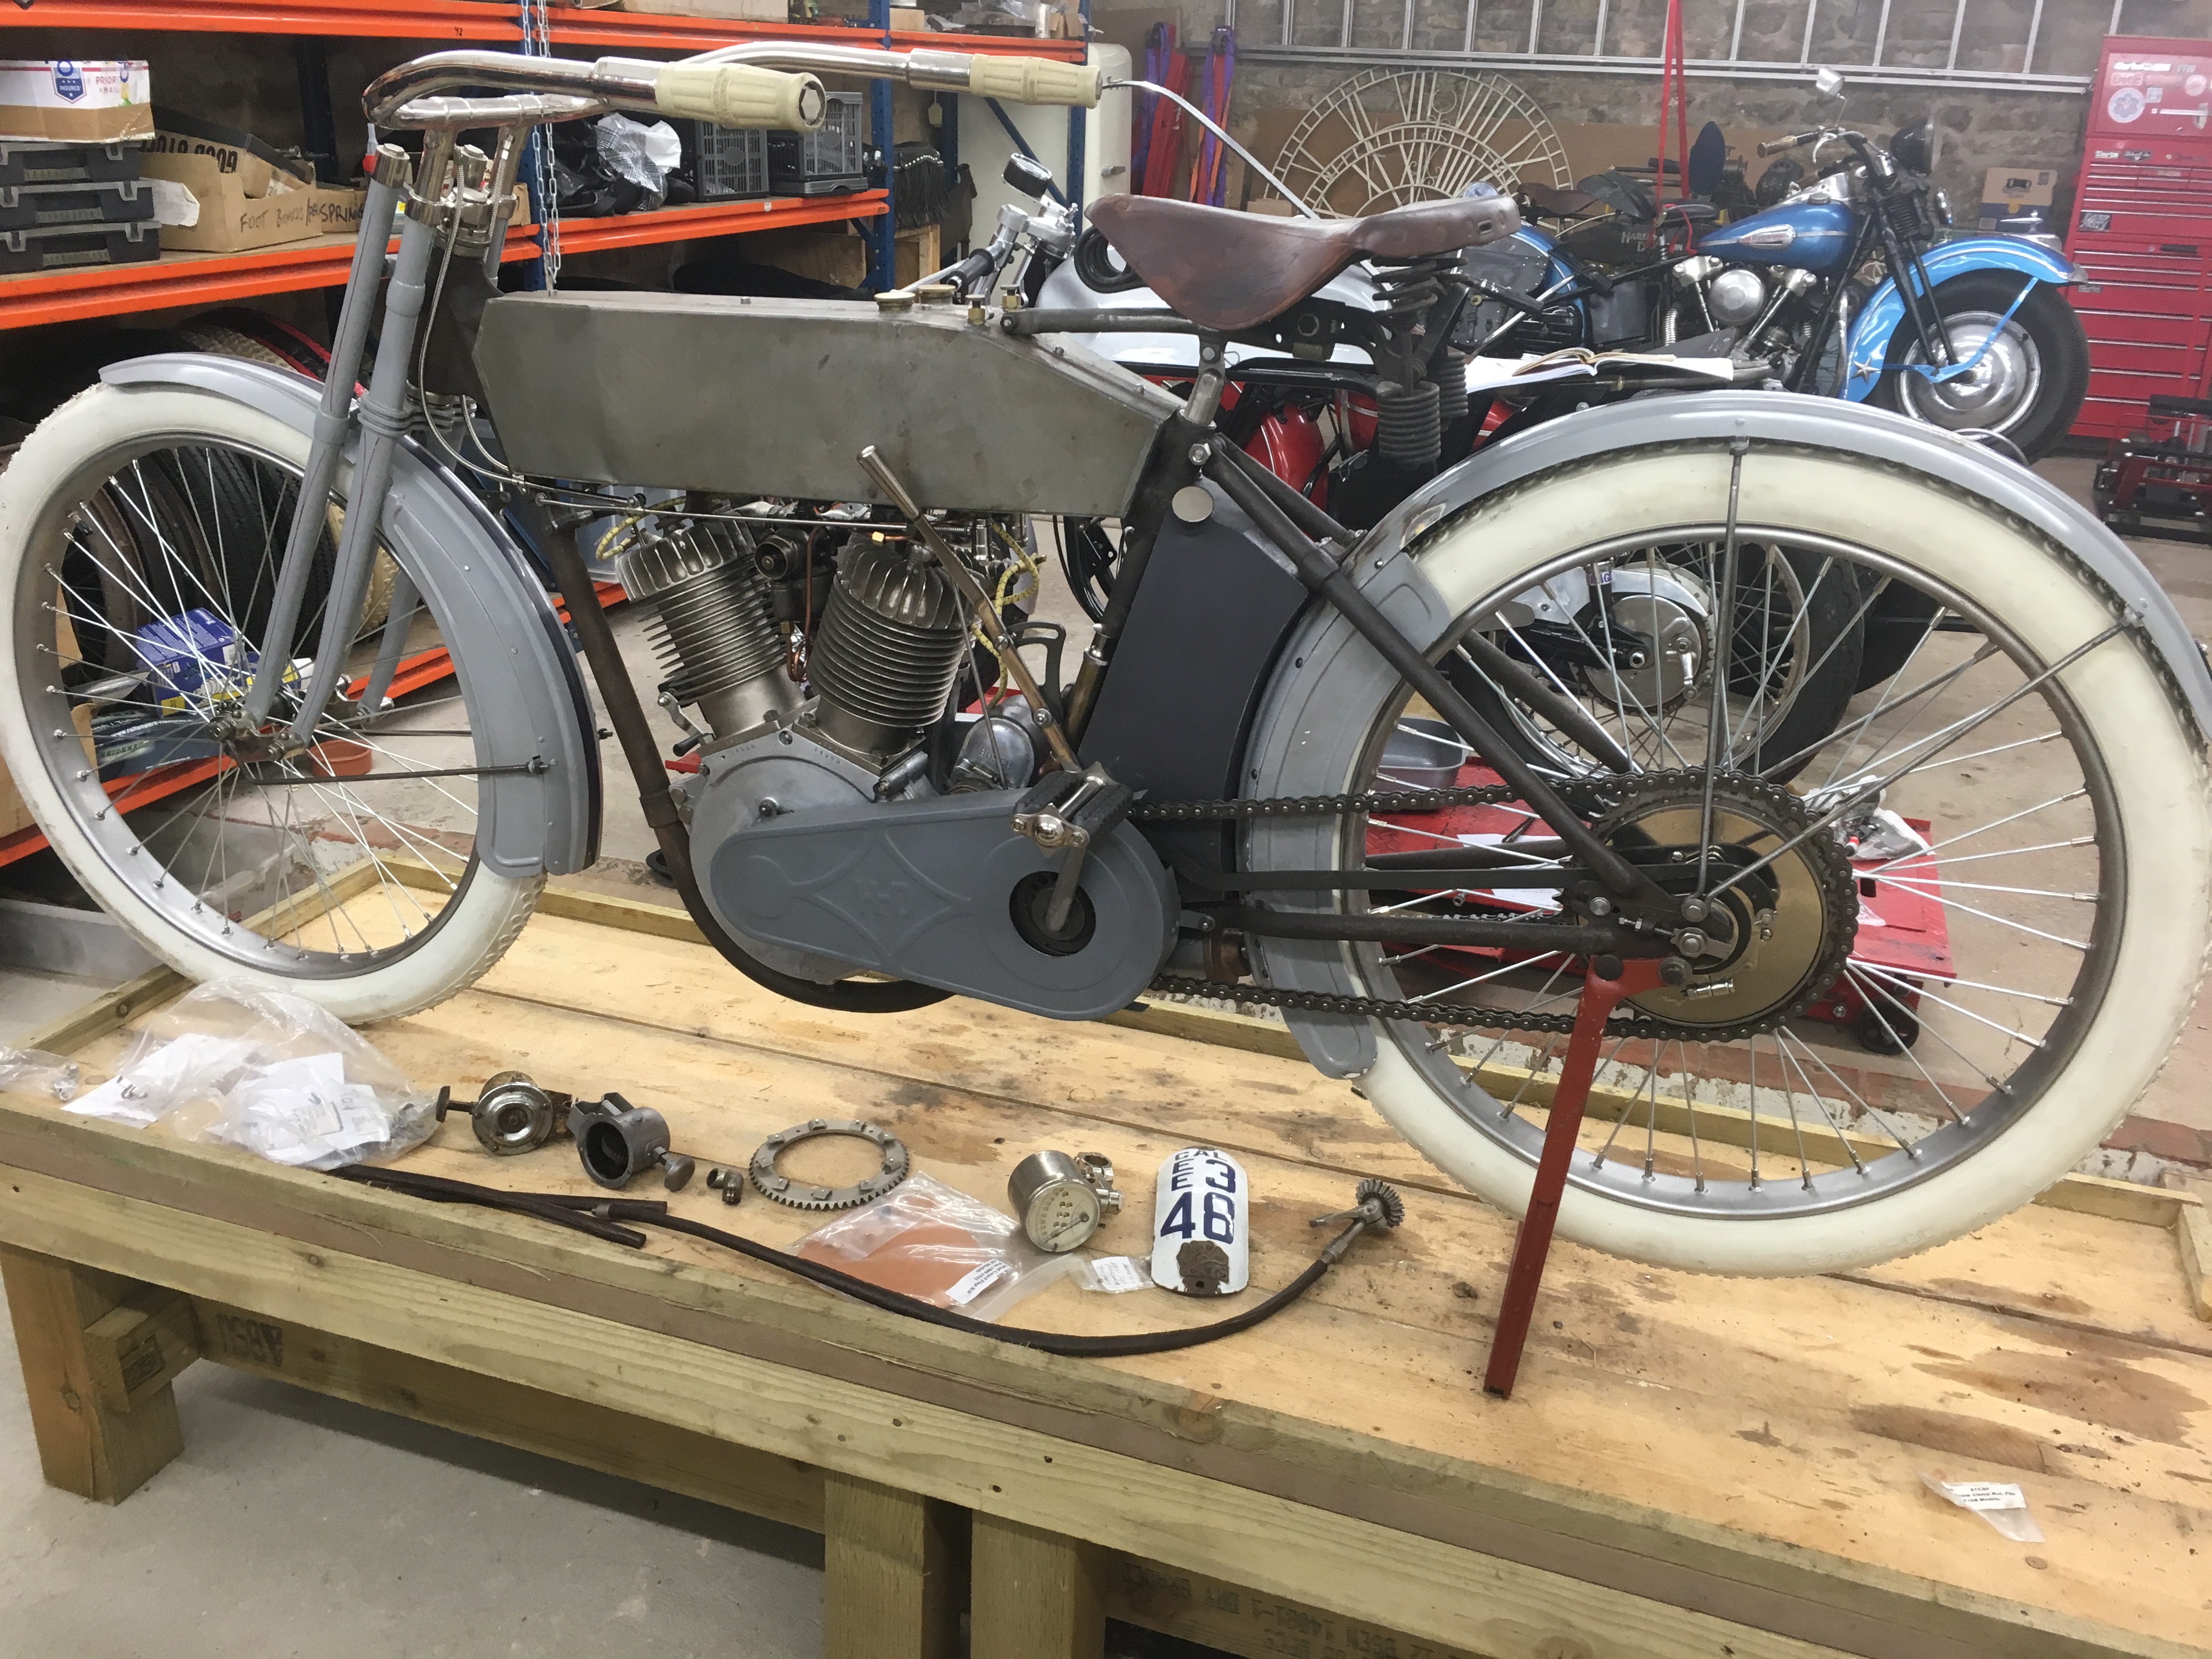
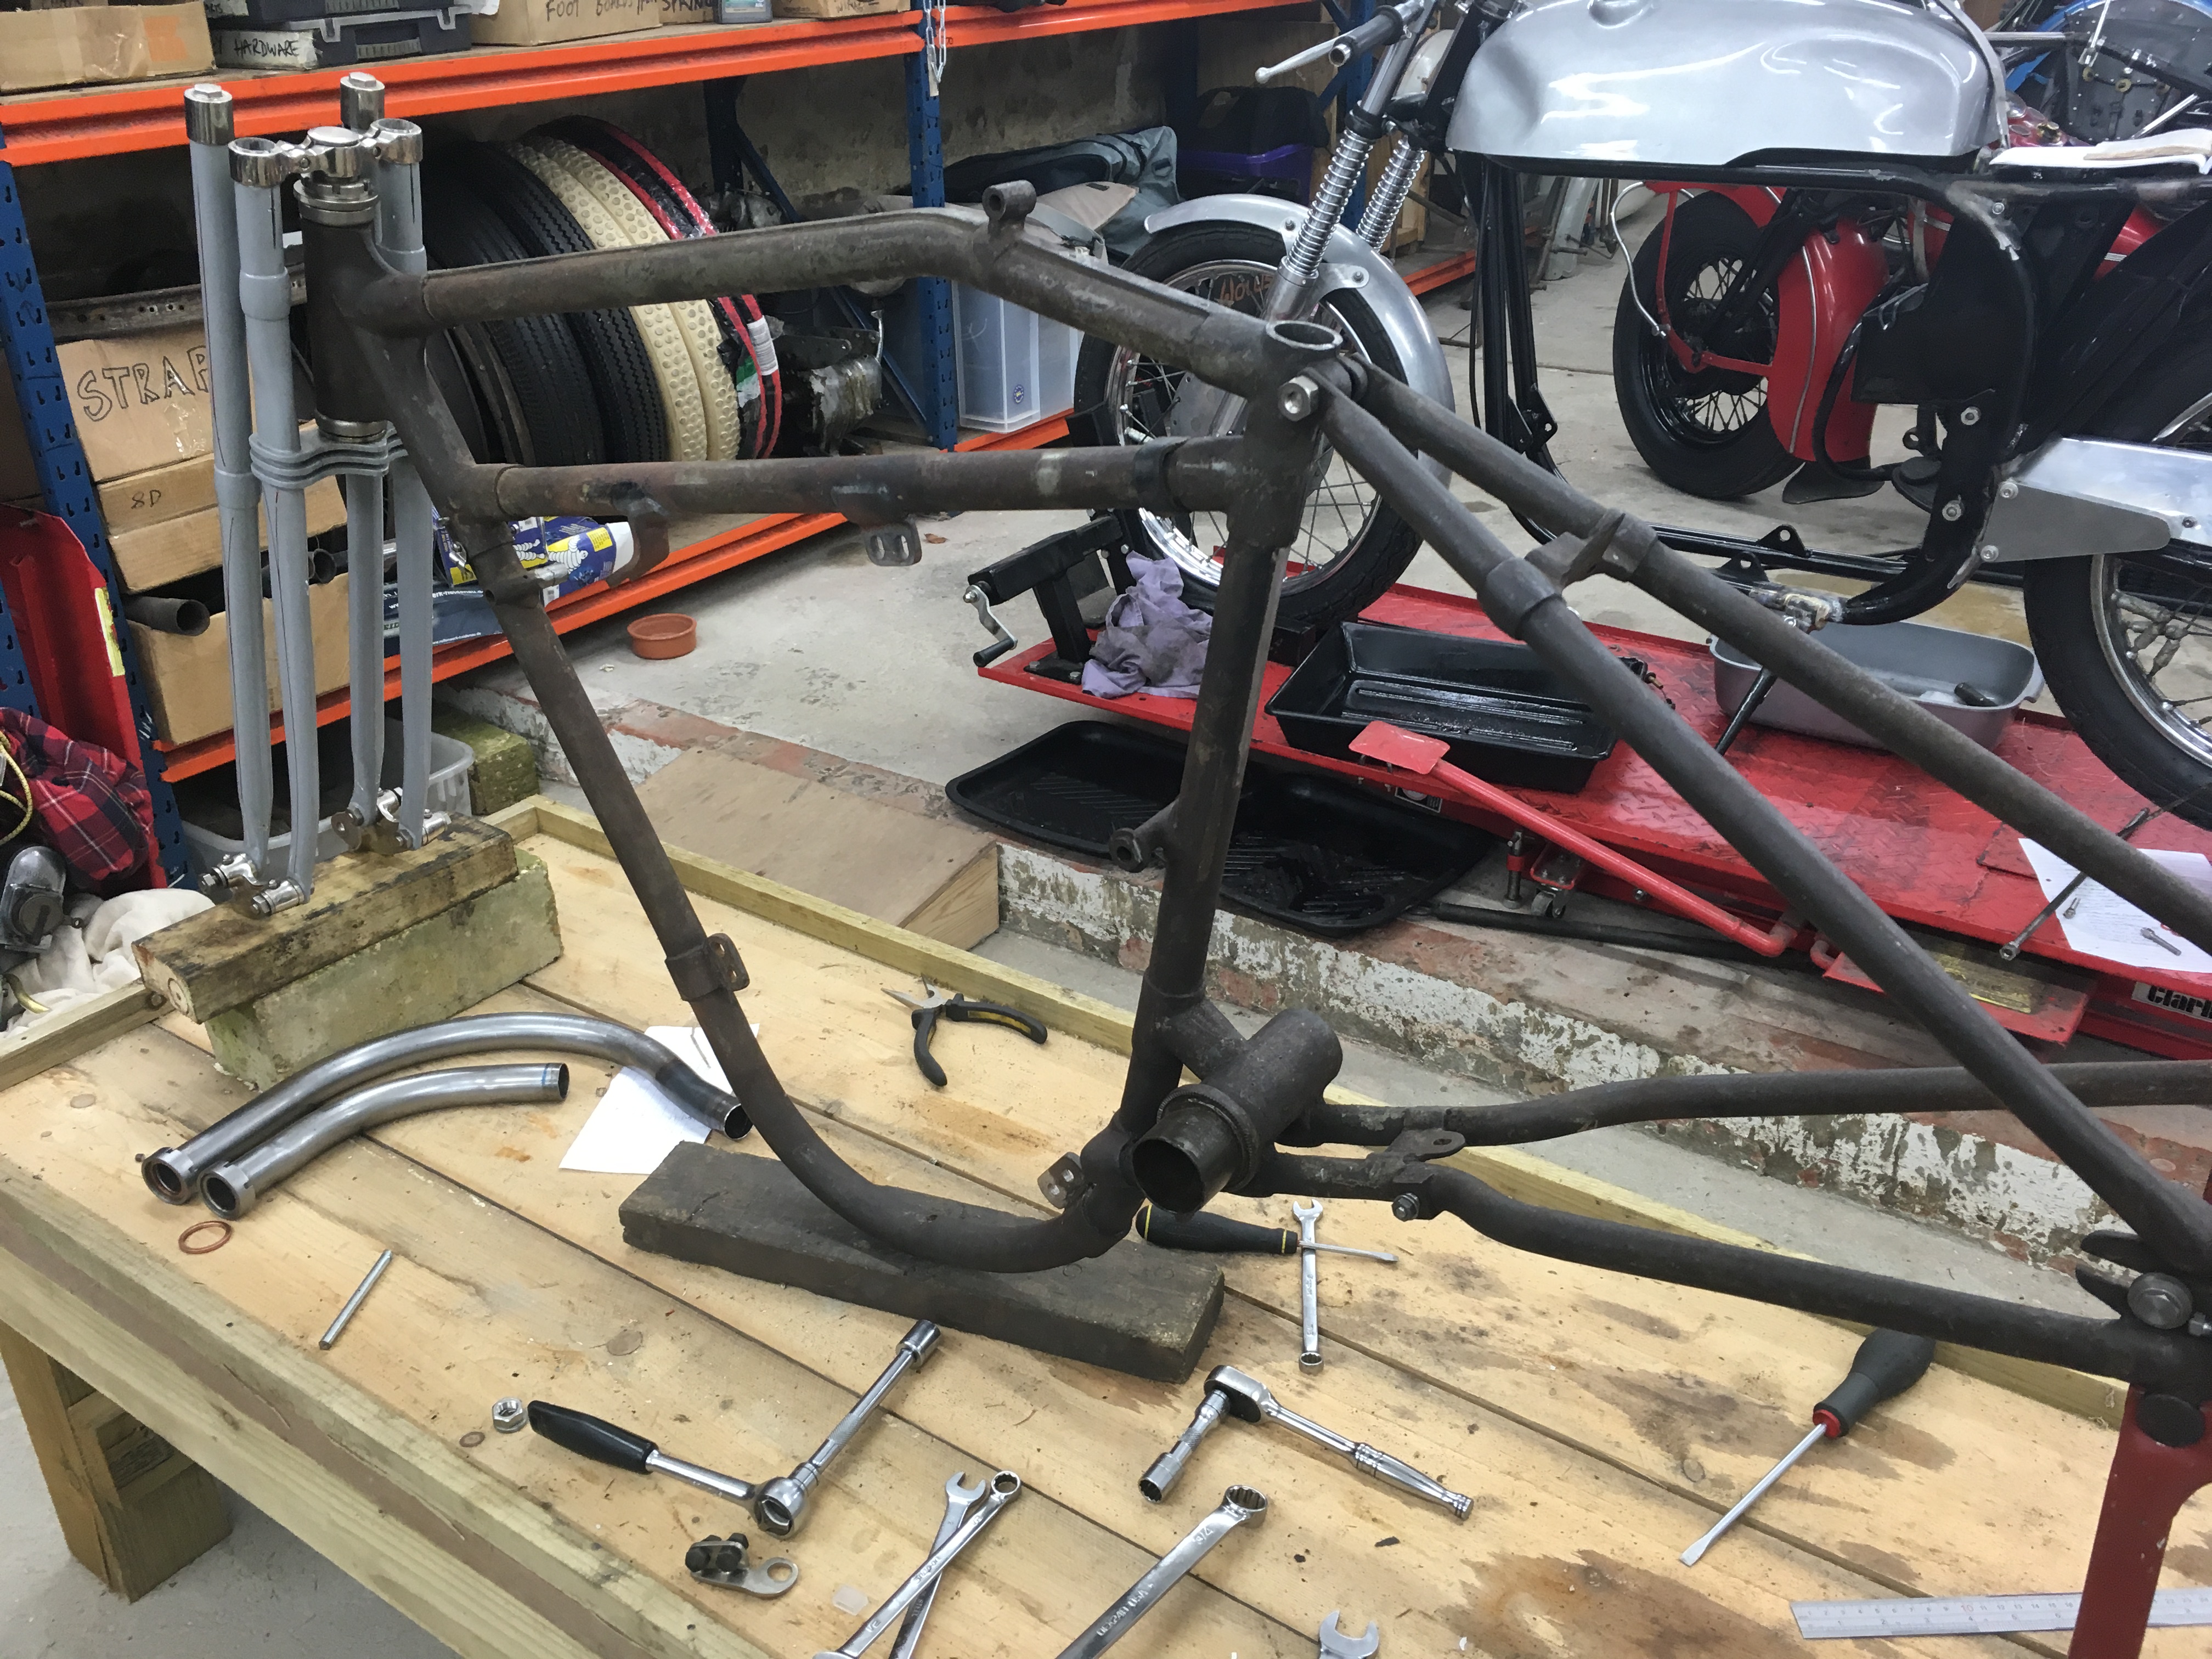
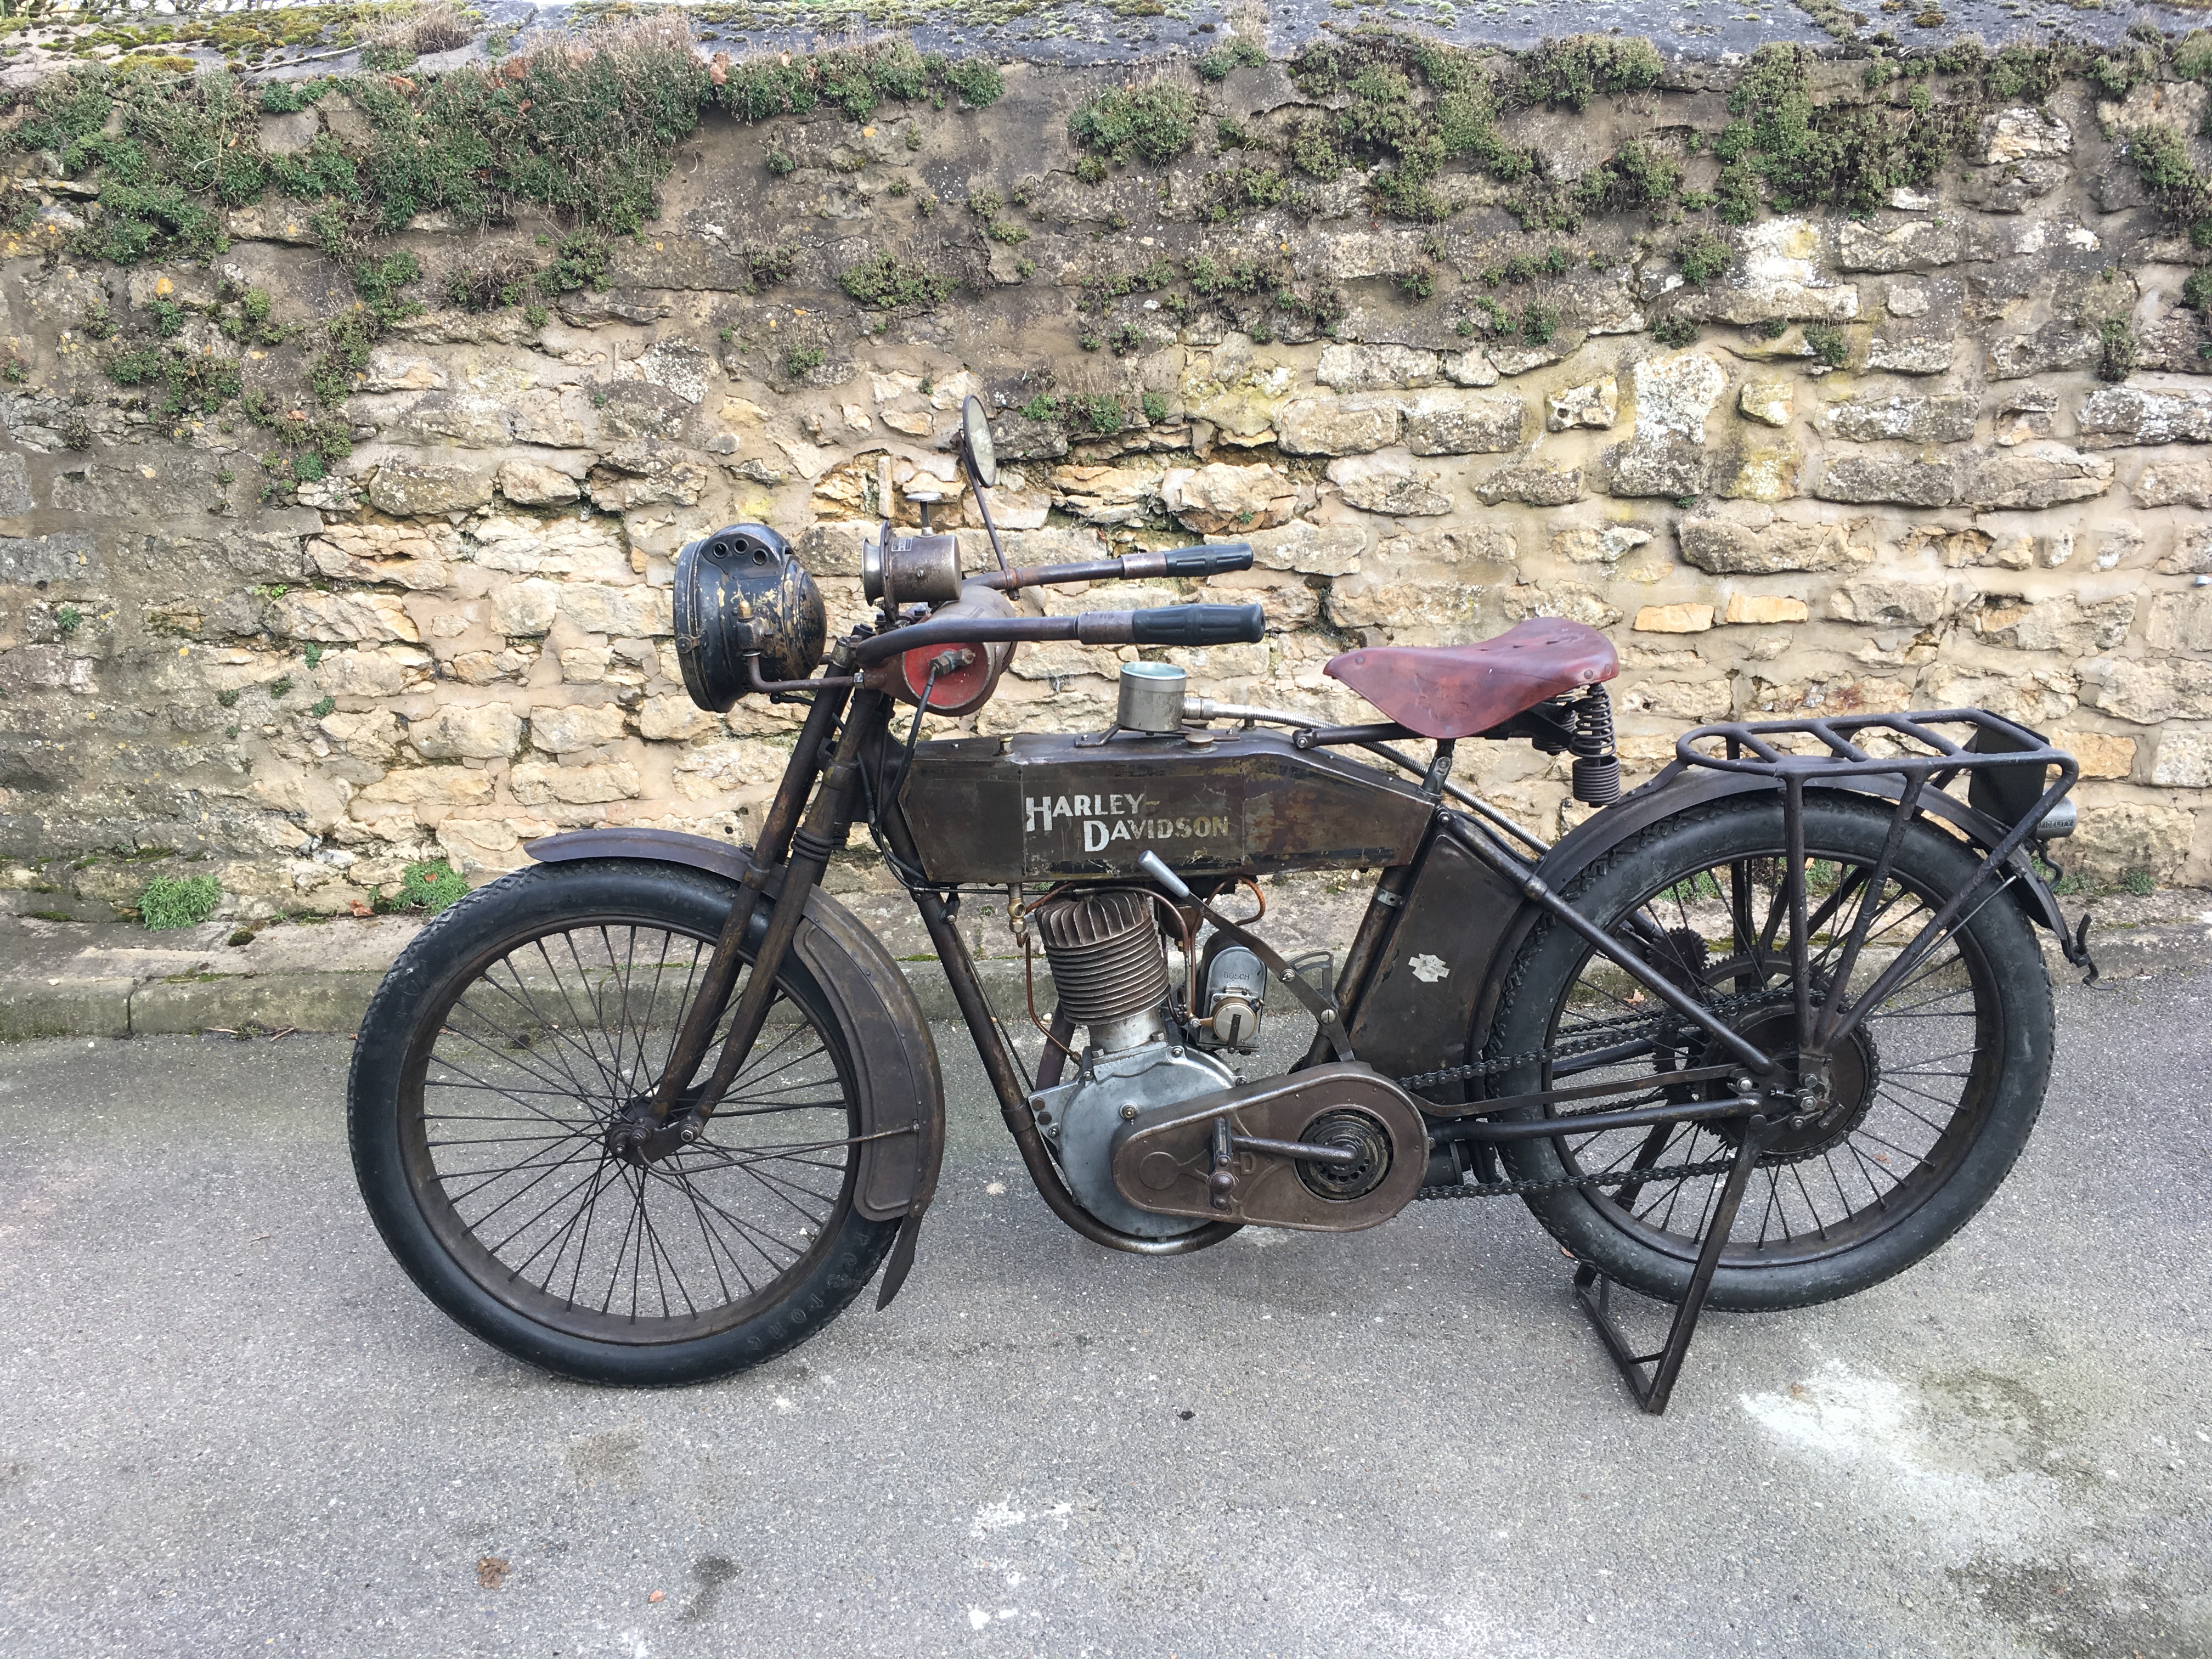
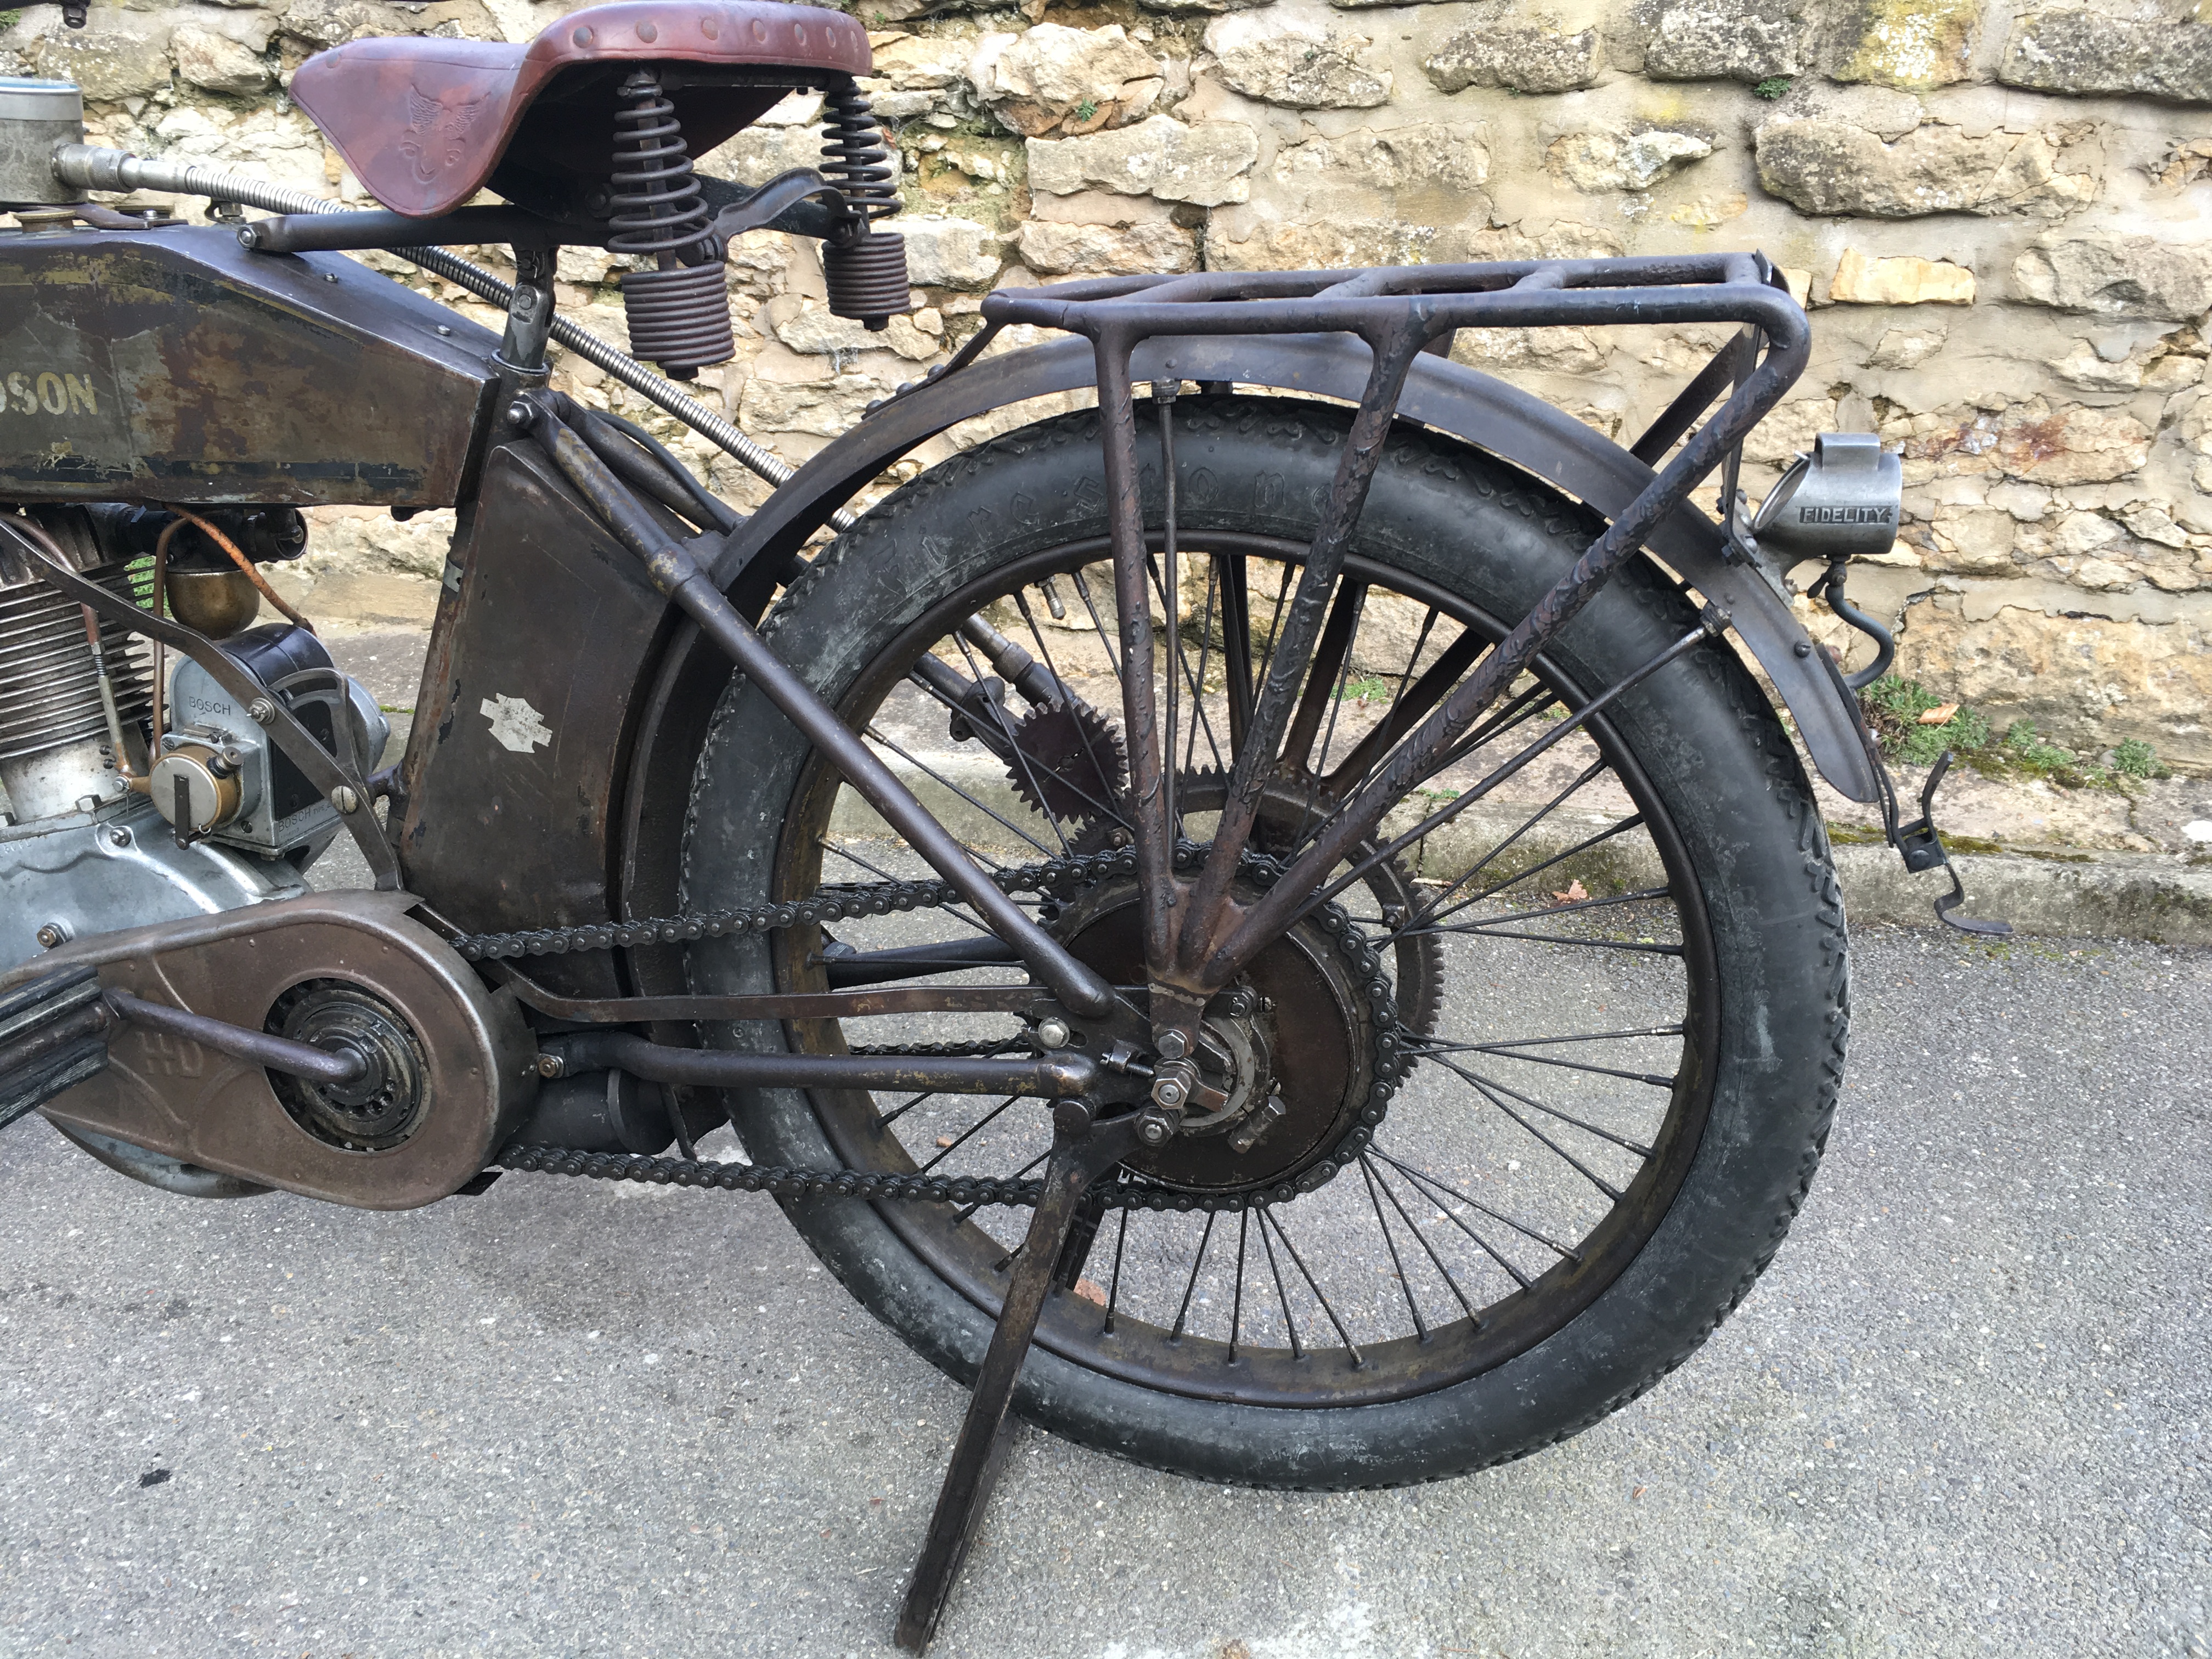
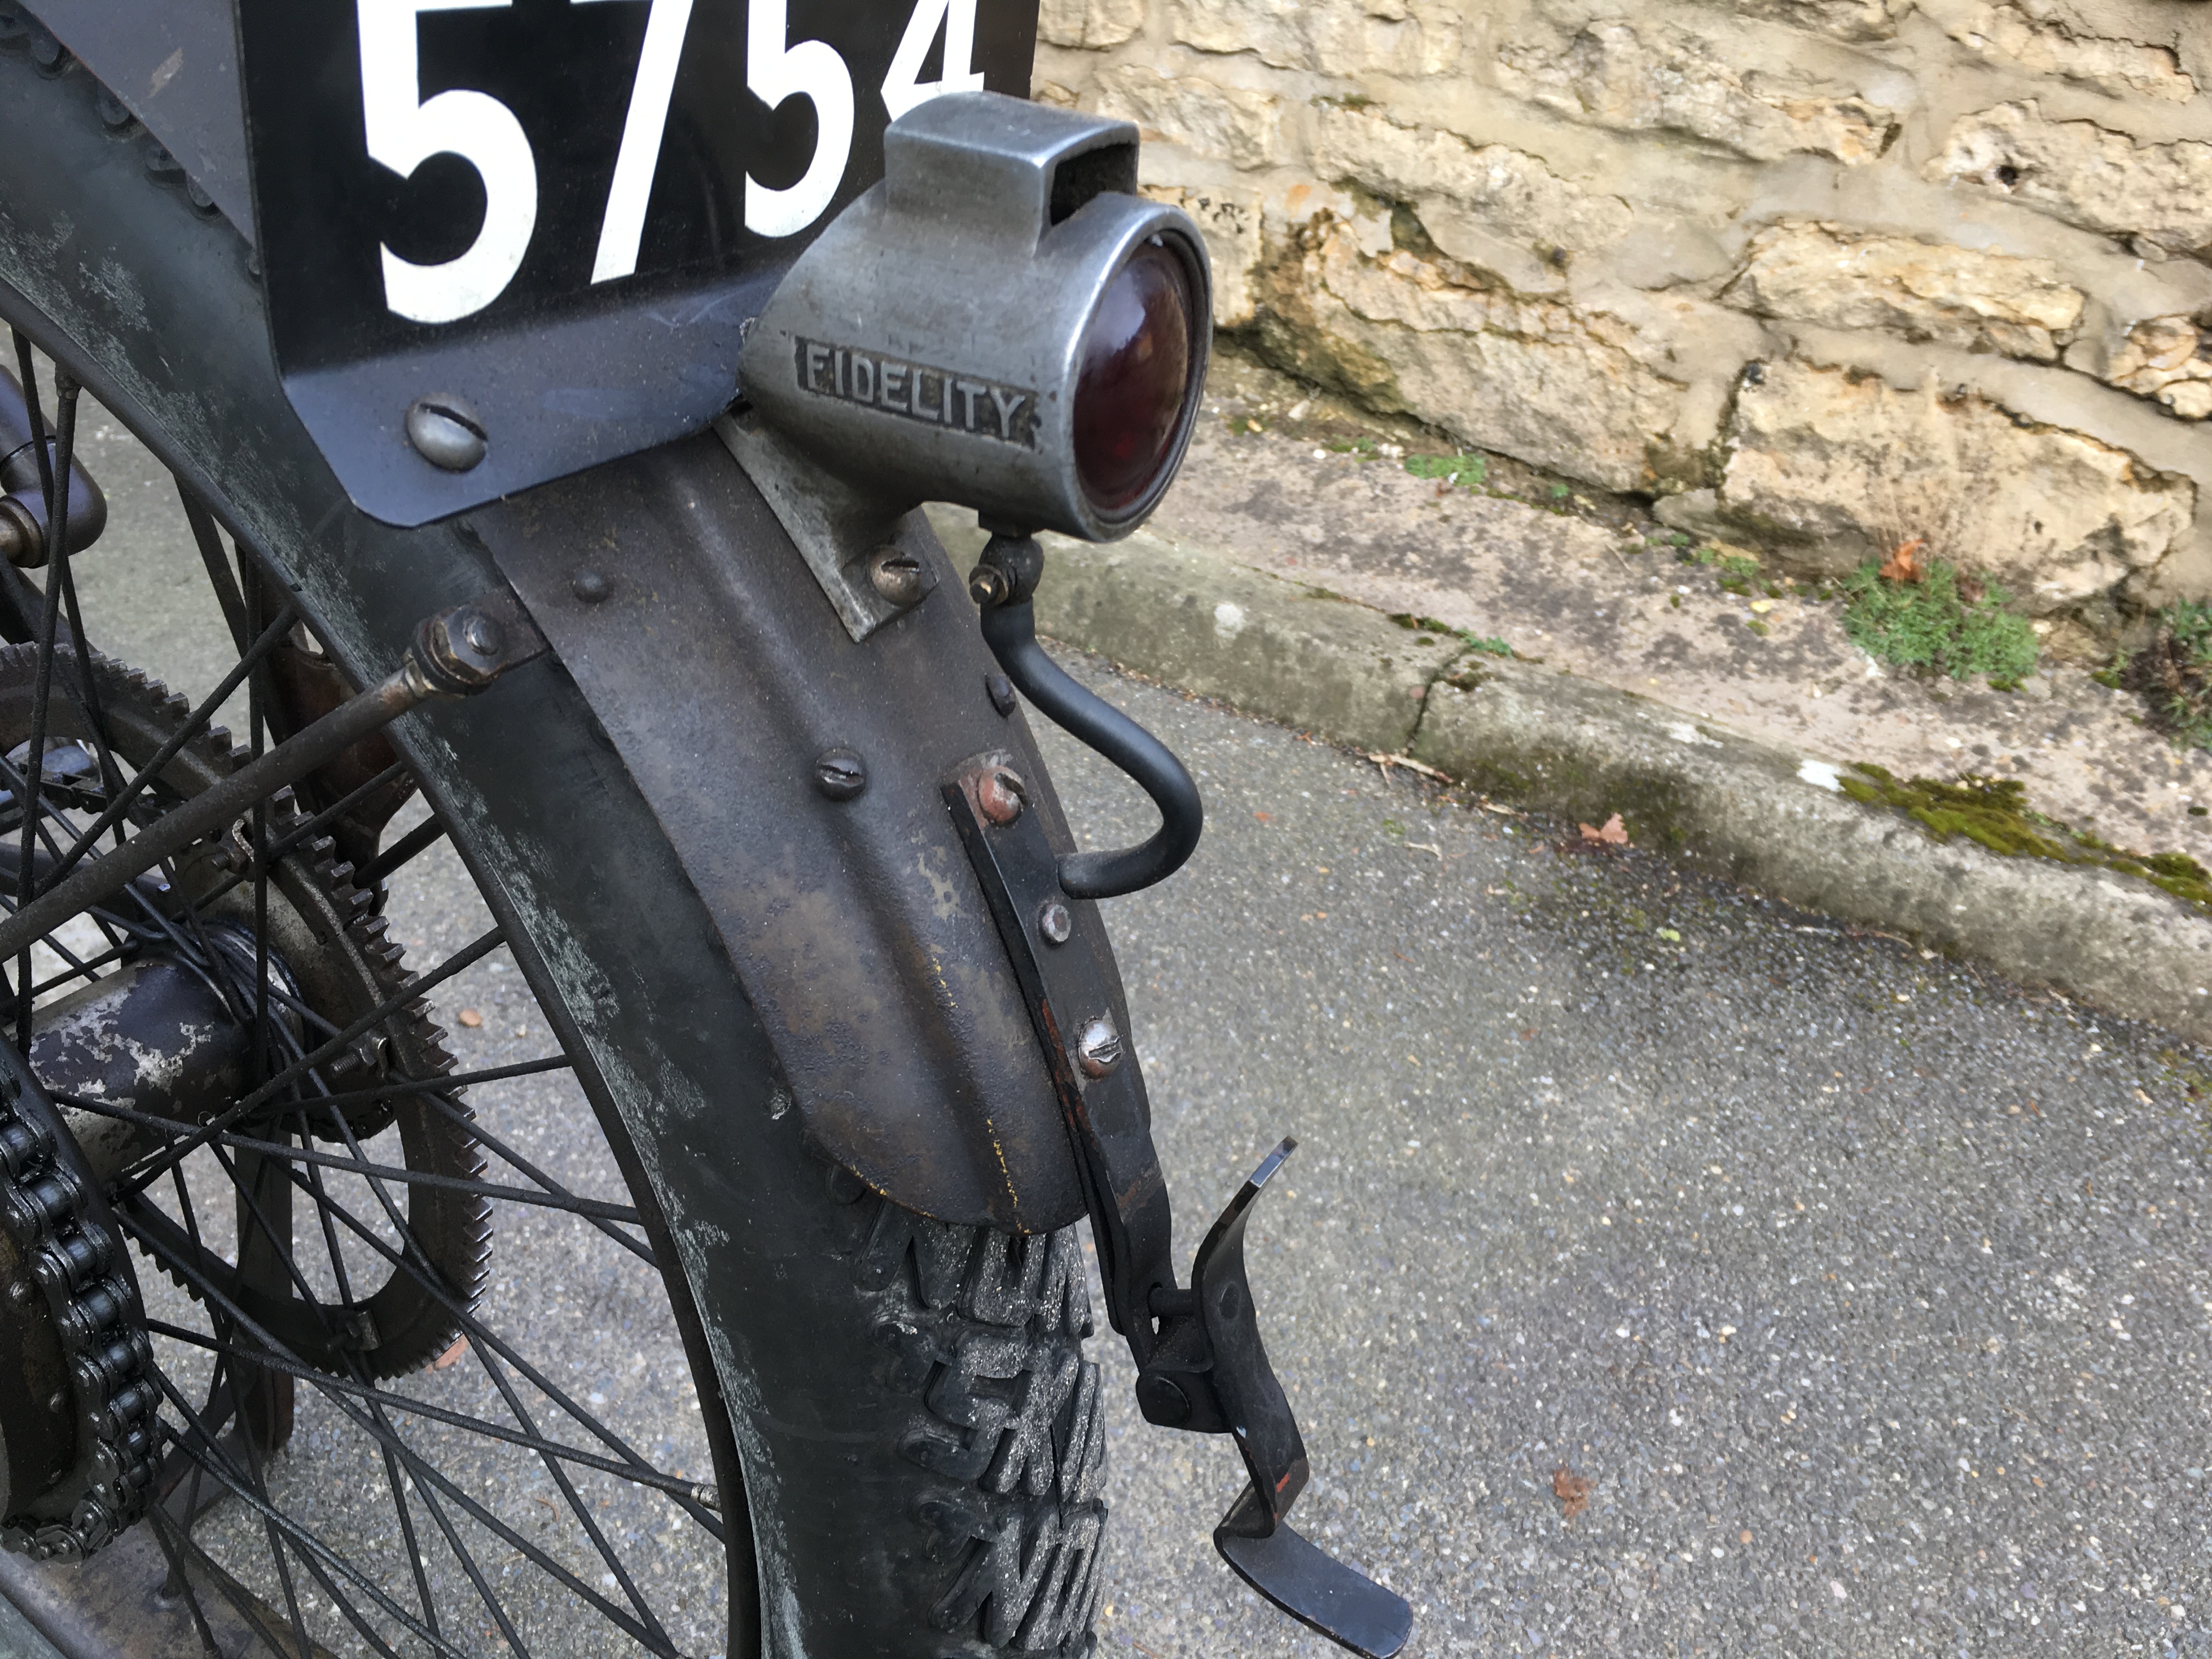
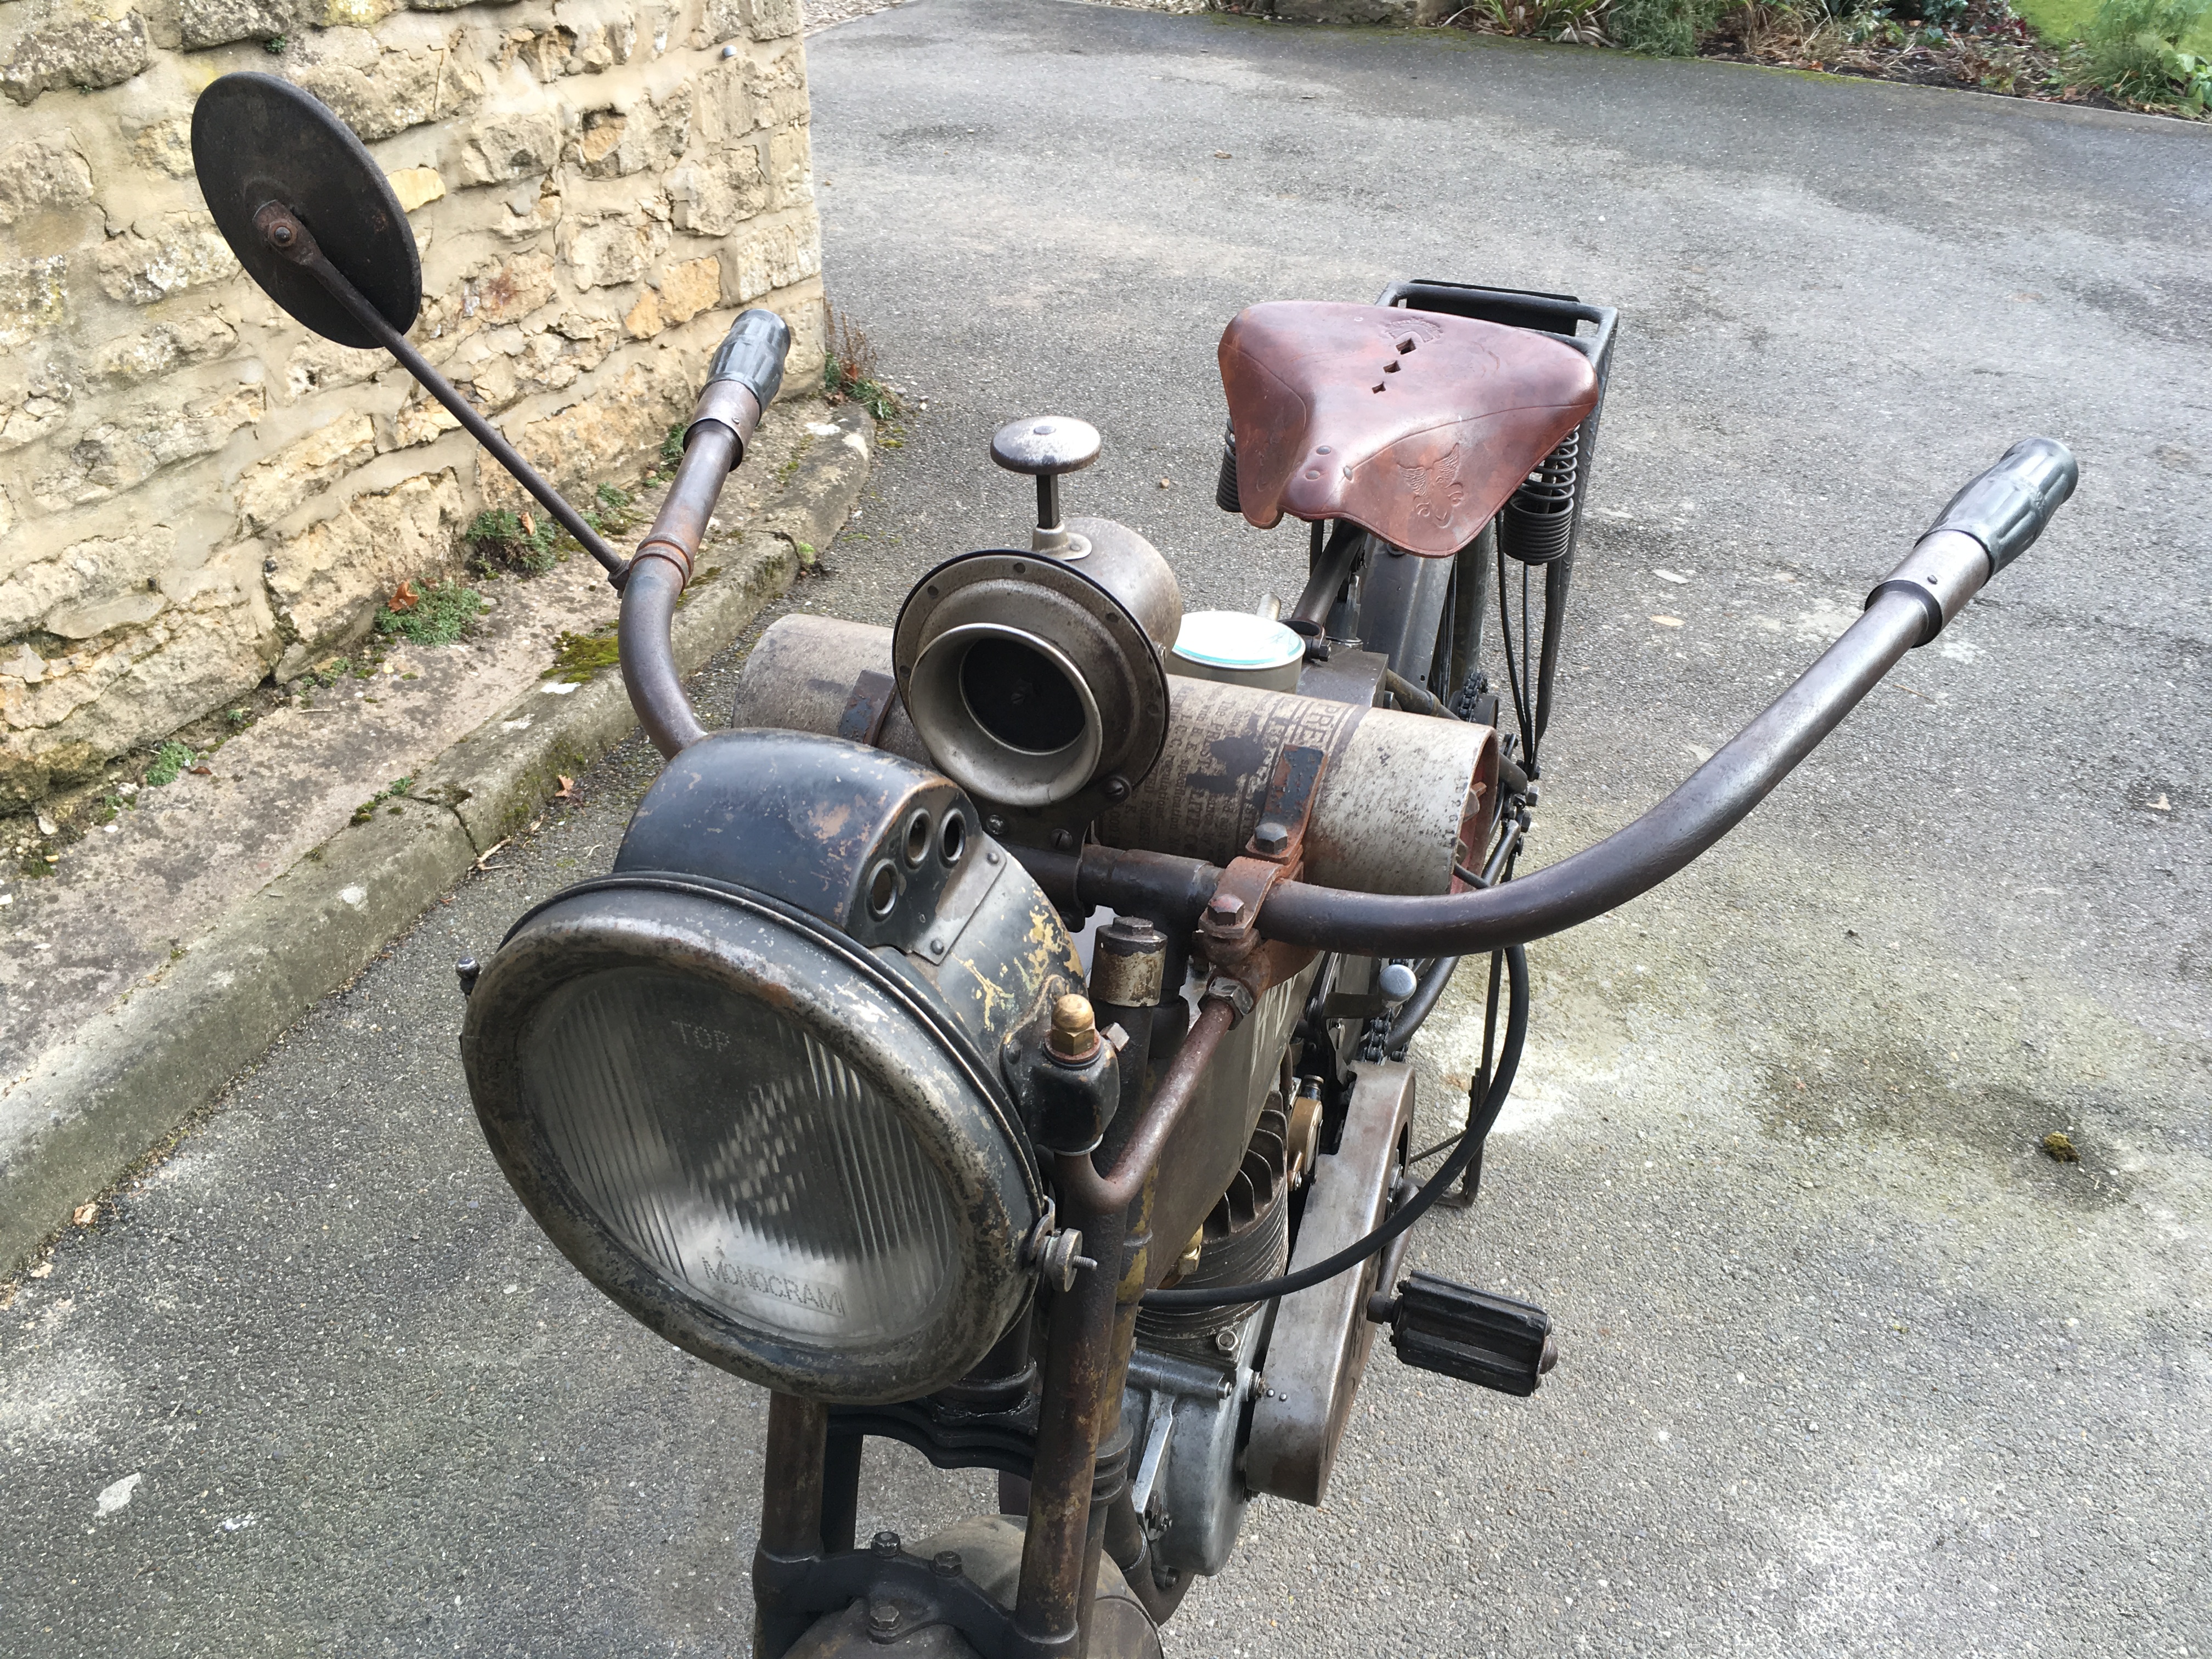
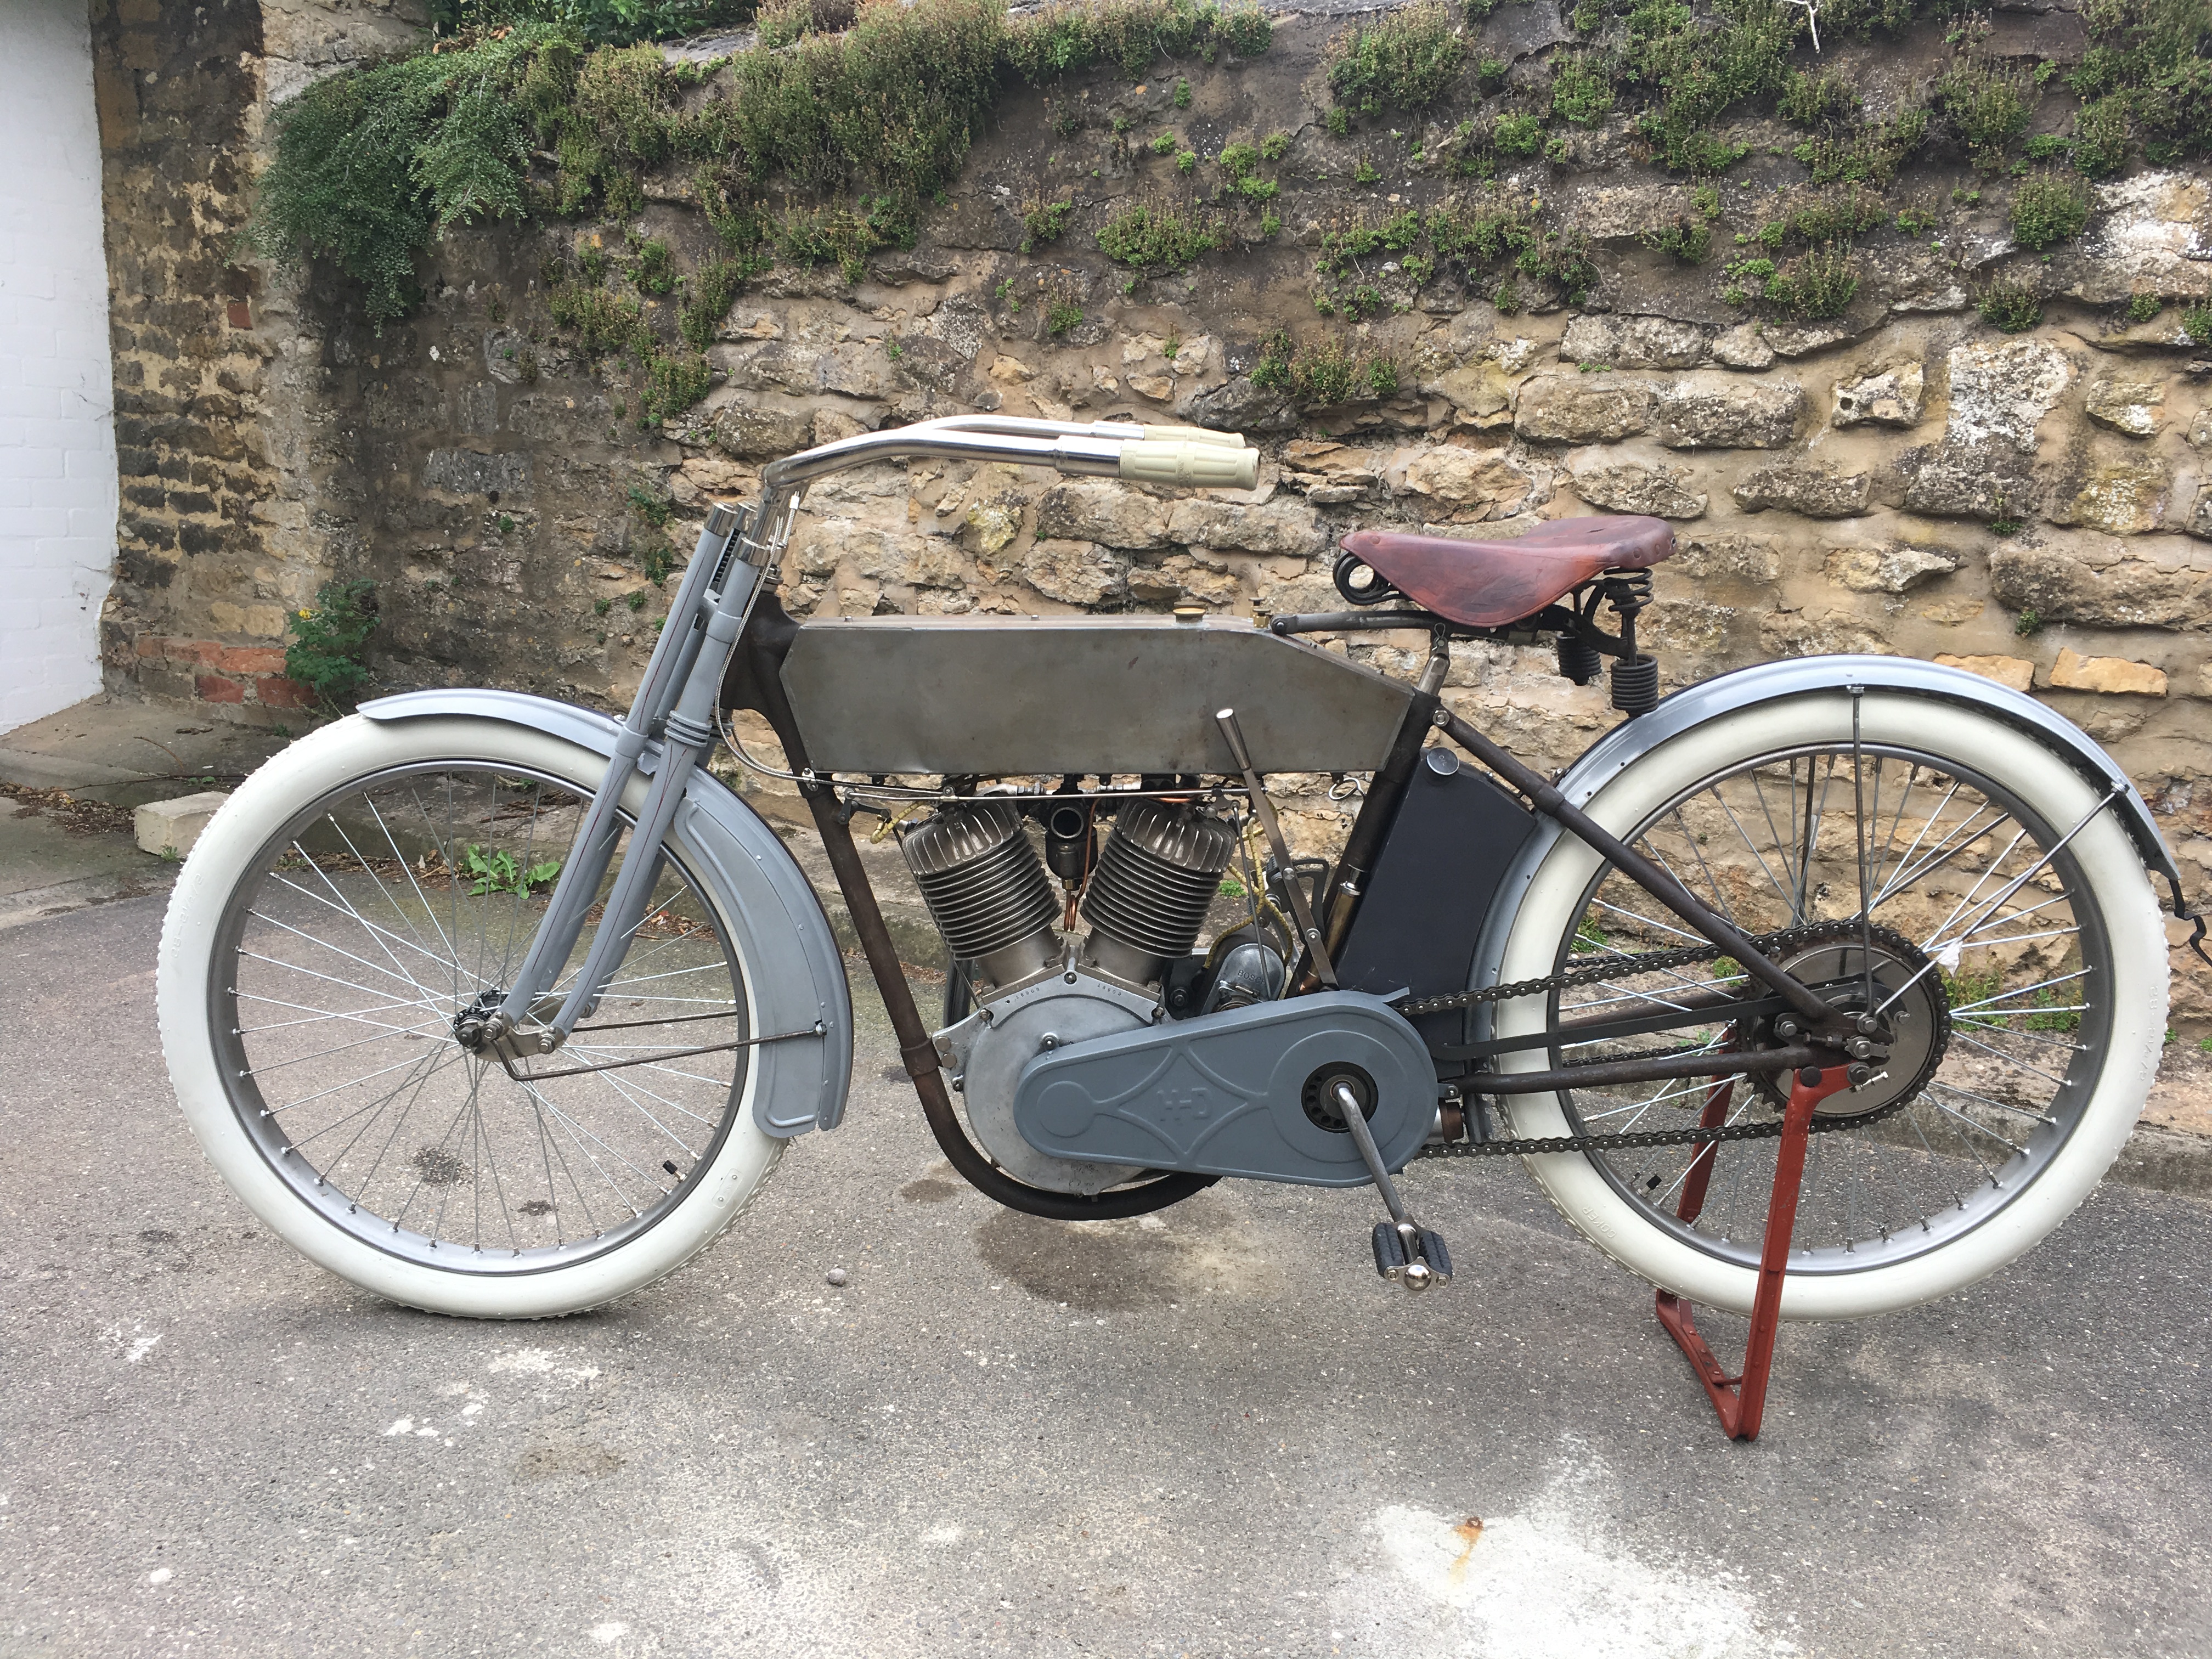
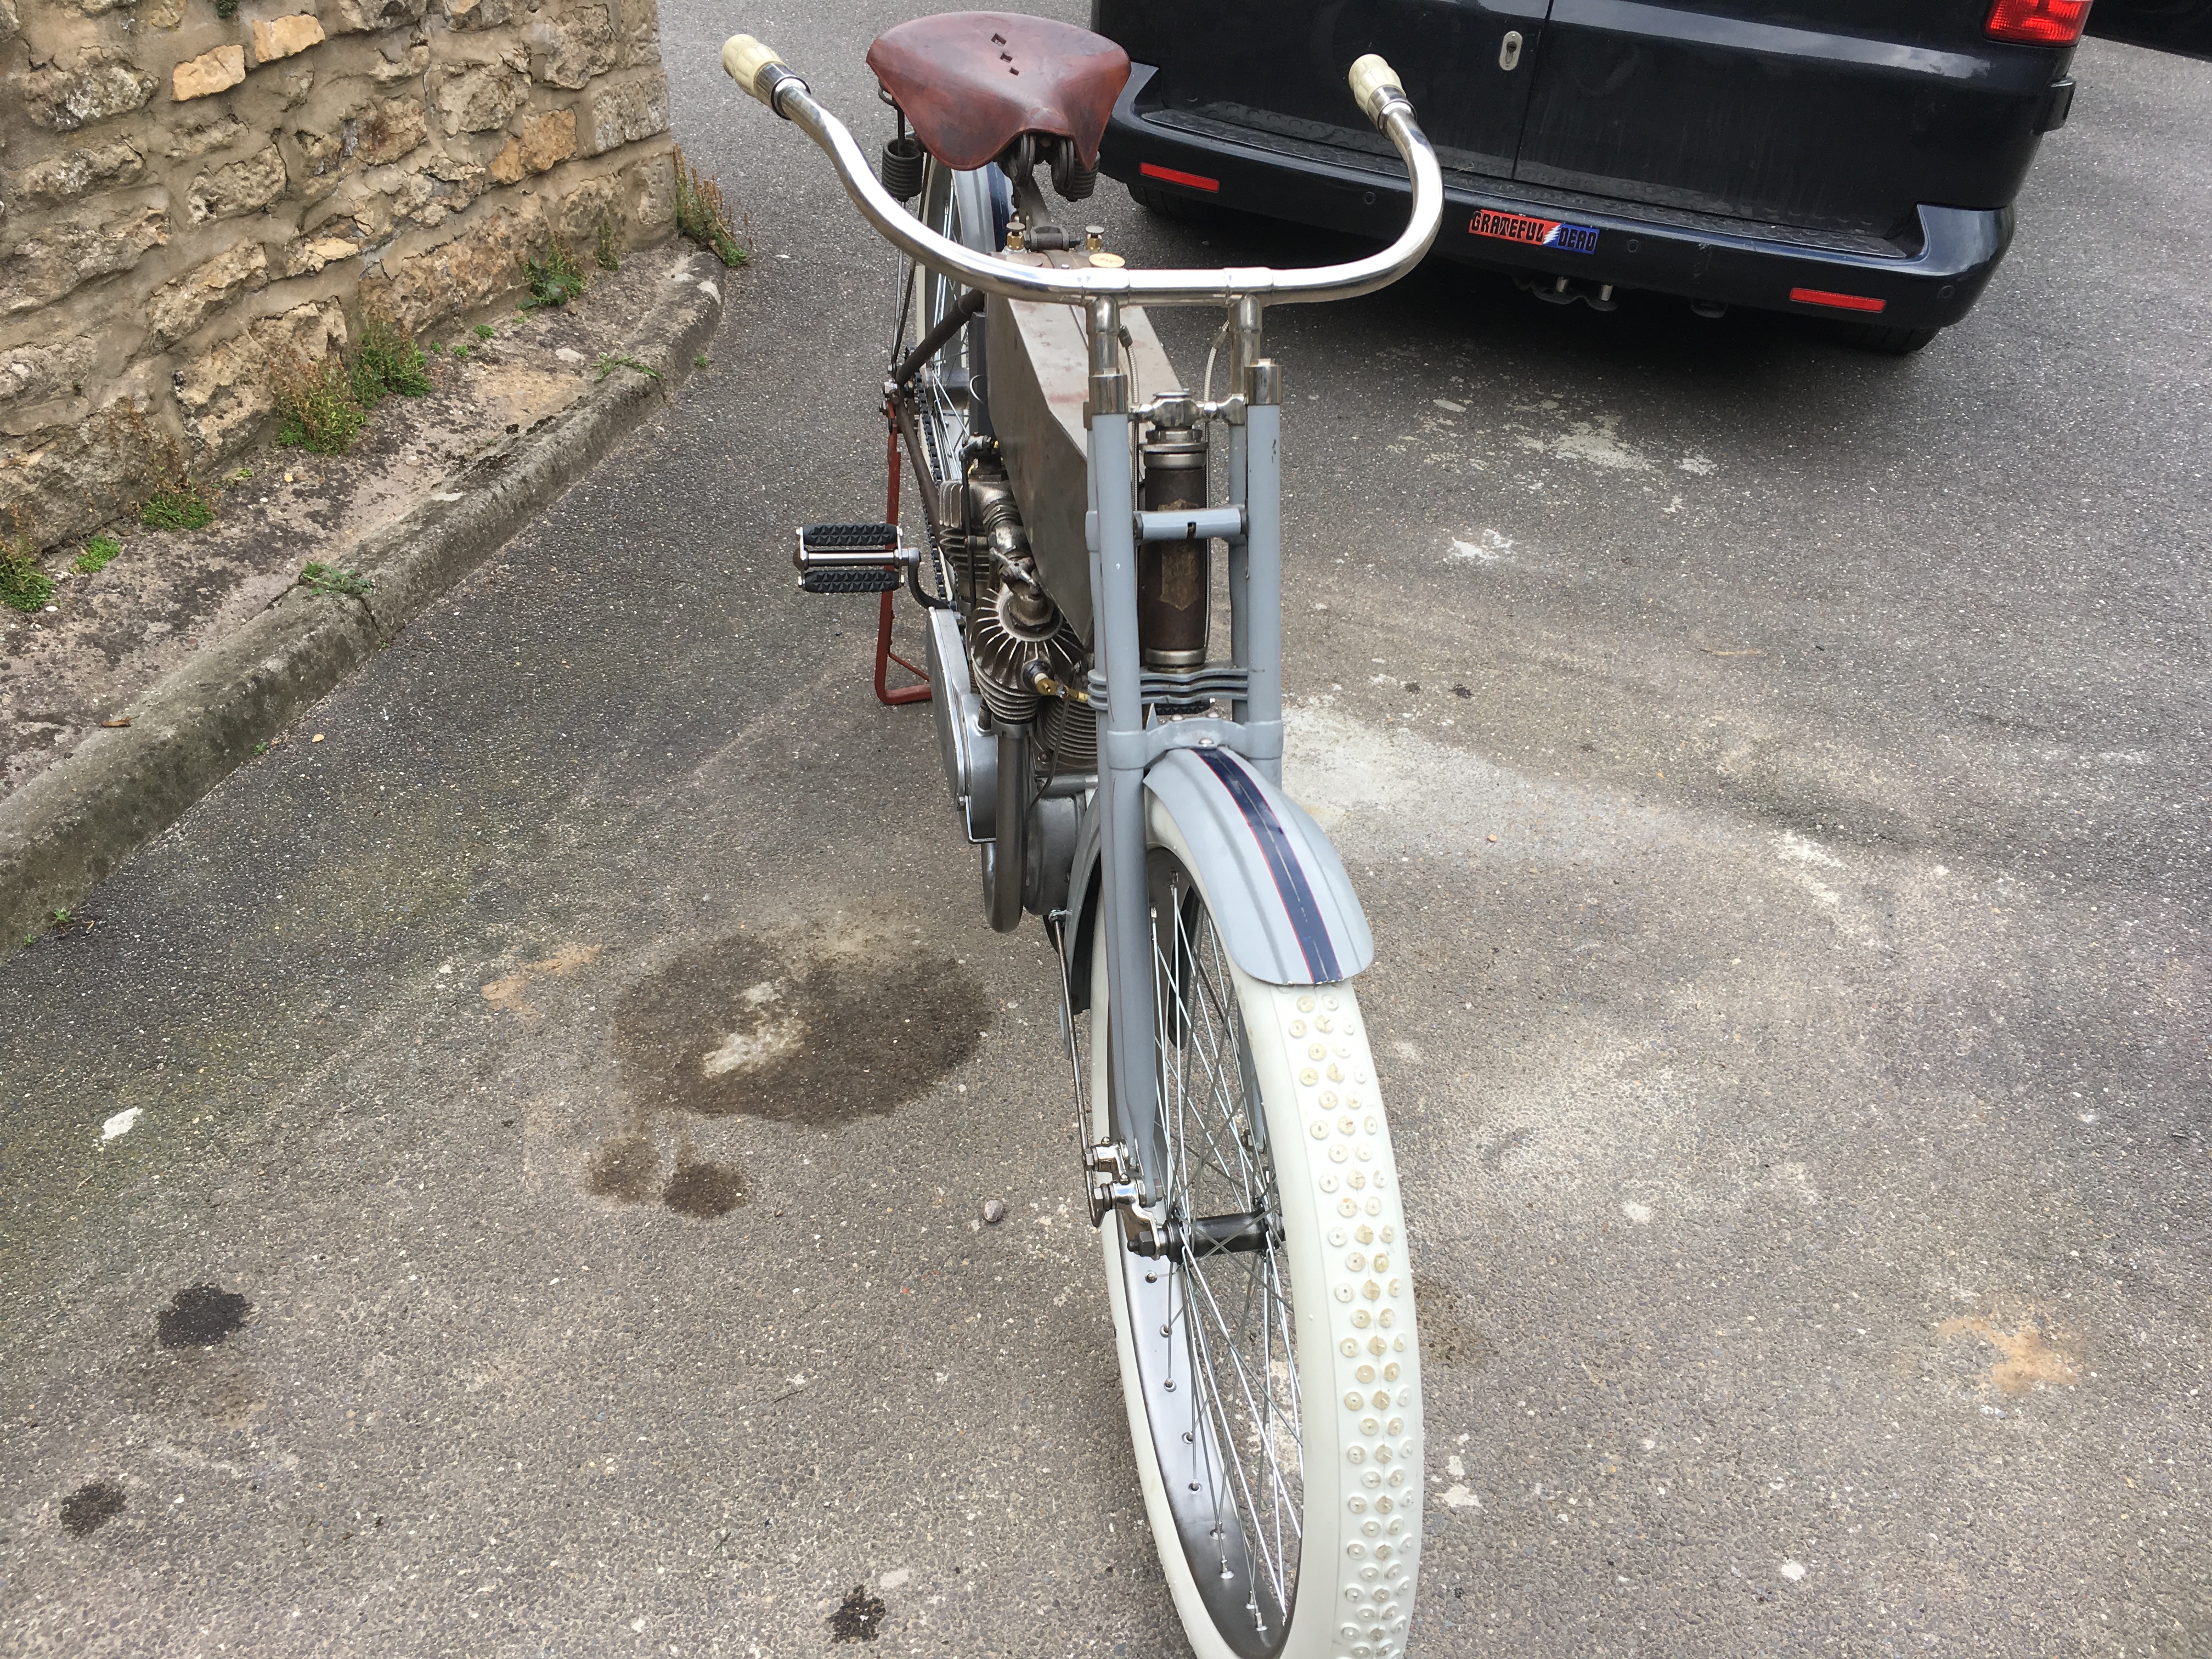
1912 8D update 1

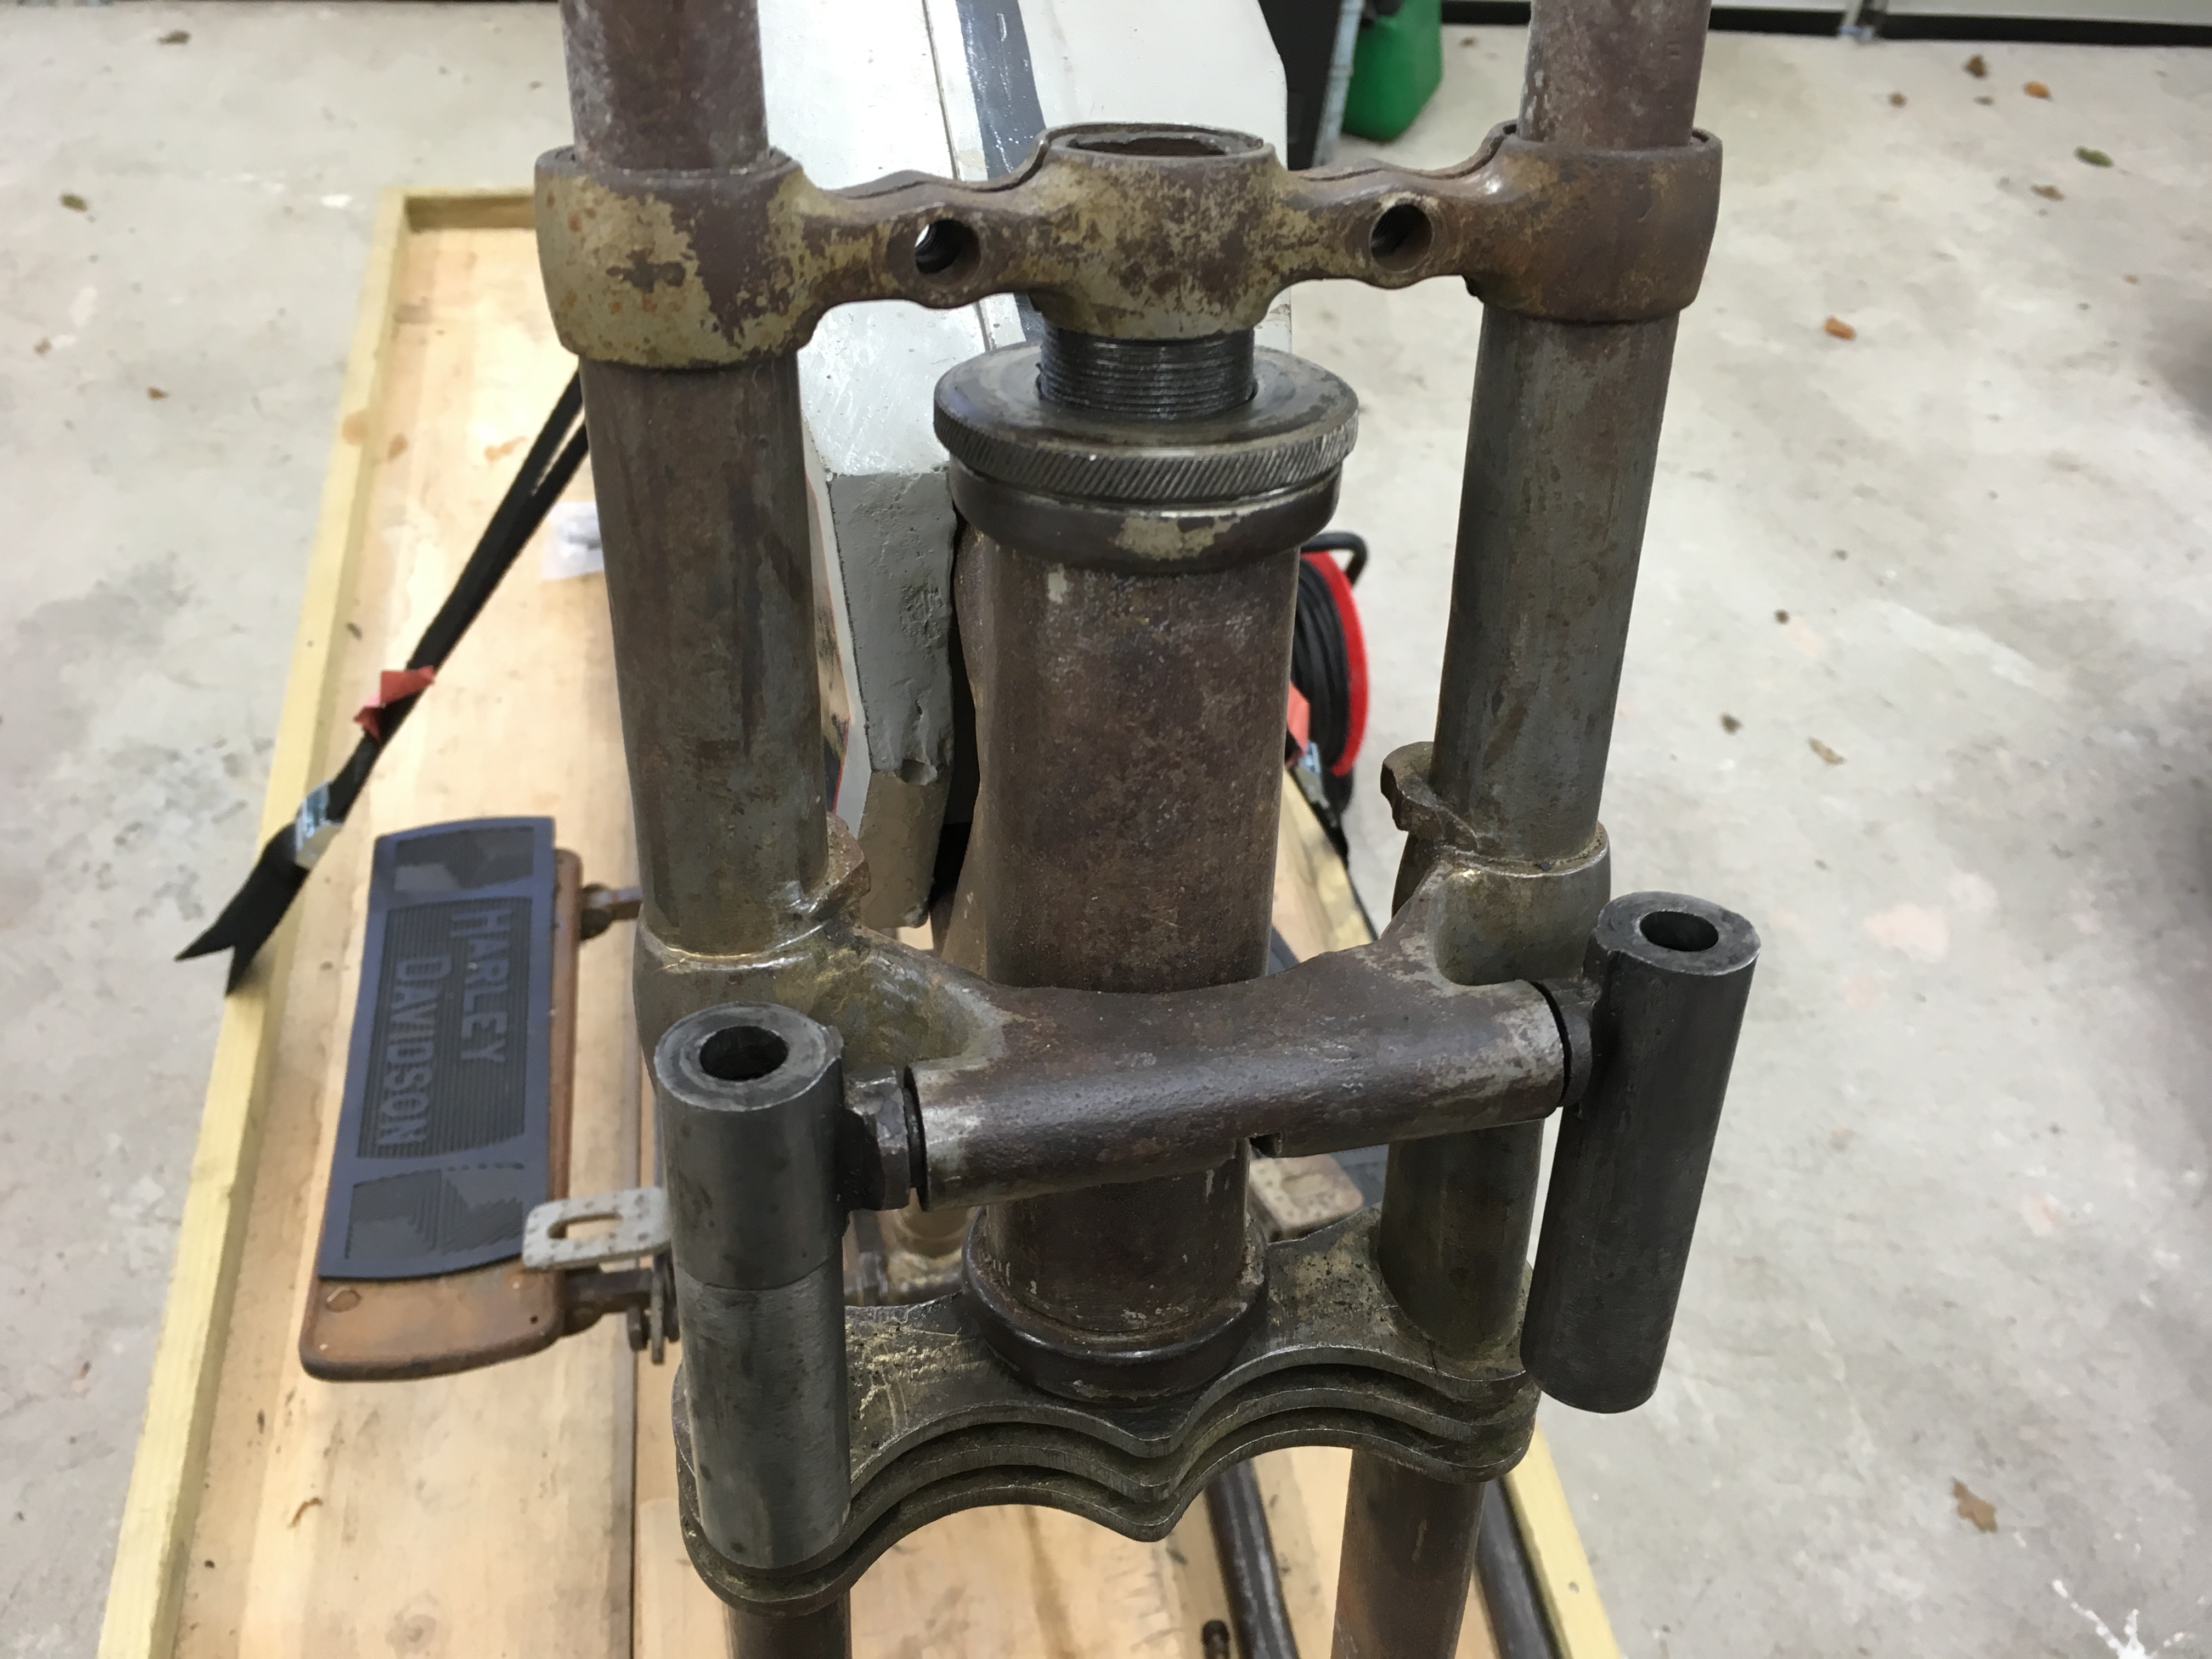
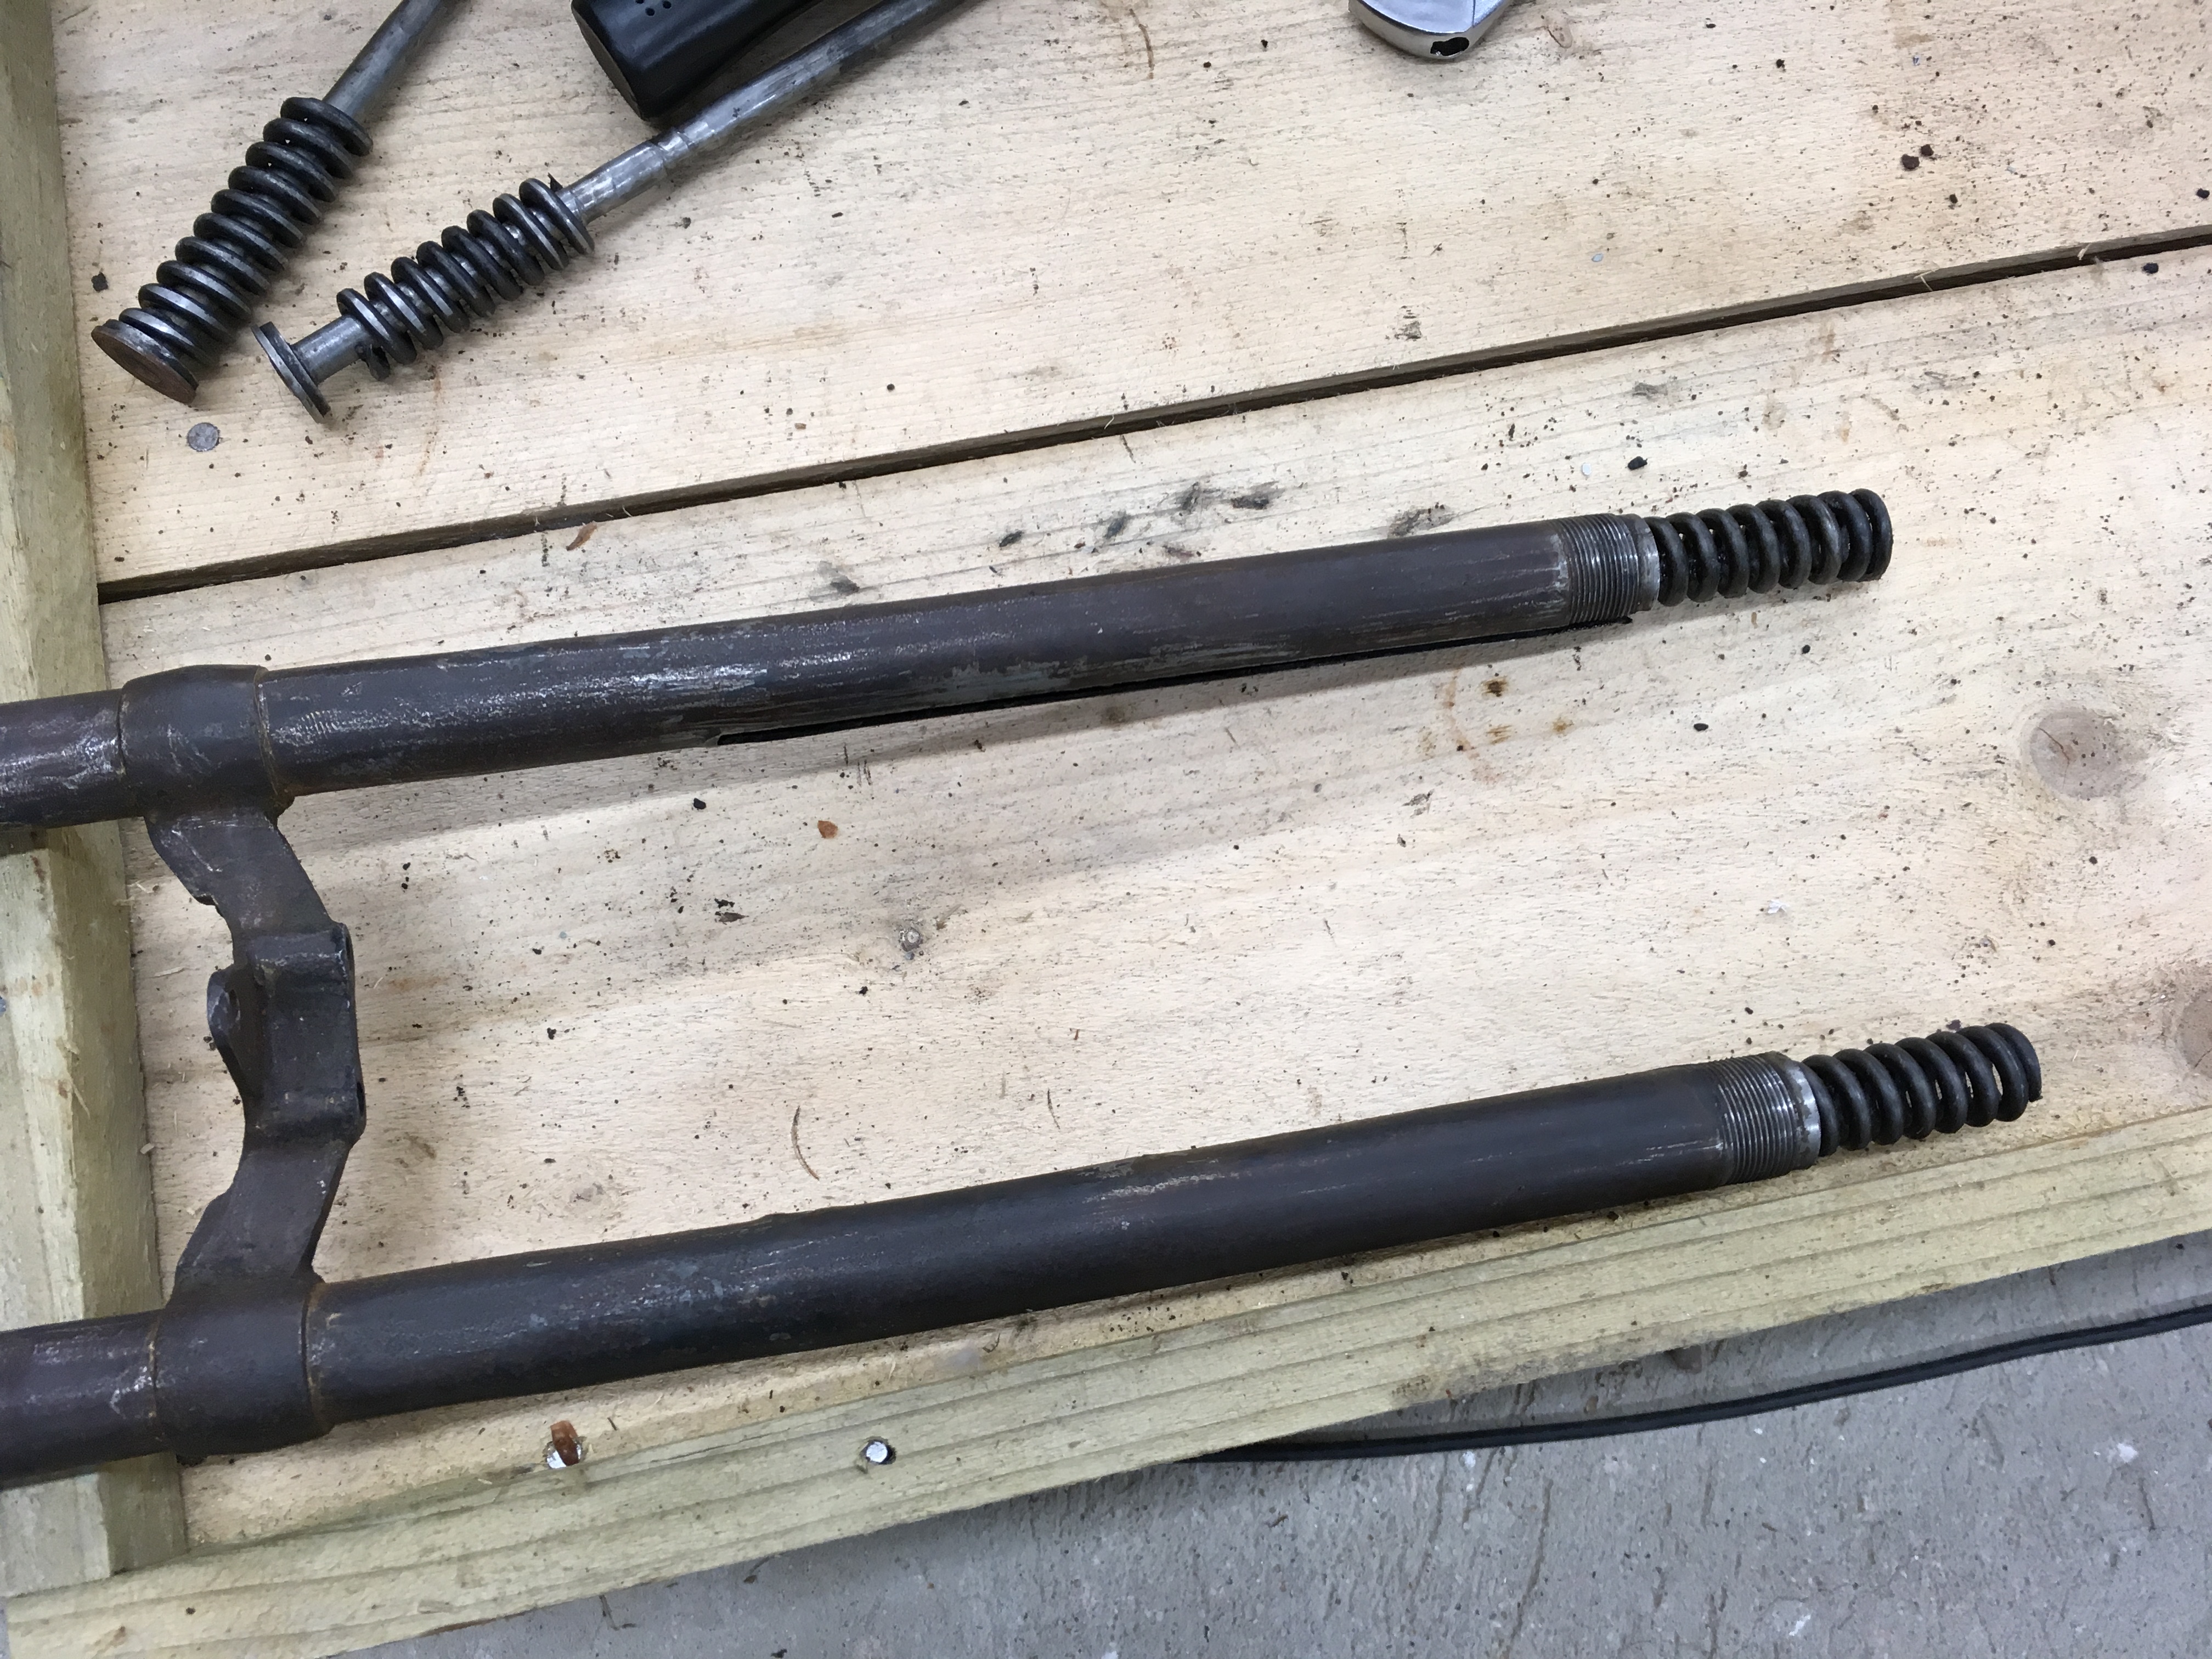
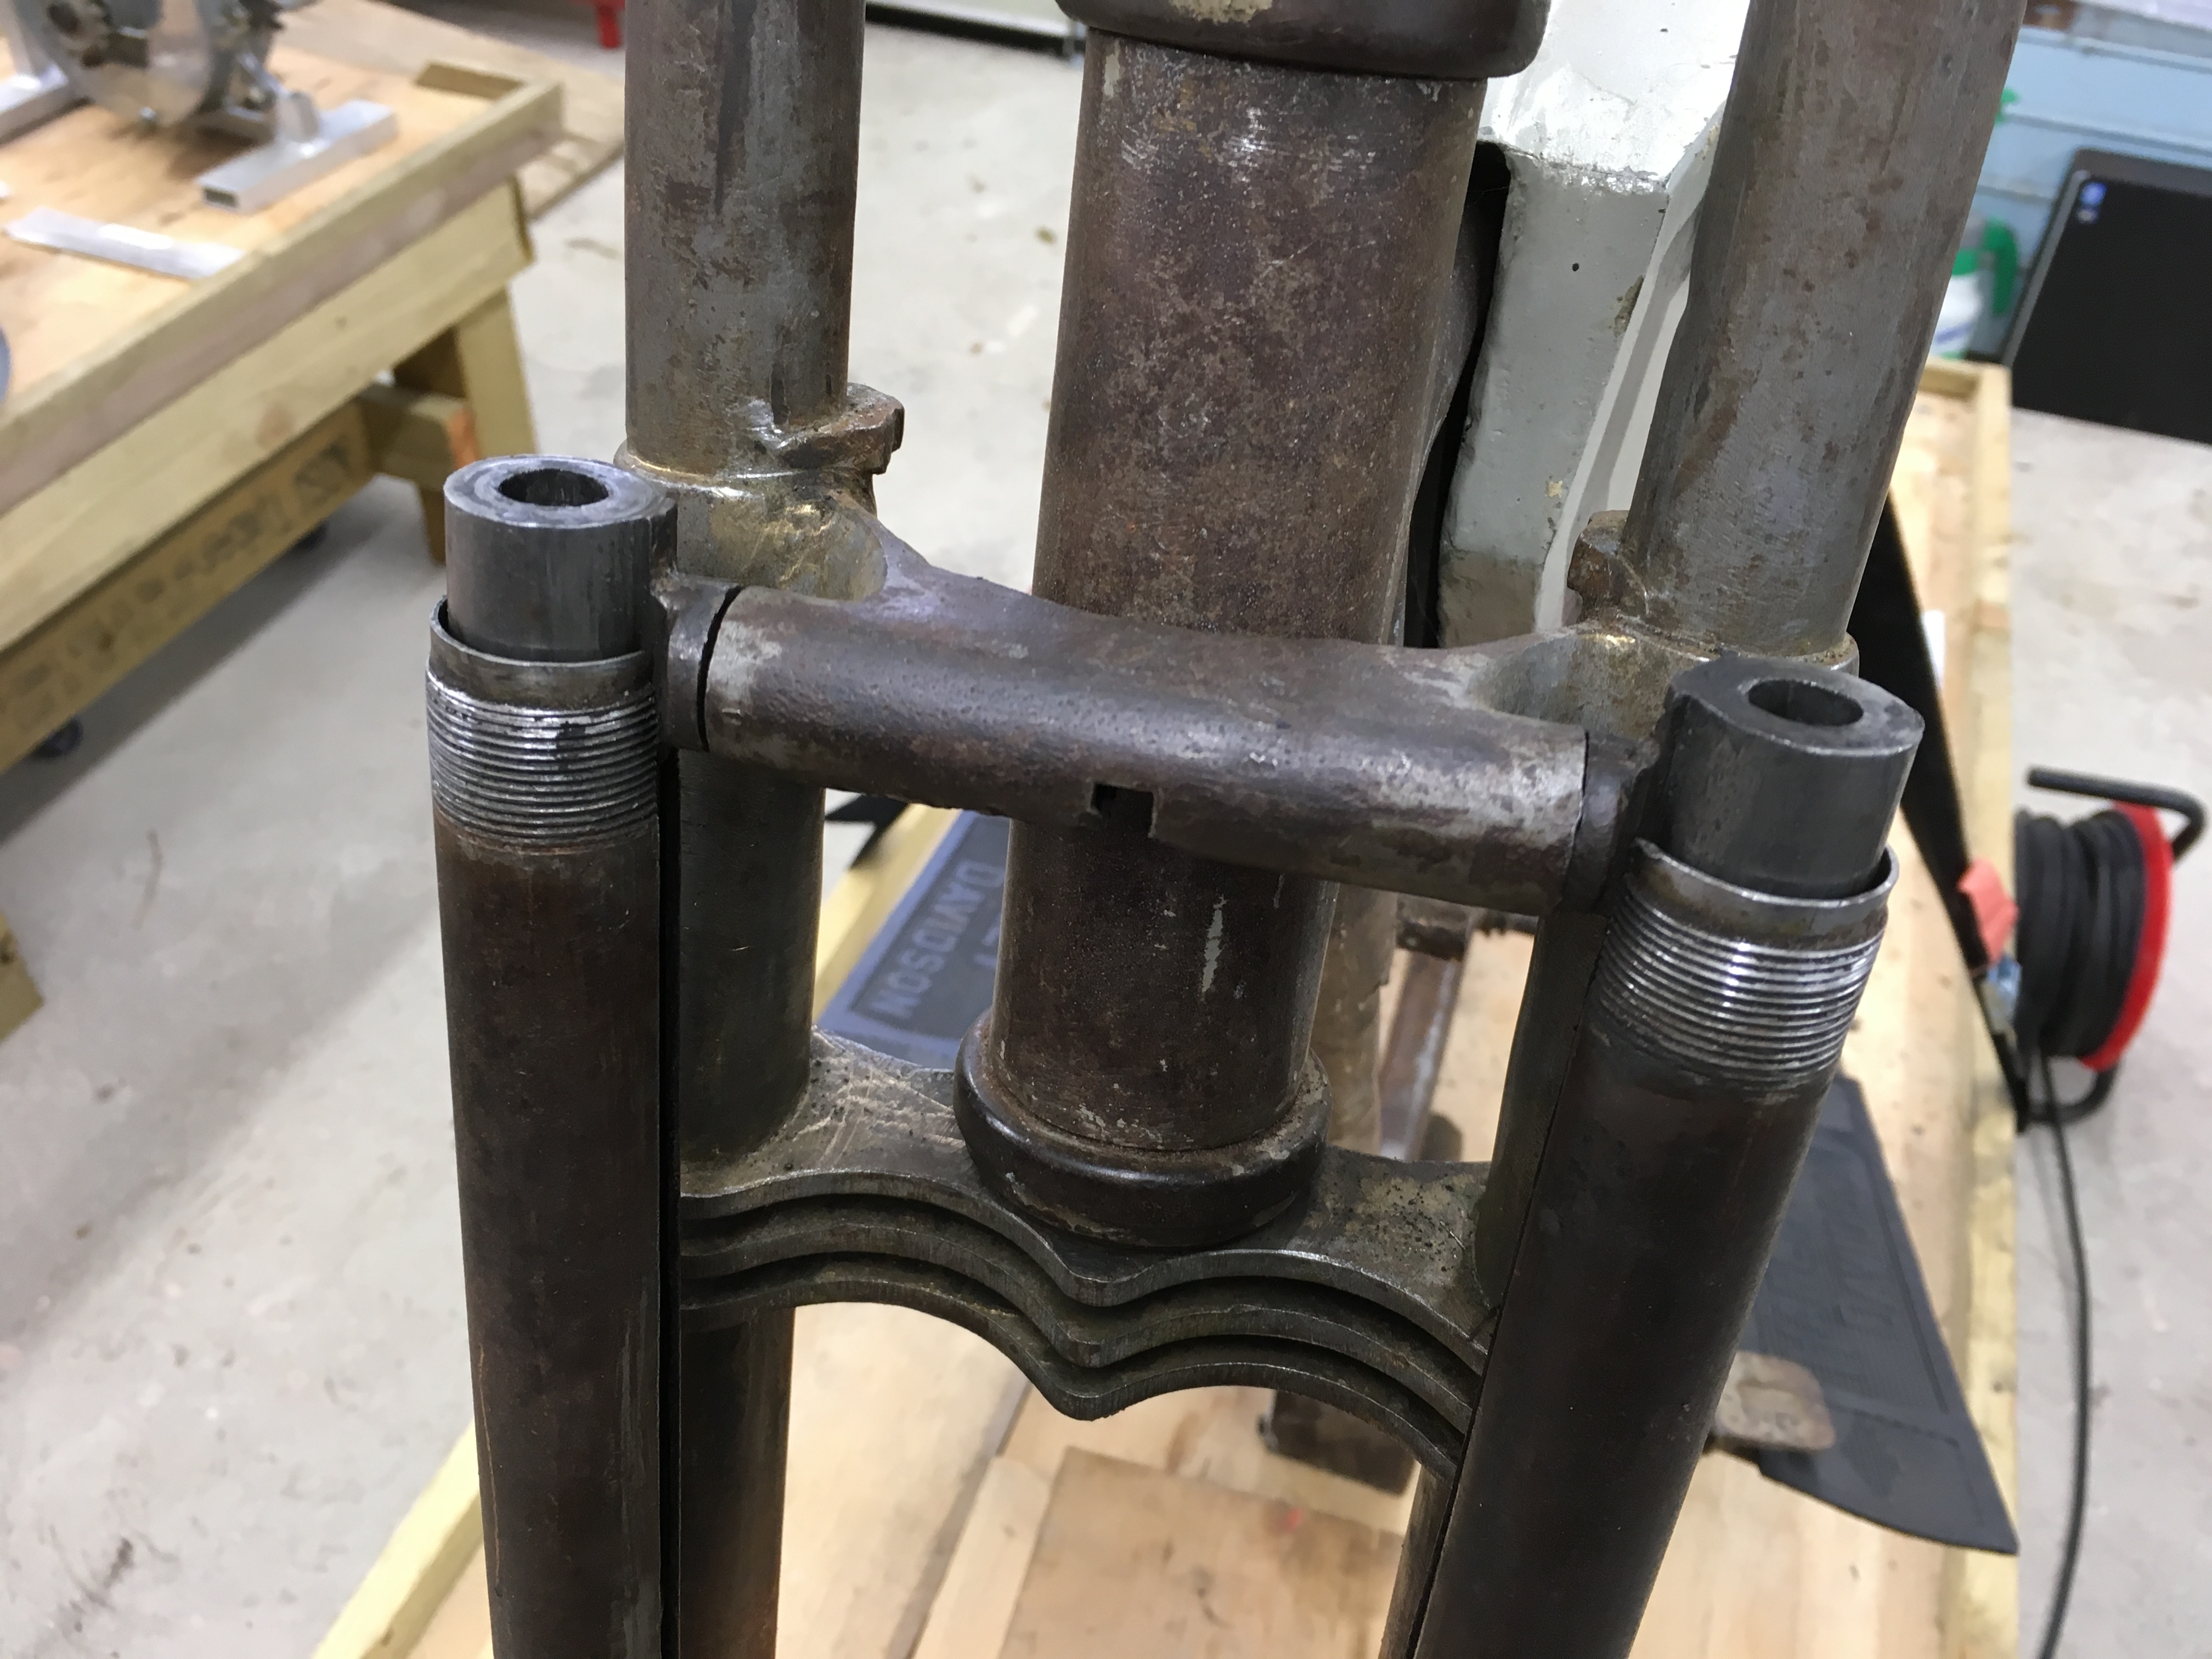
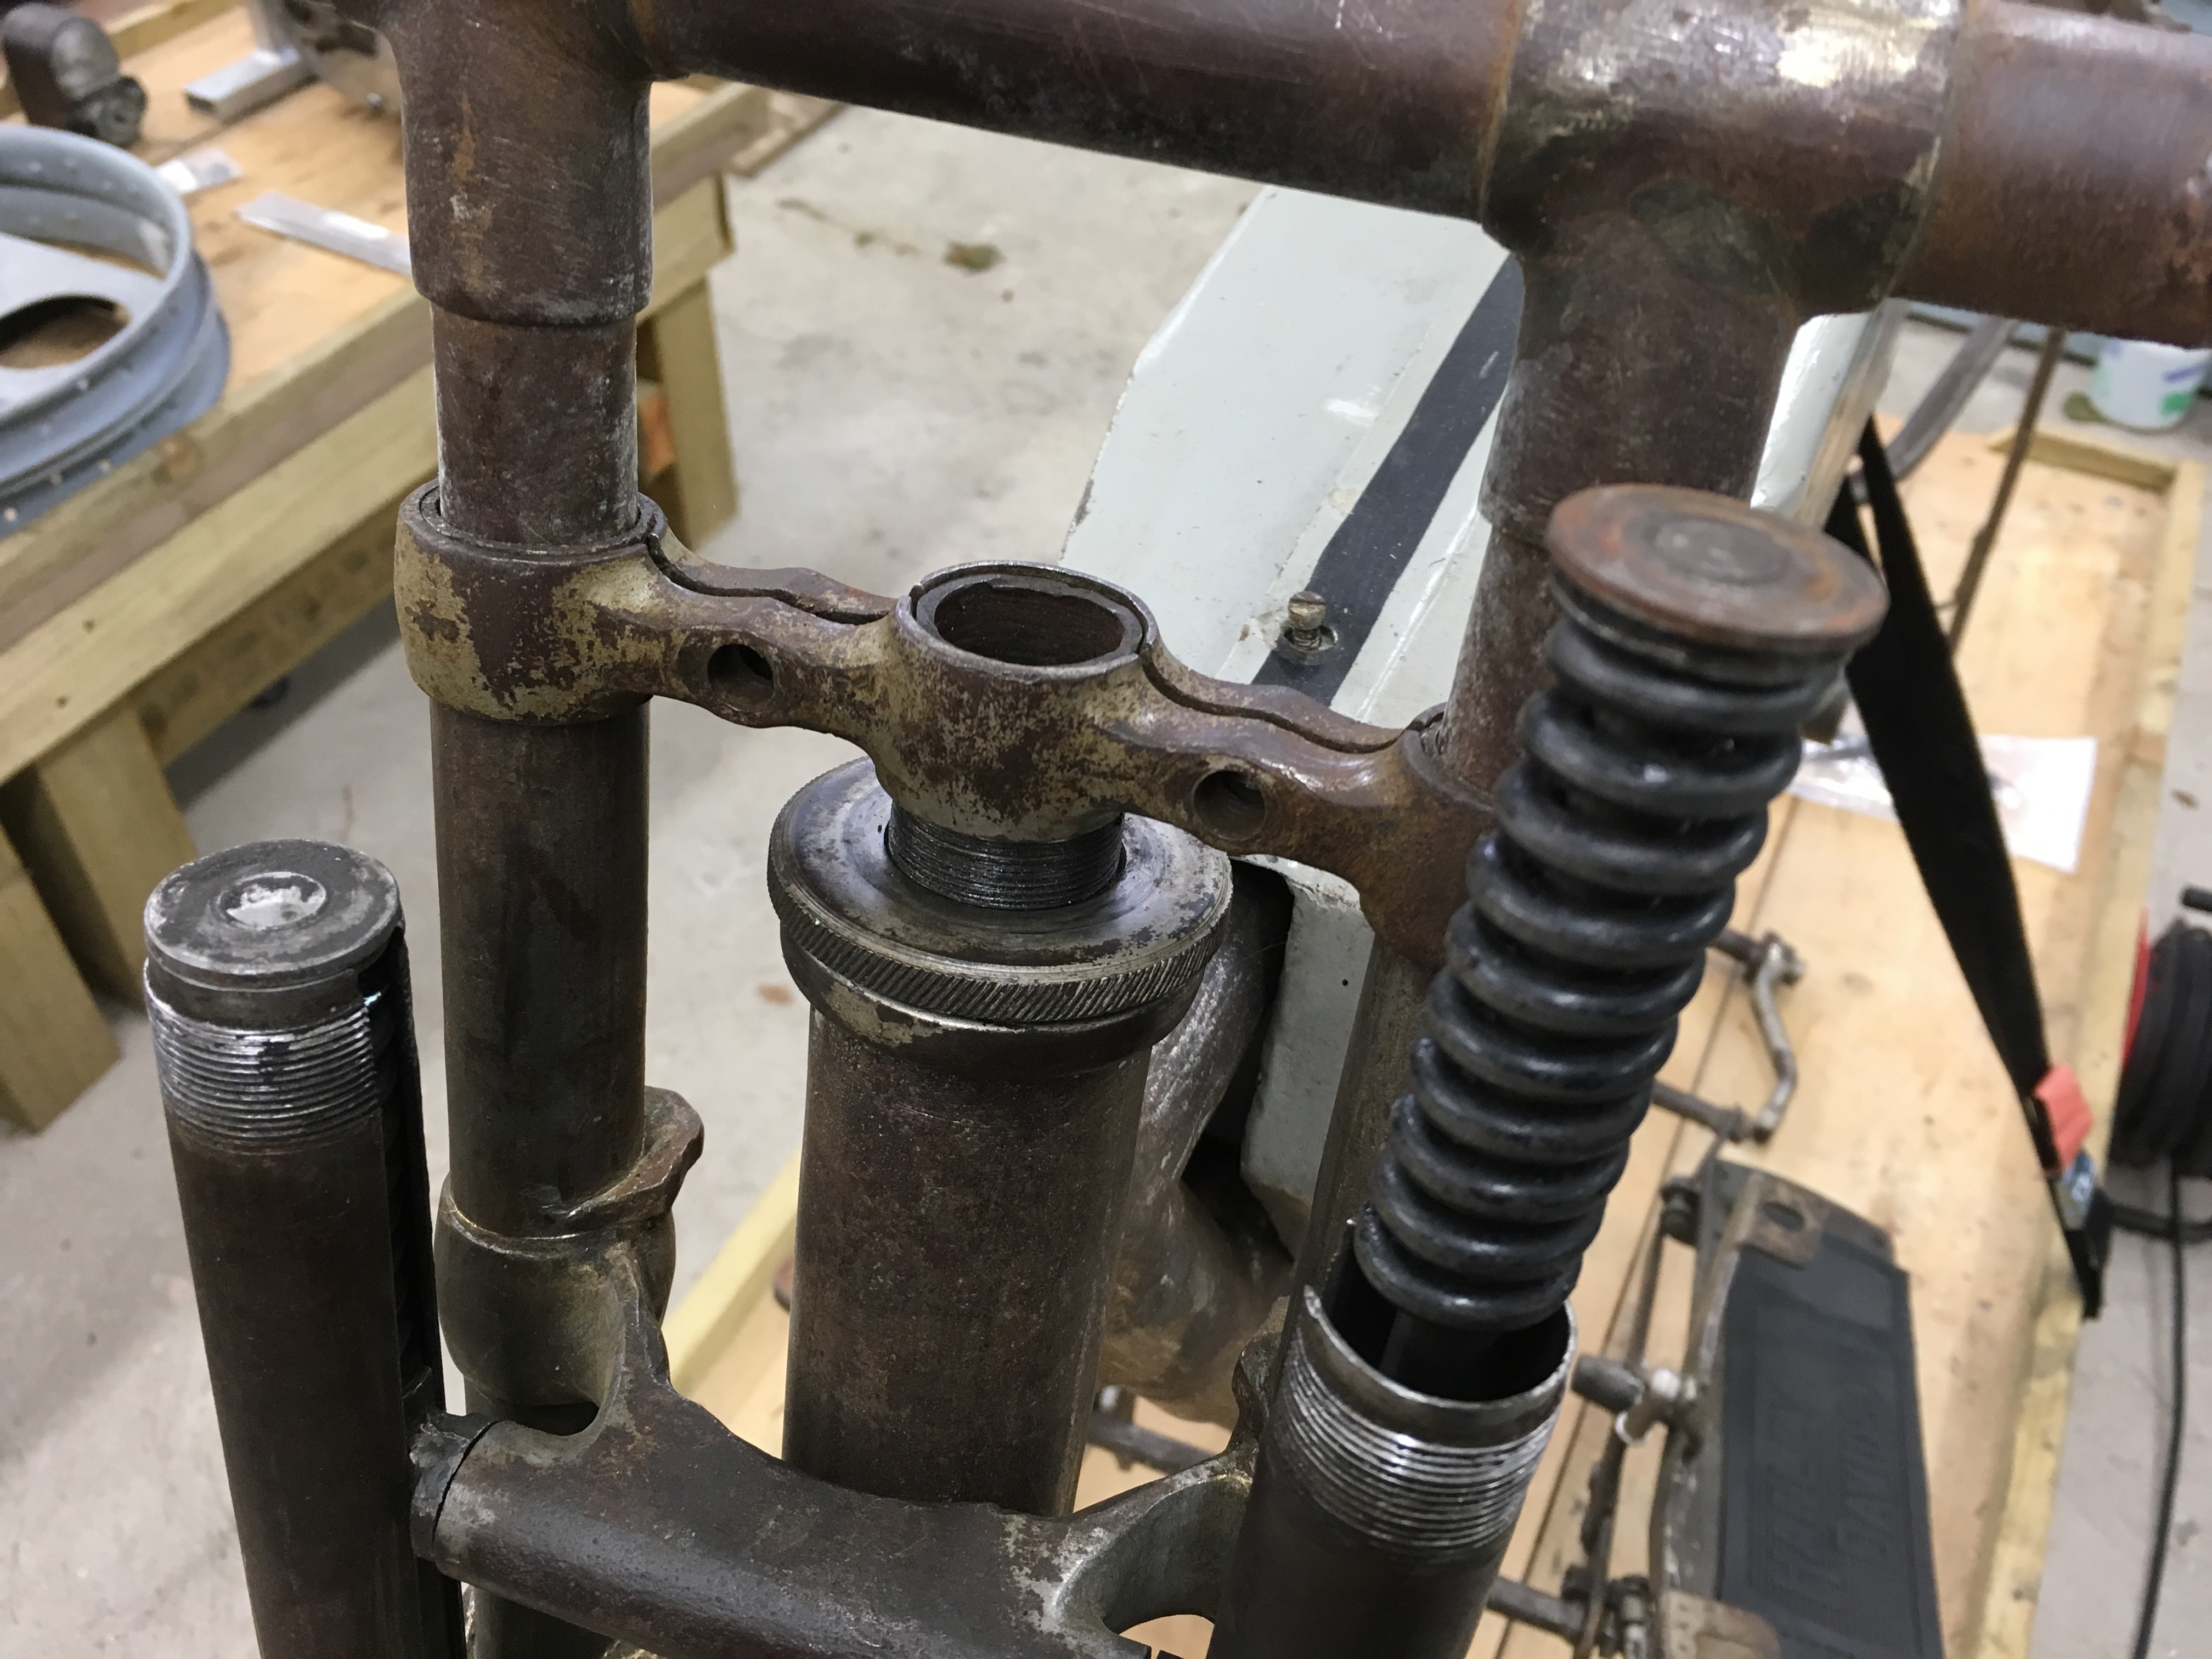
While the 8XE is away with the paint and plating people, I thought I should do a check on the parts I have collected for the 8D. Most are correct original parts, but some not.

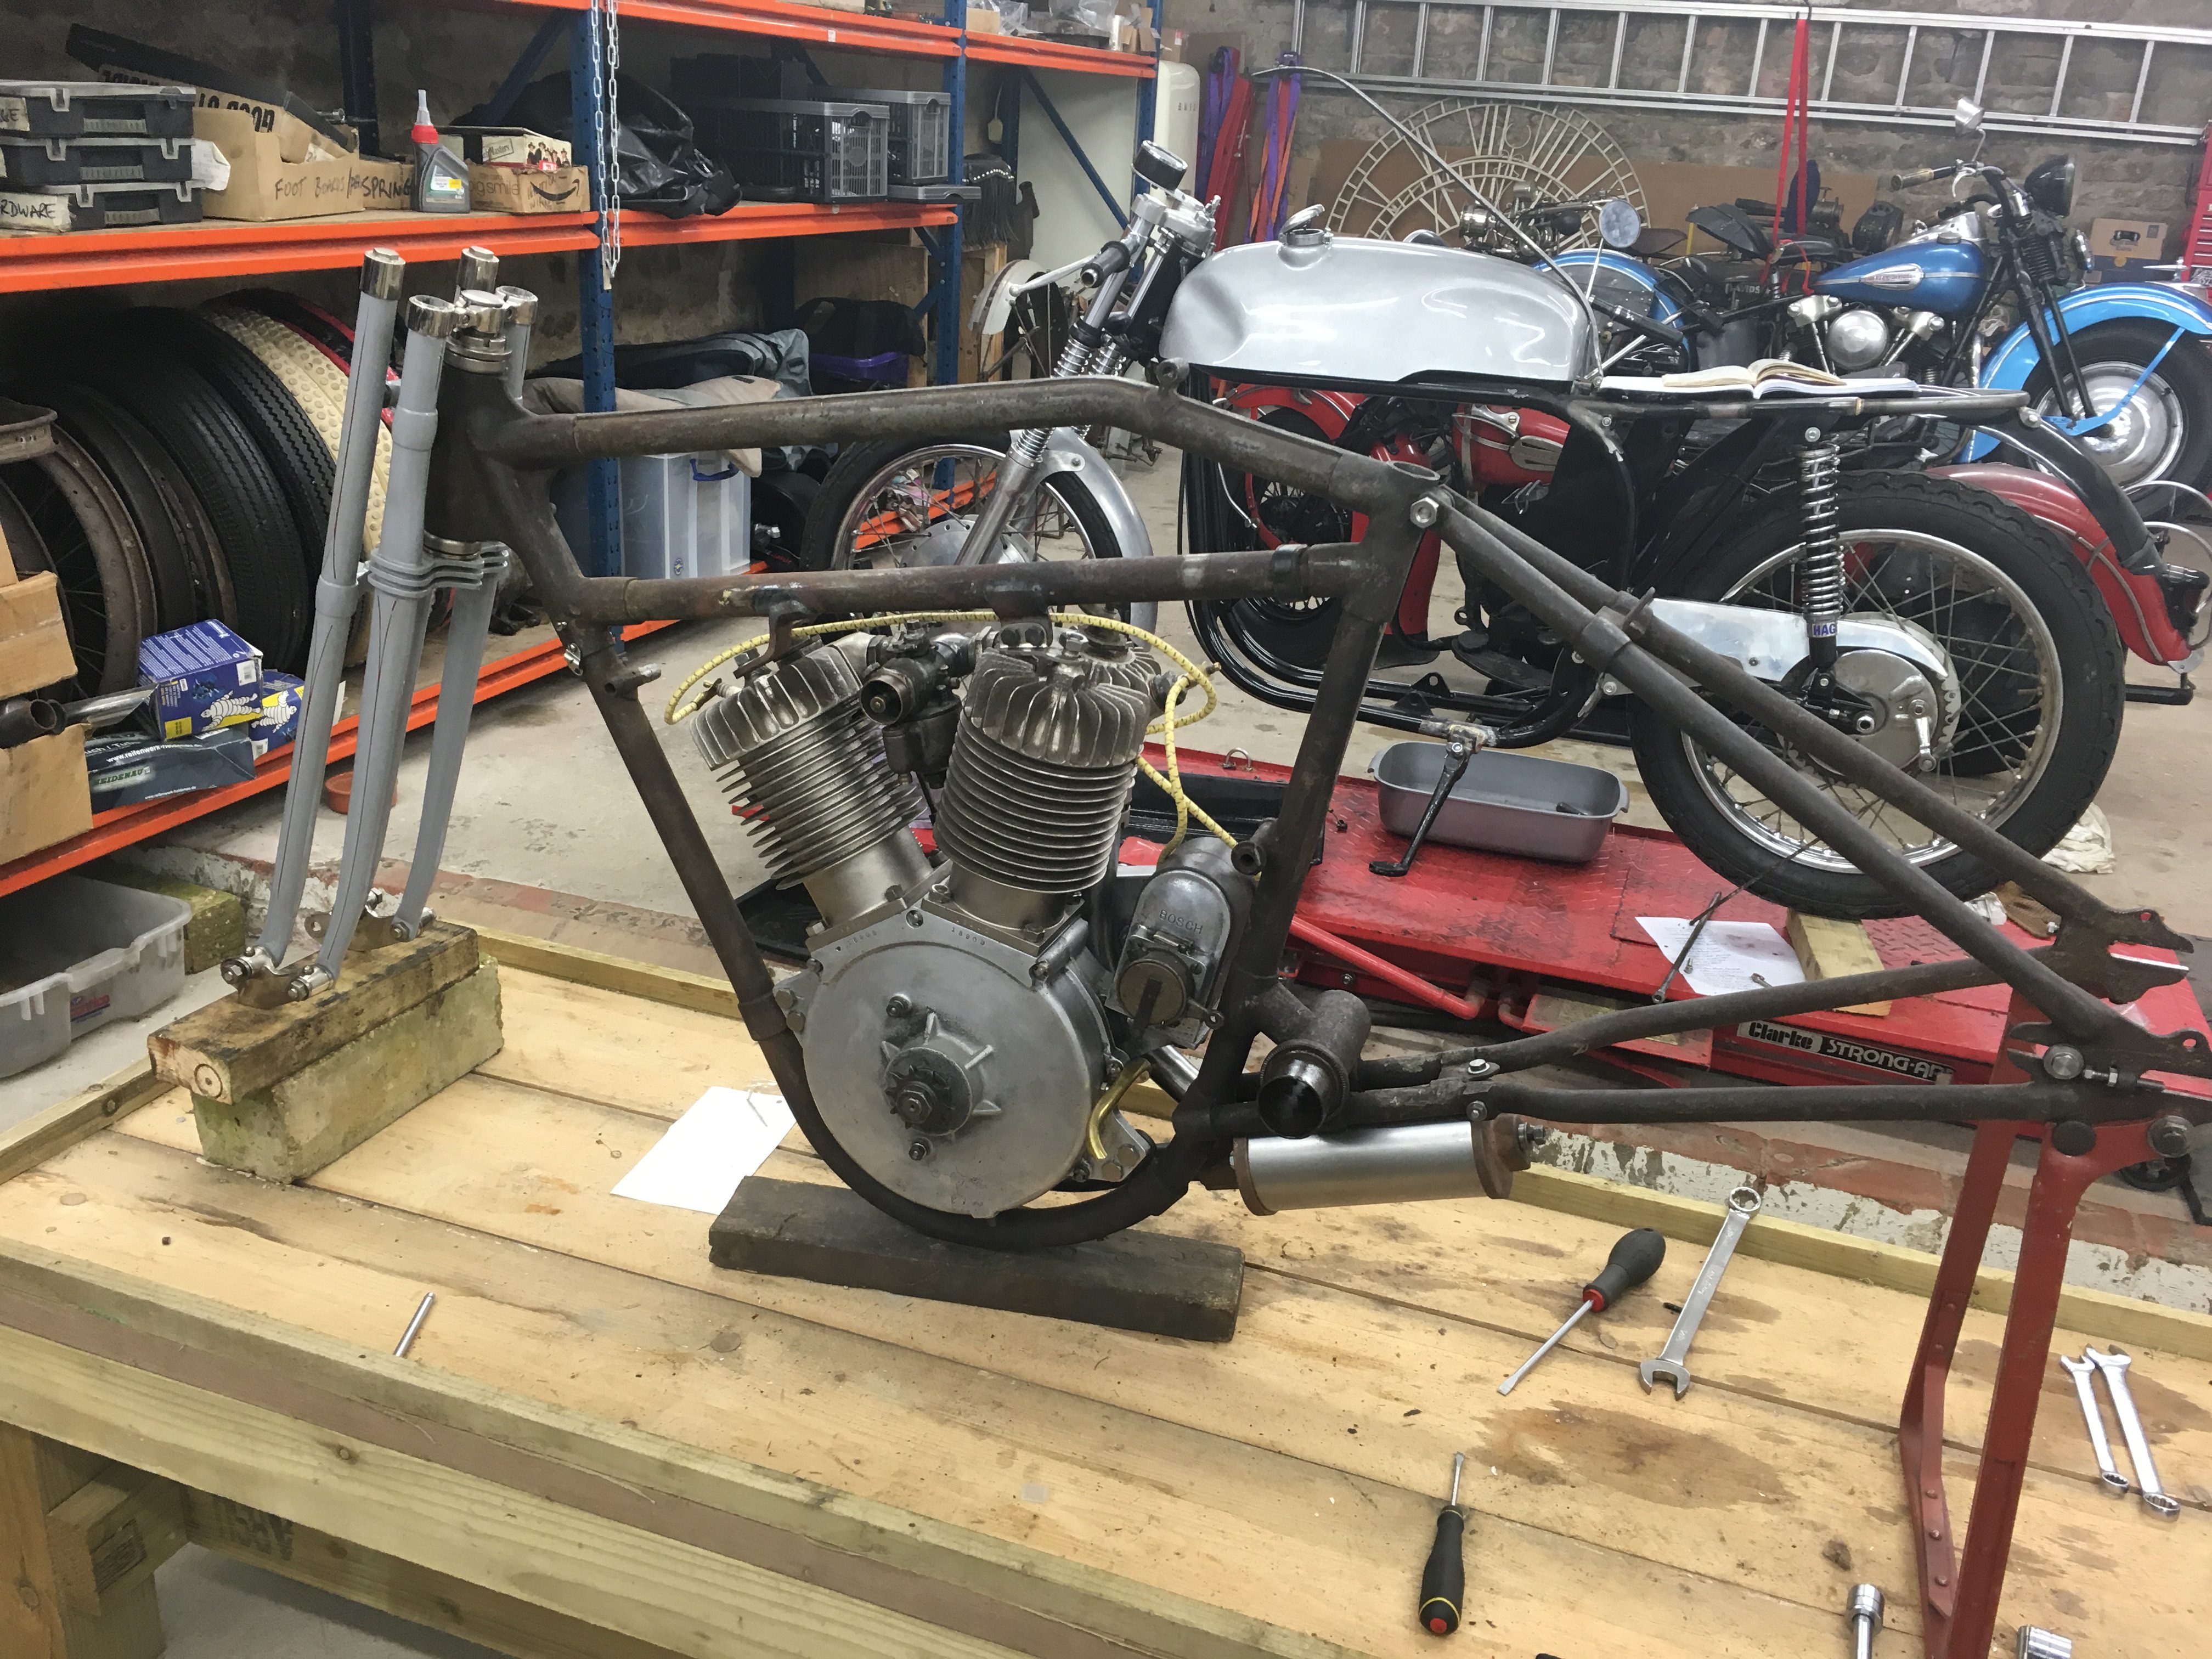
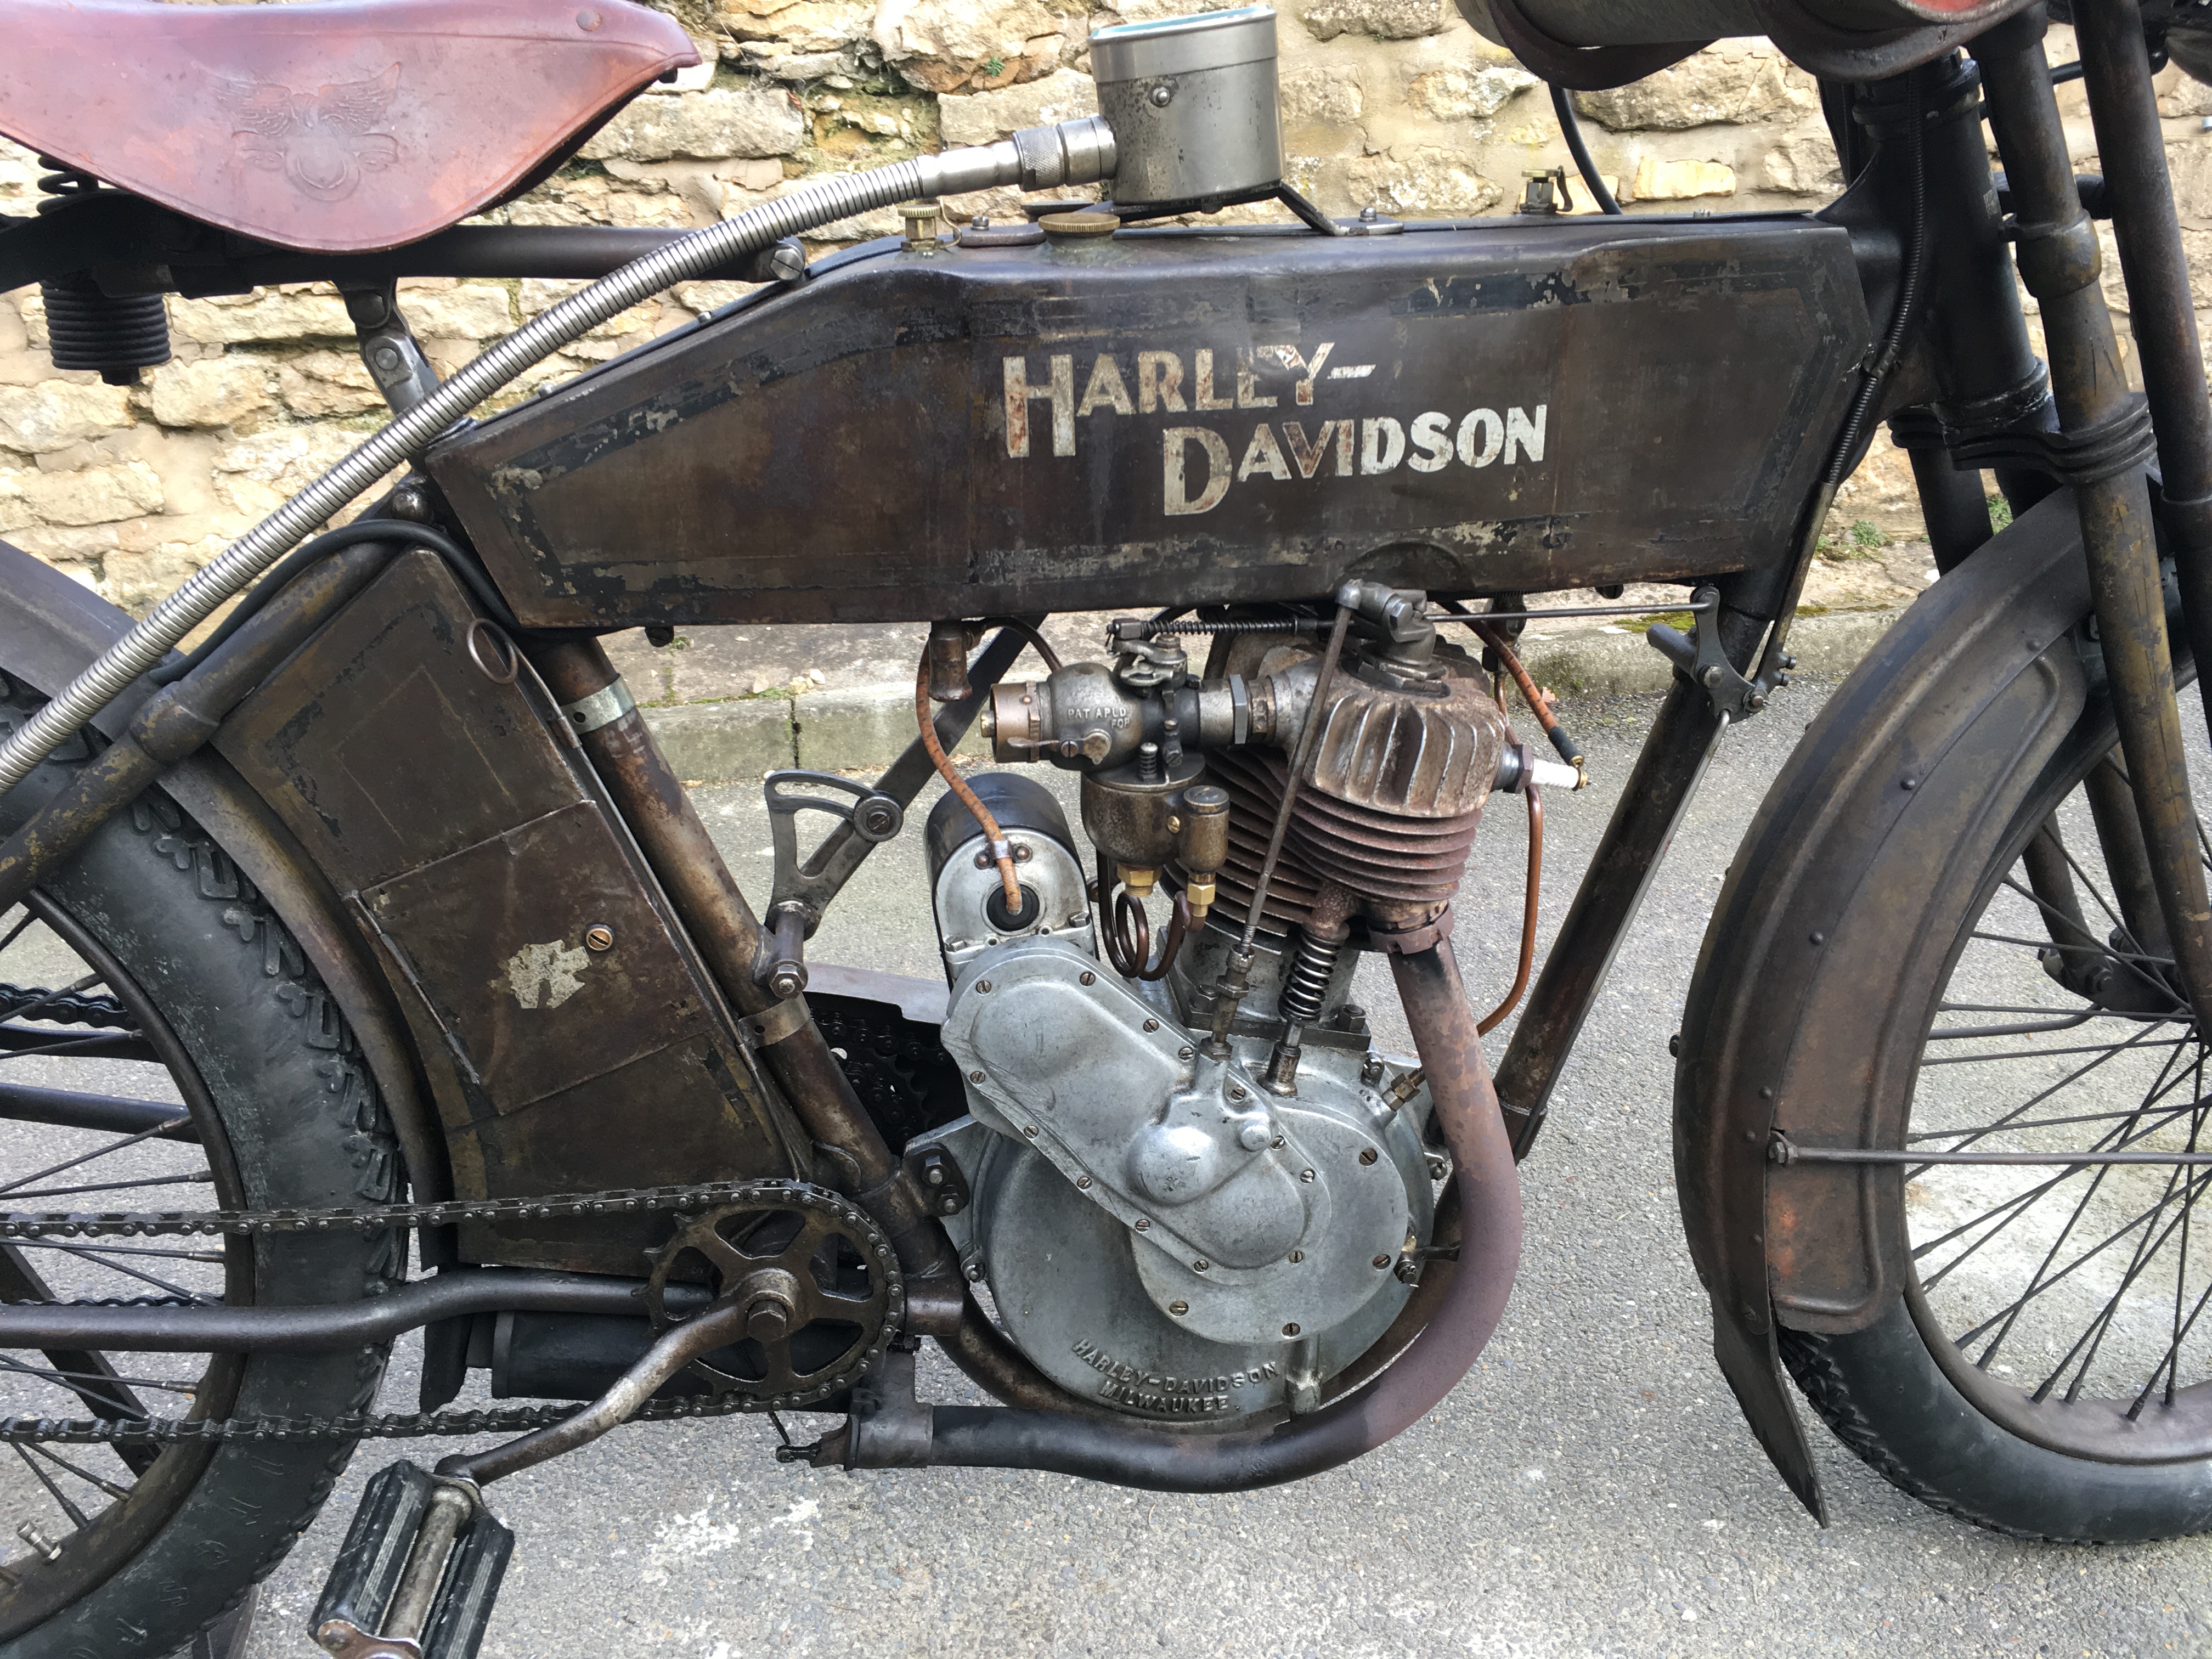
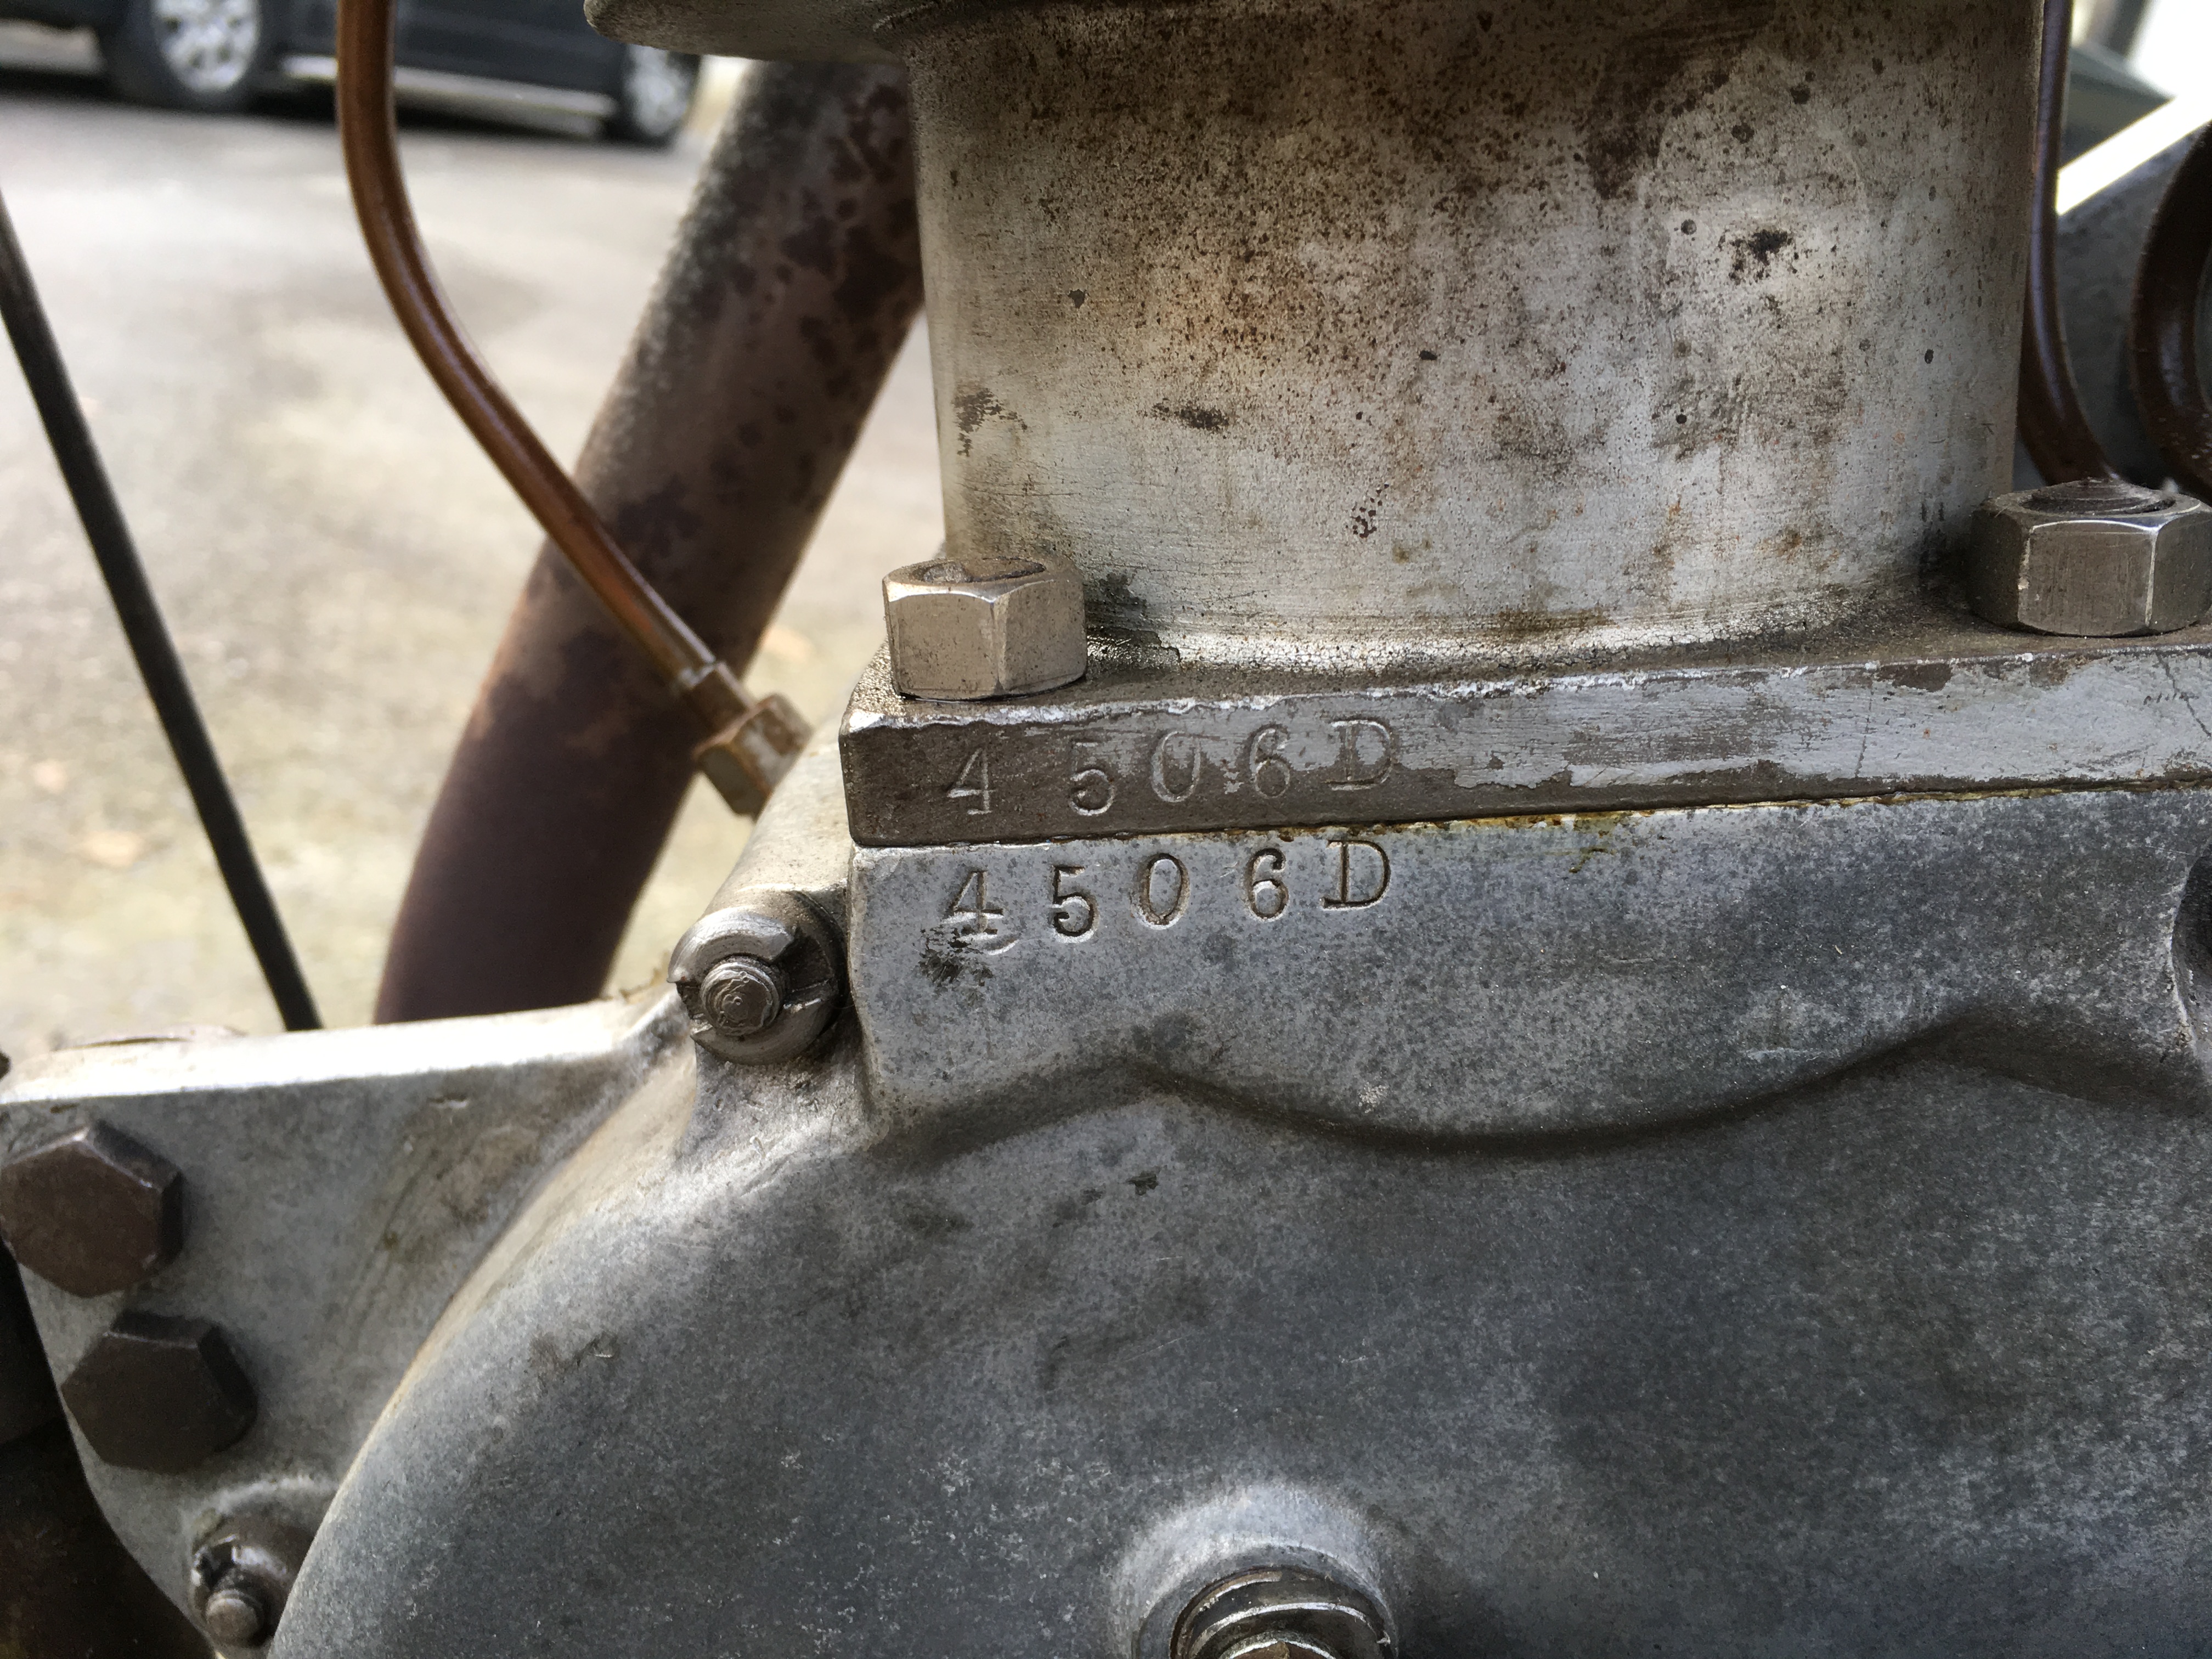
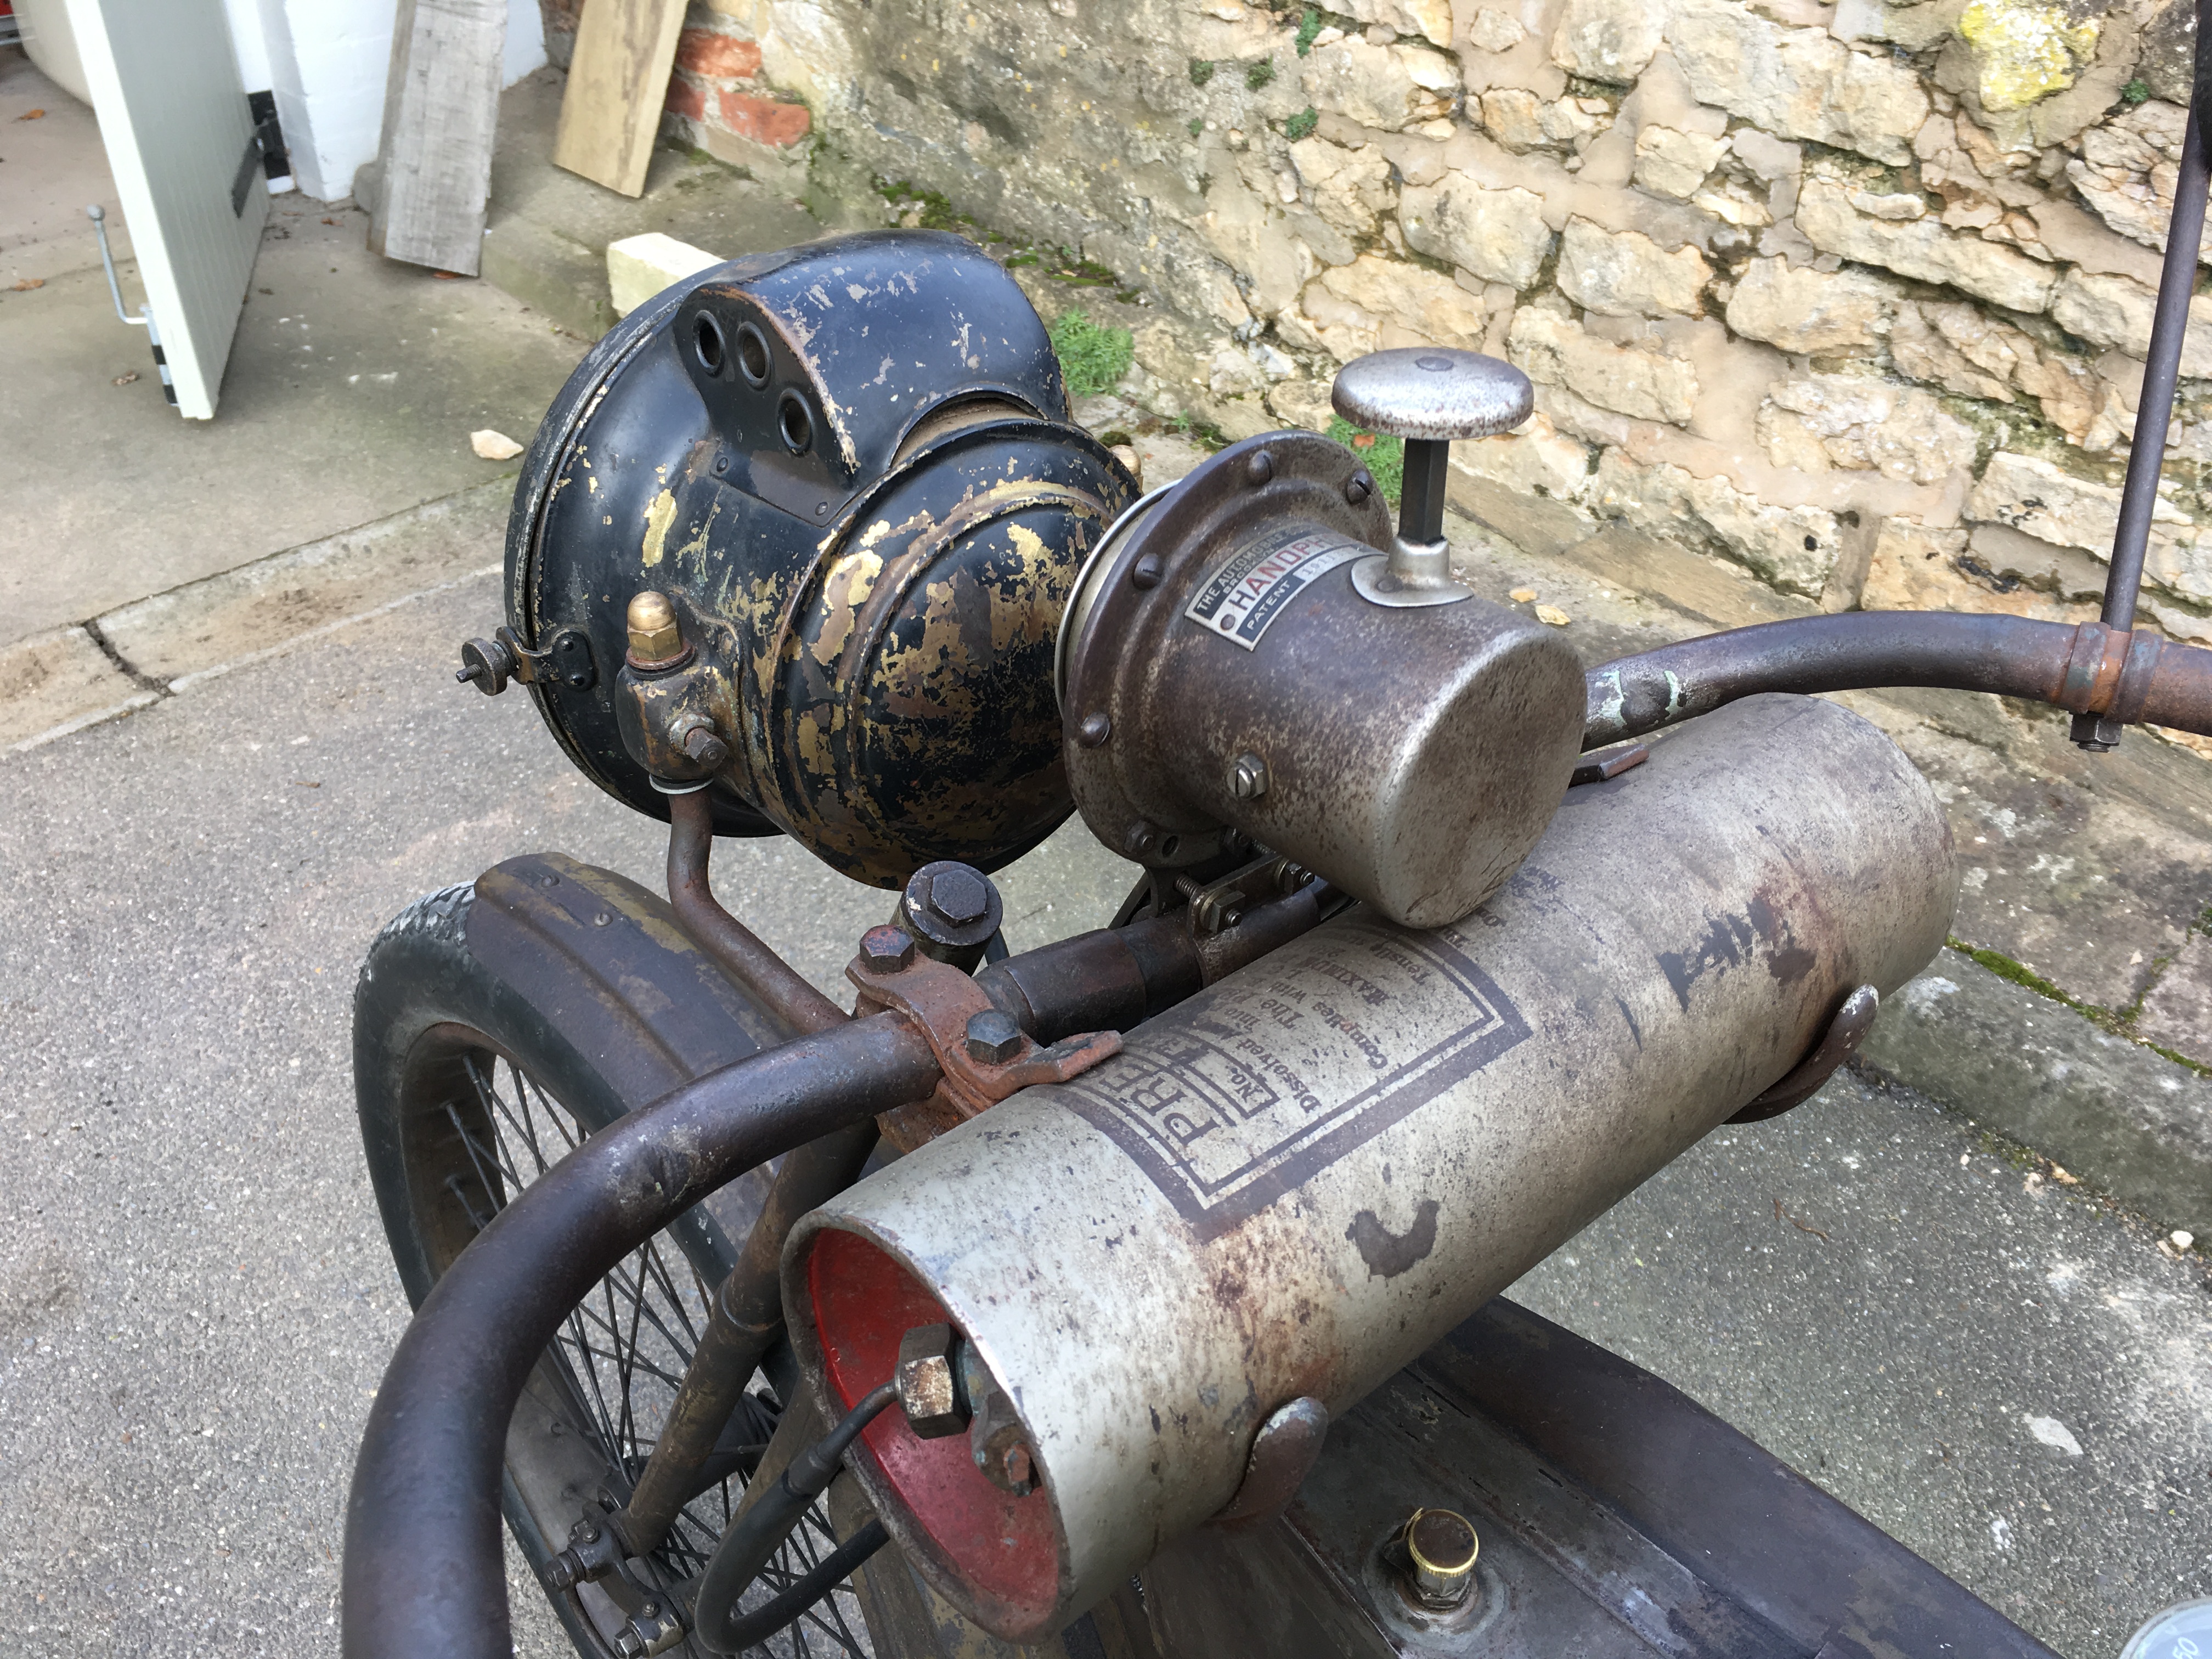
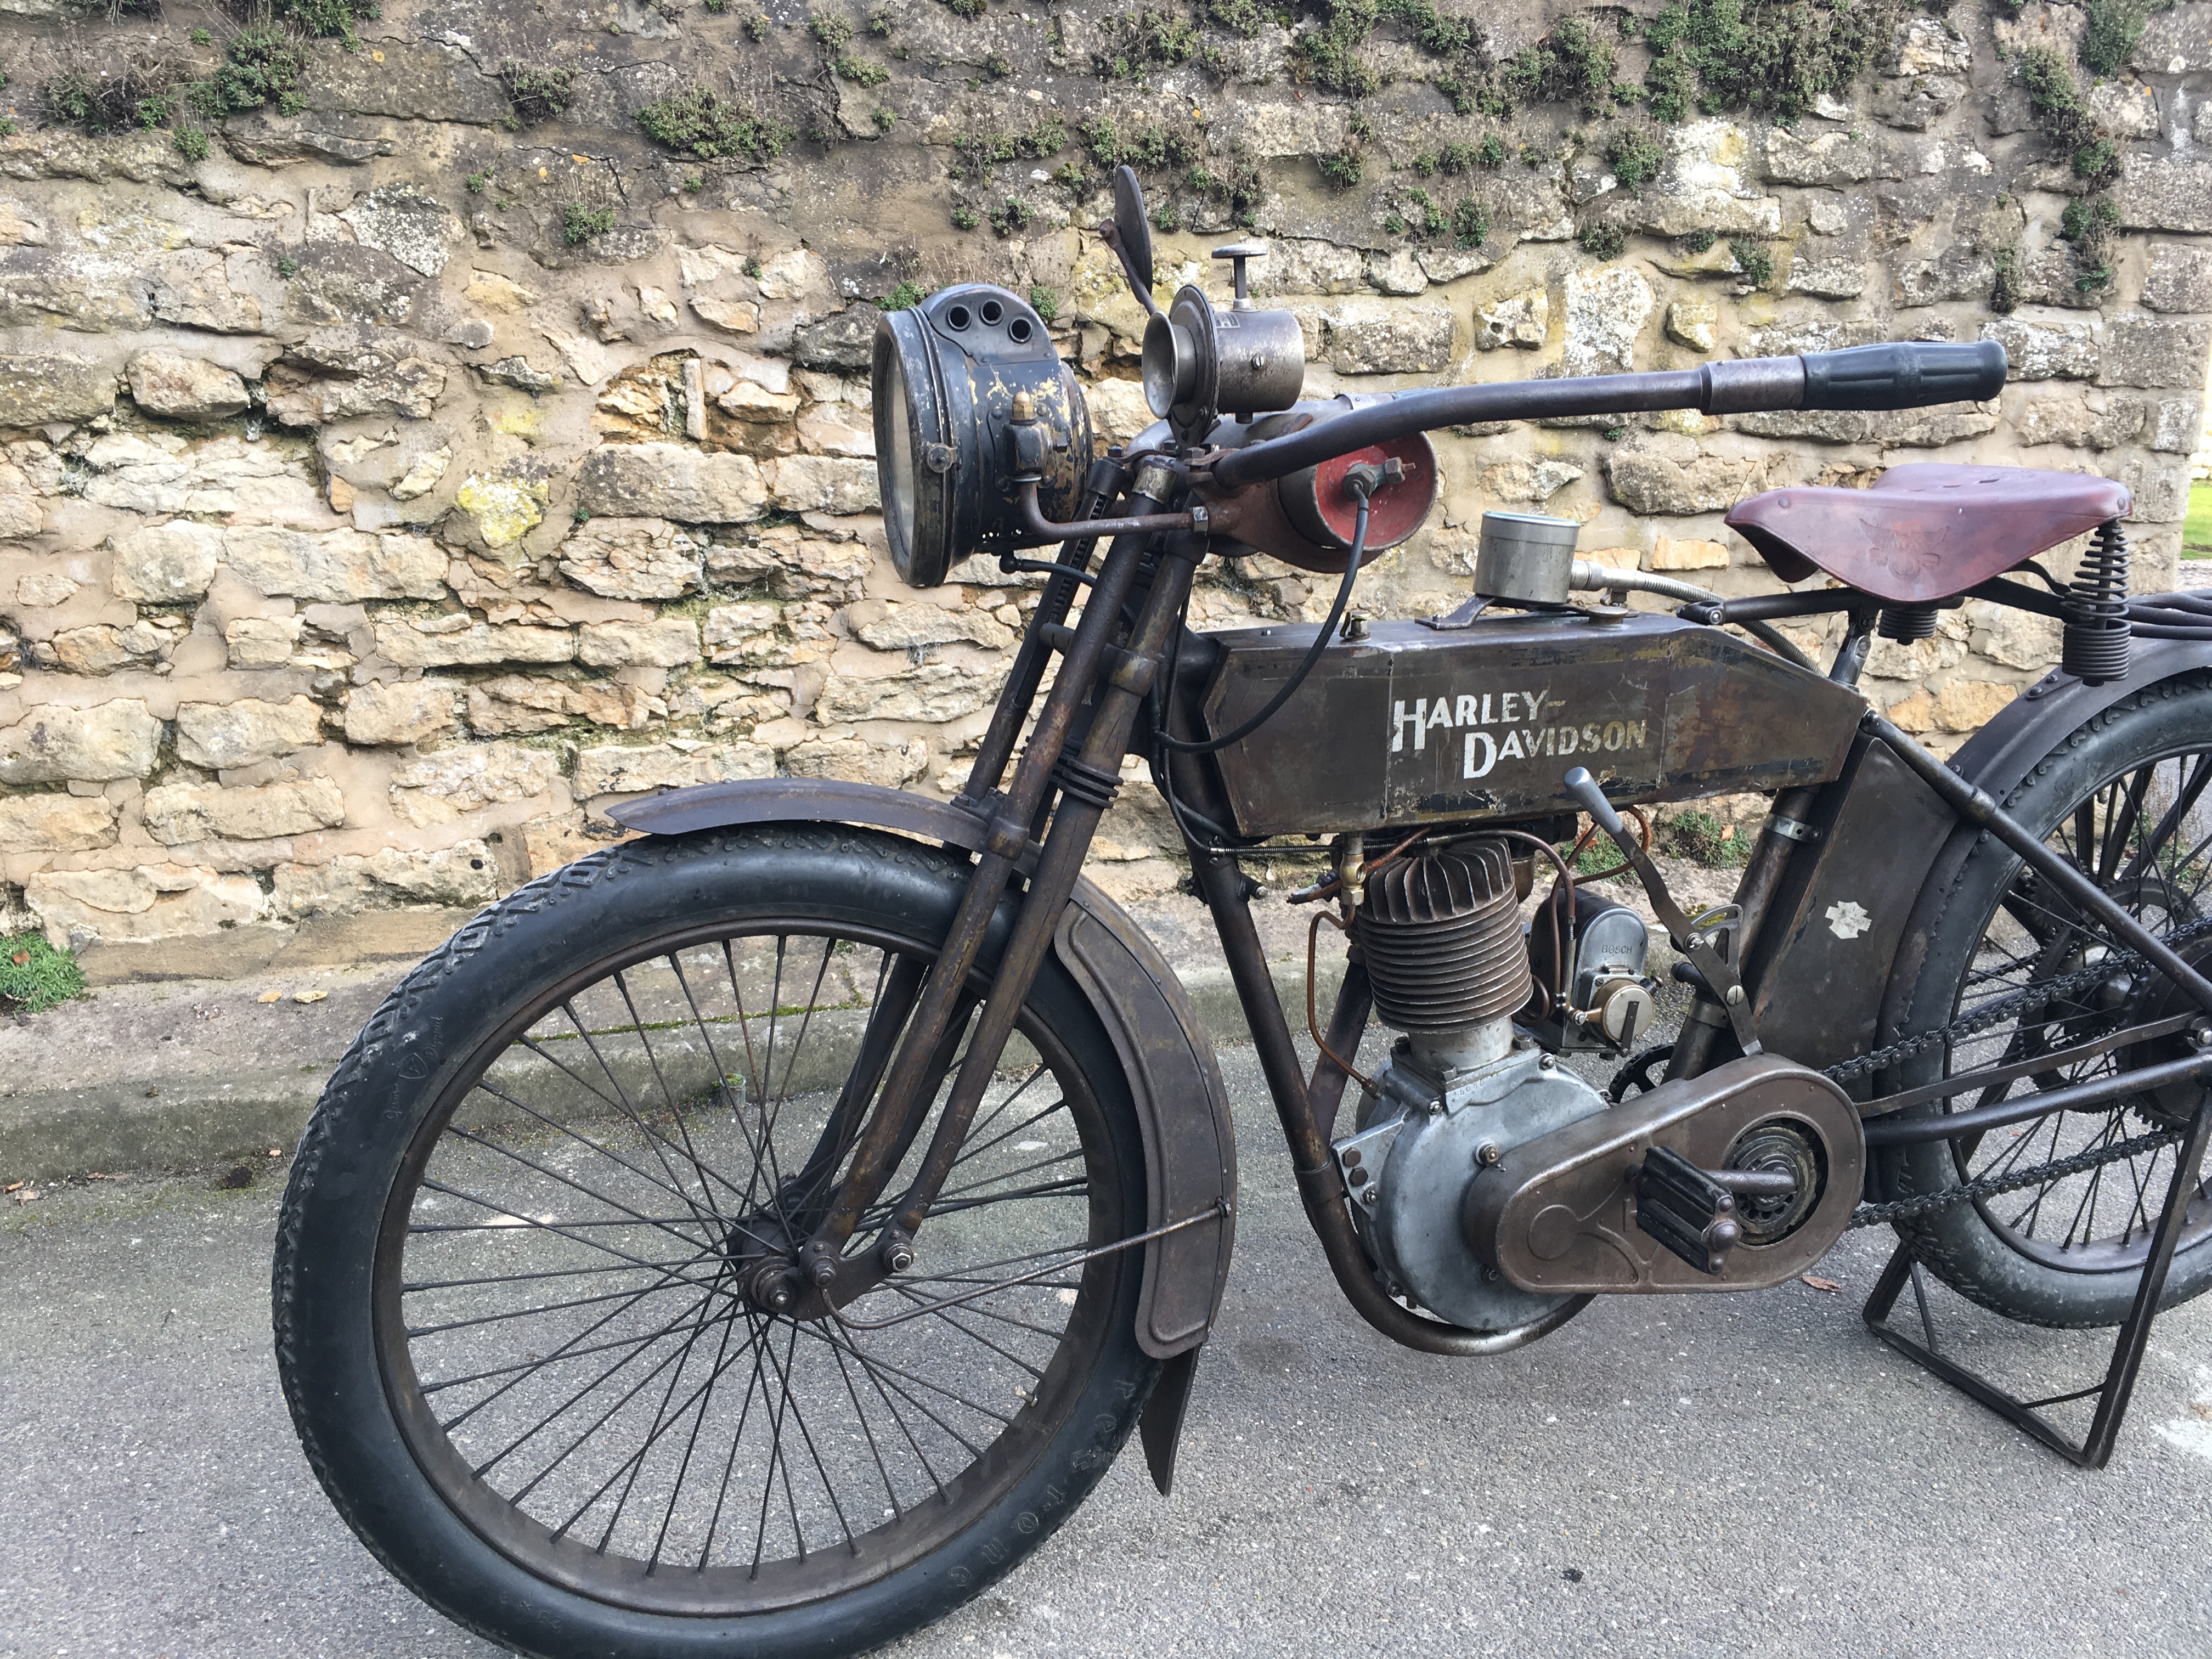
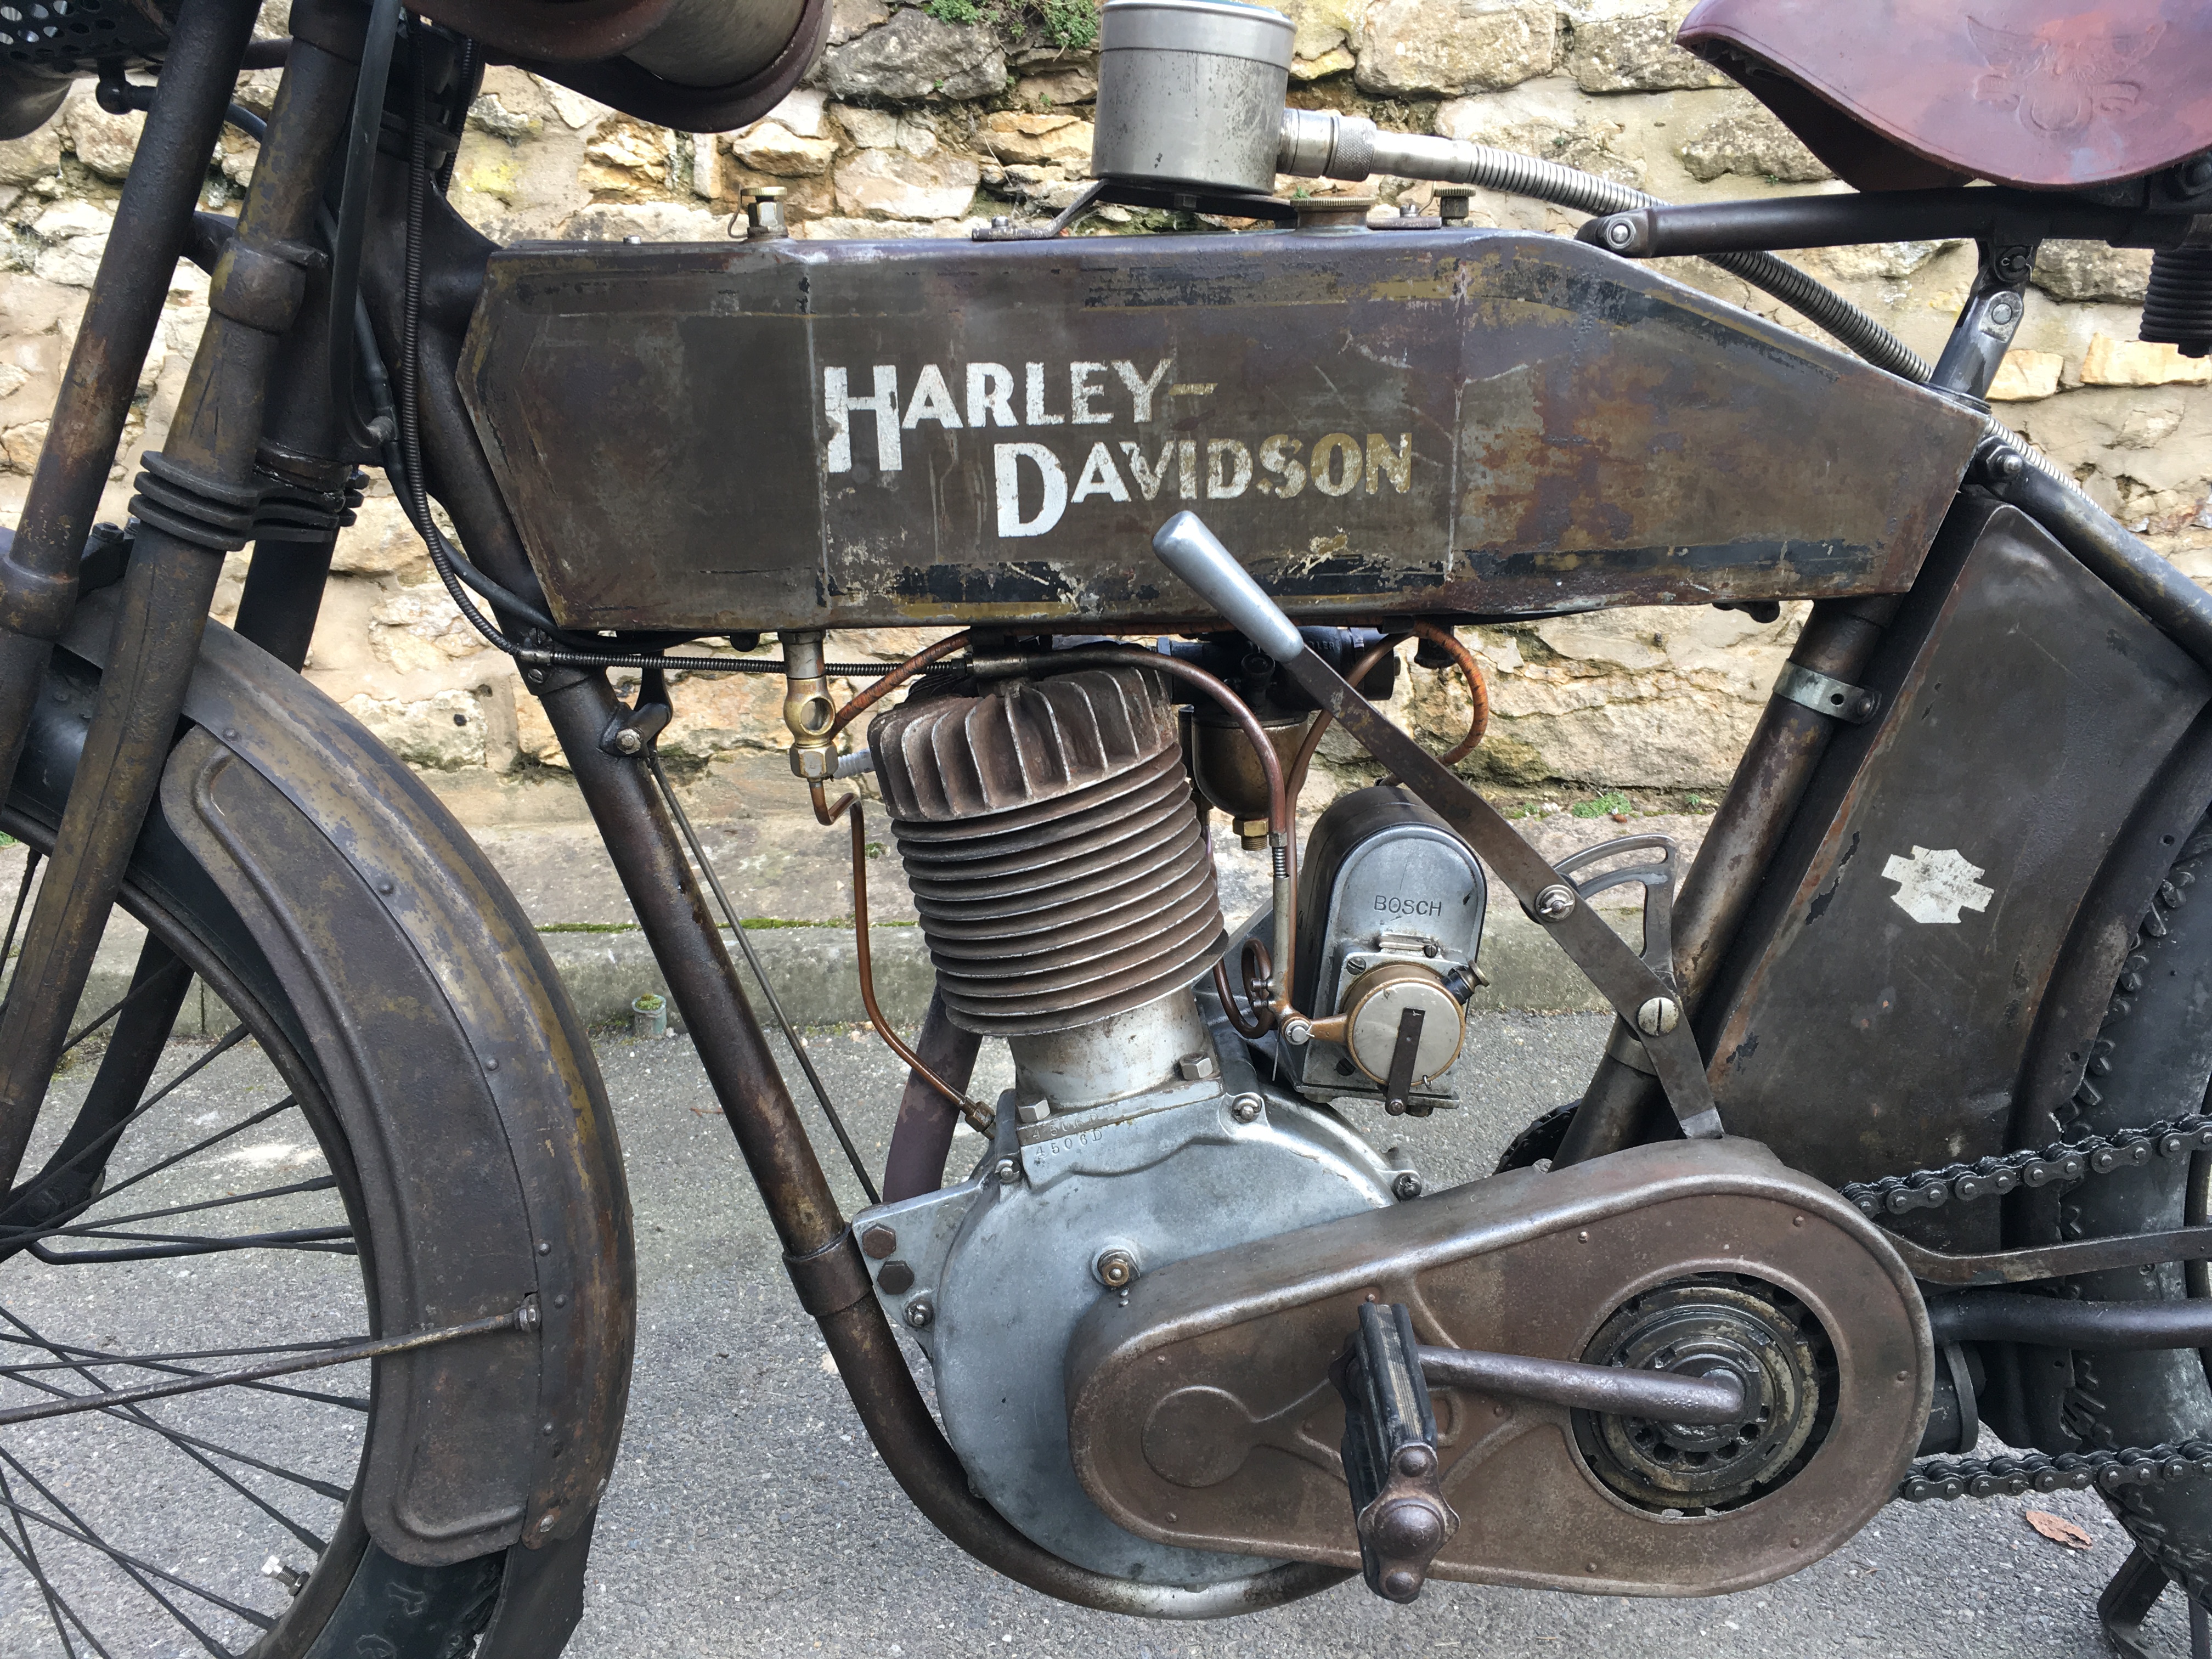
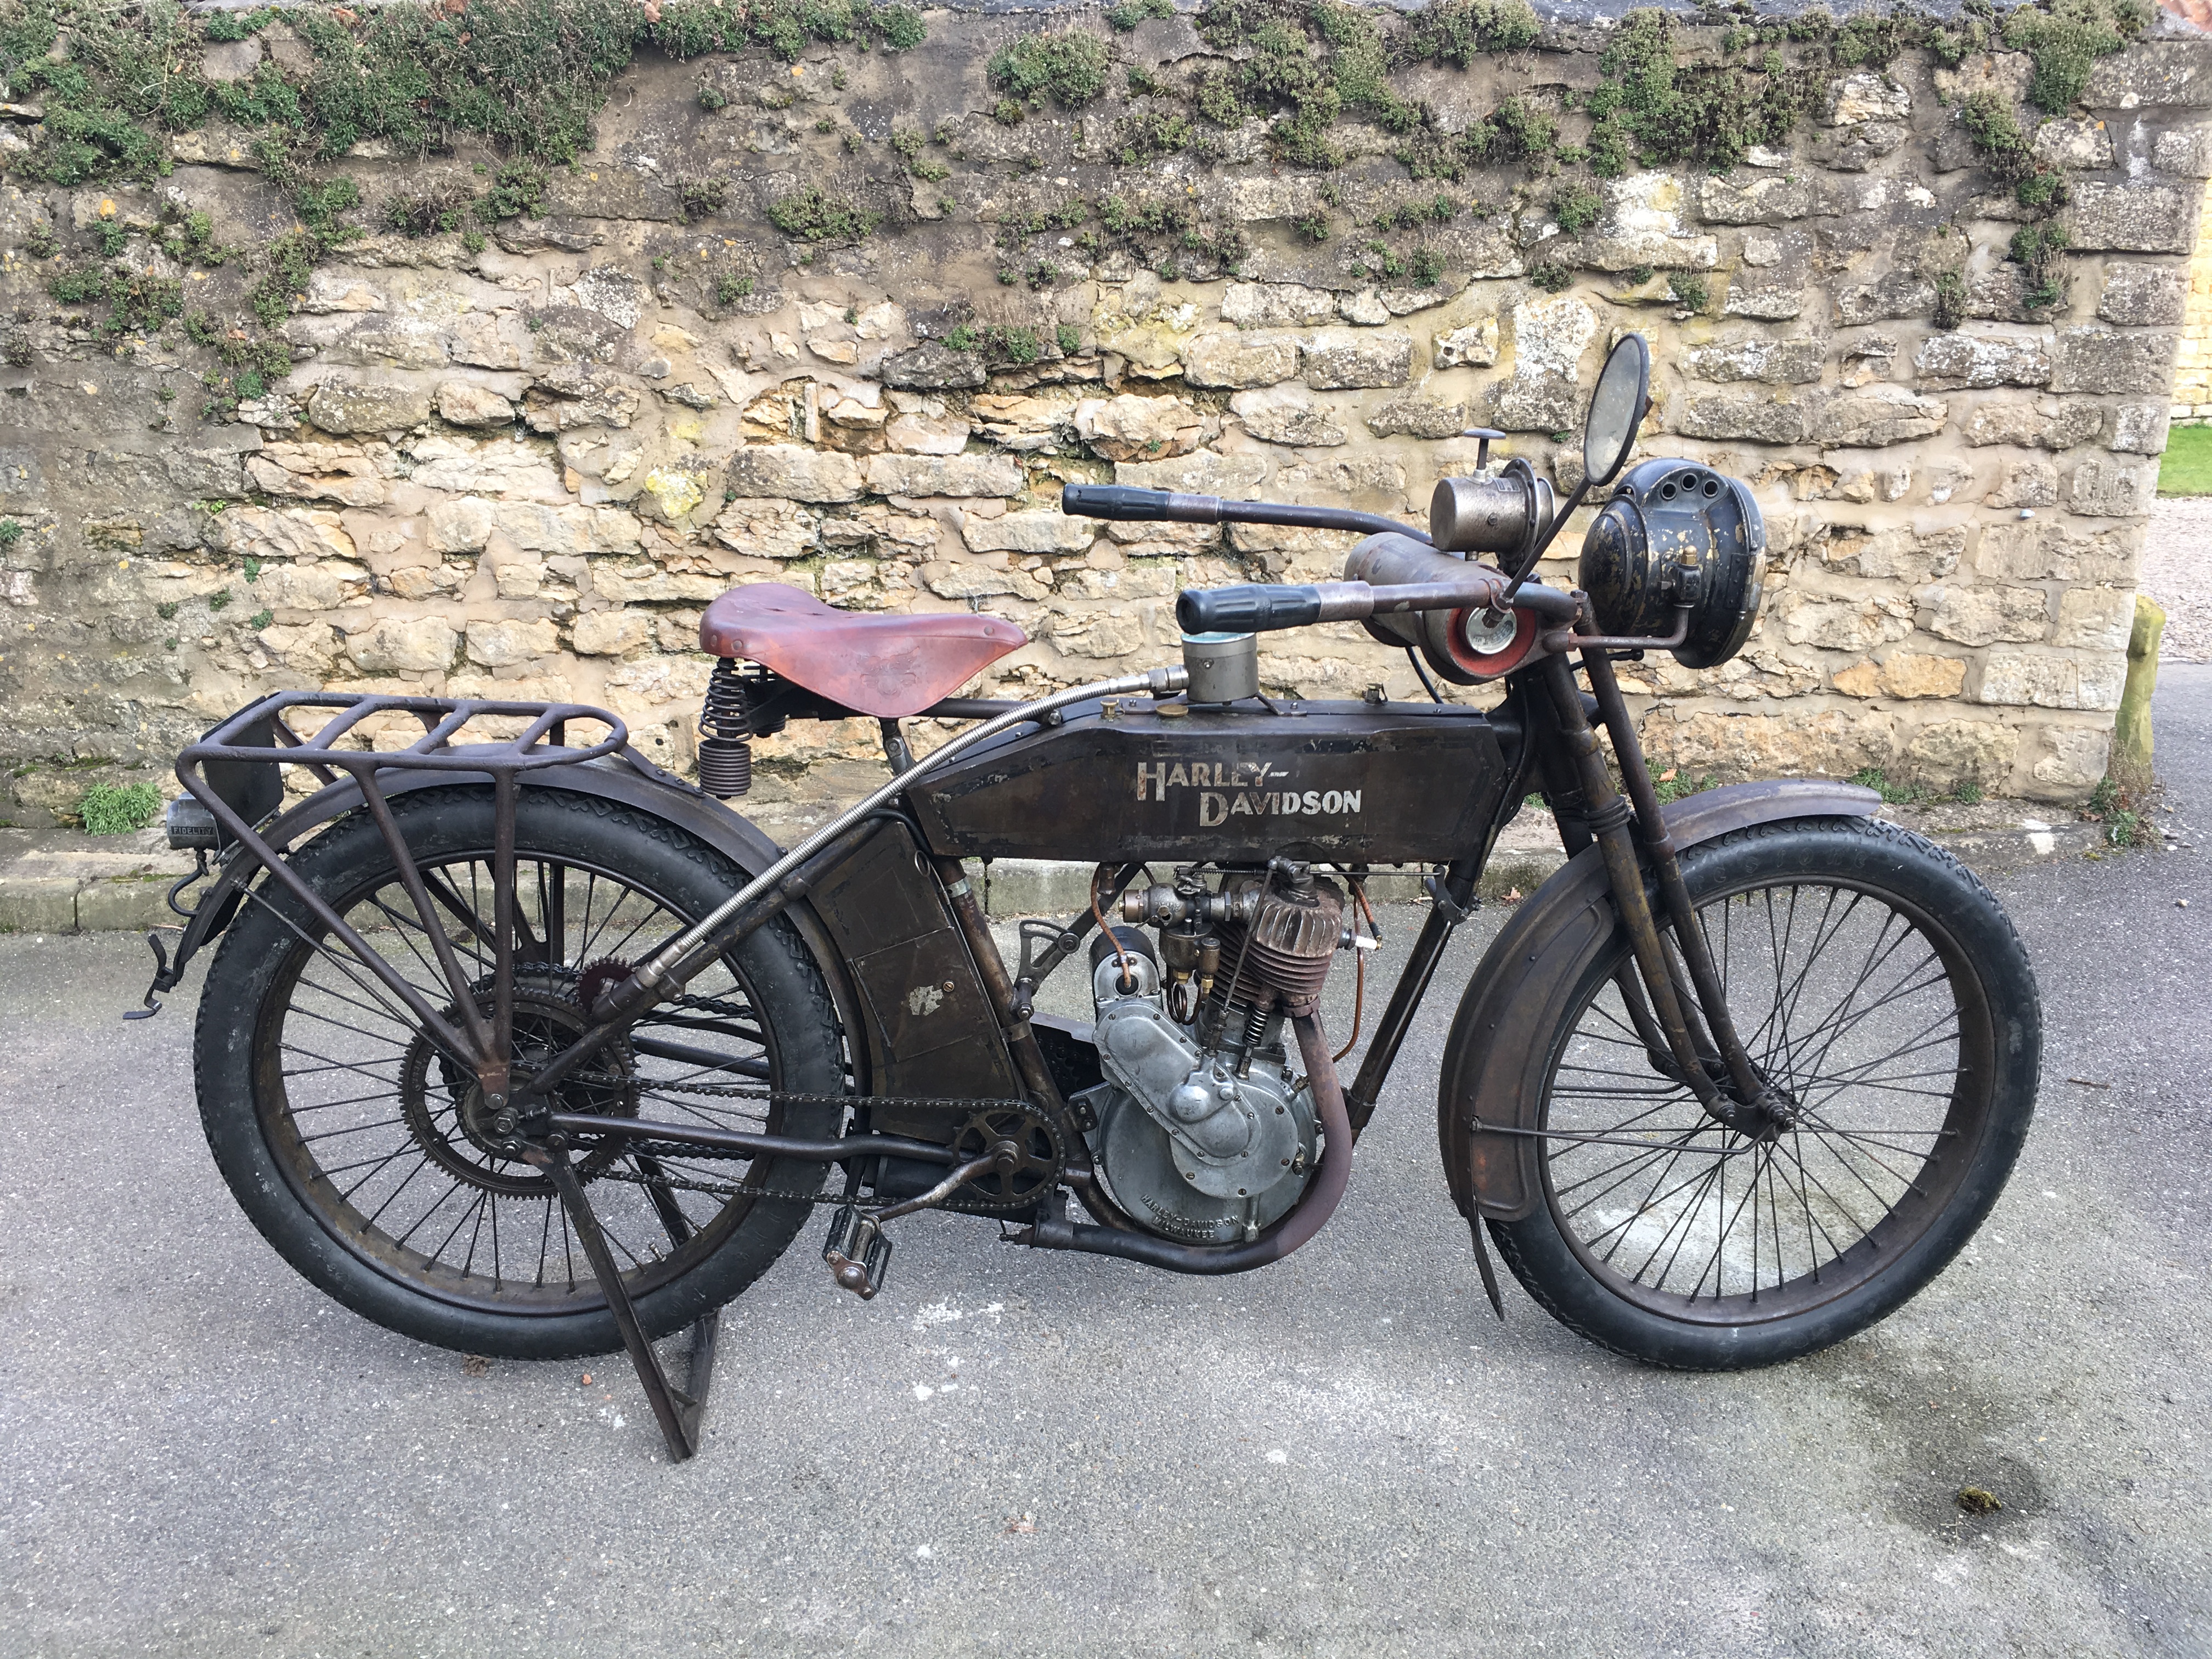
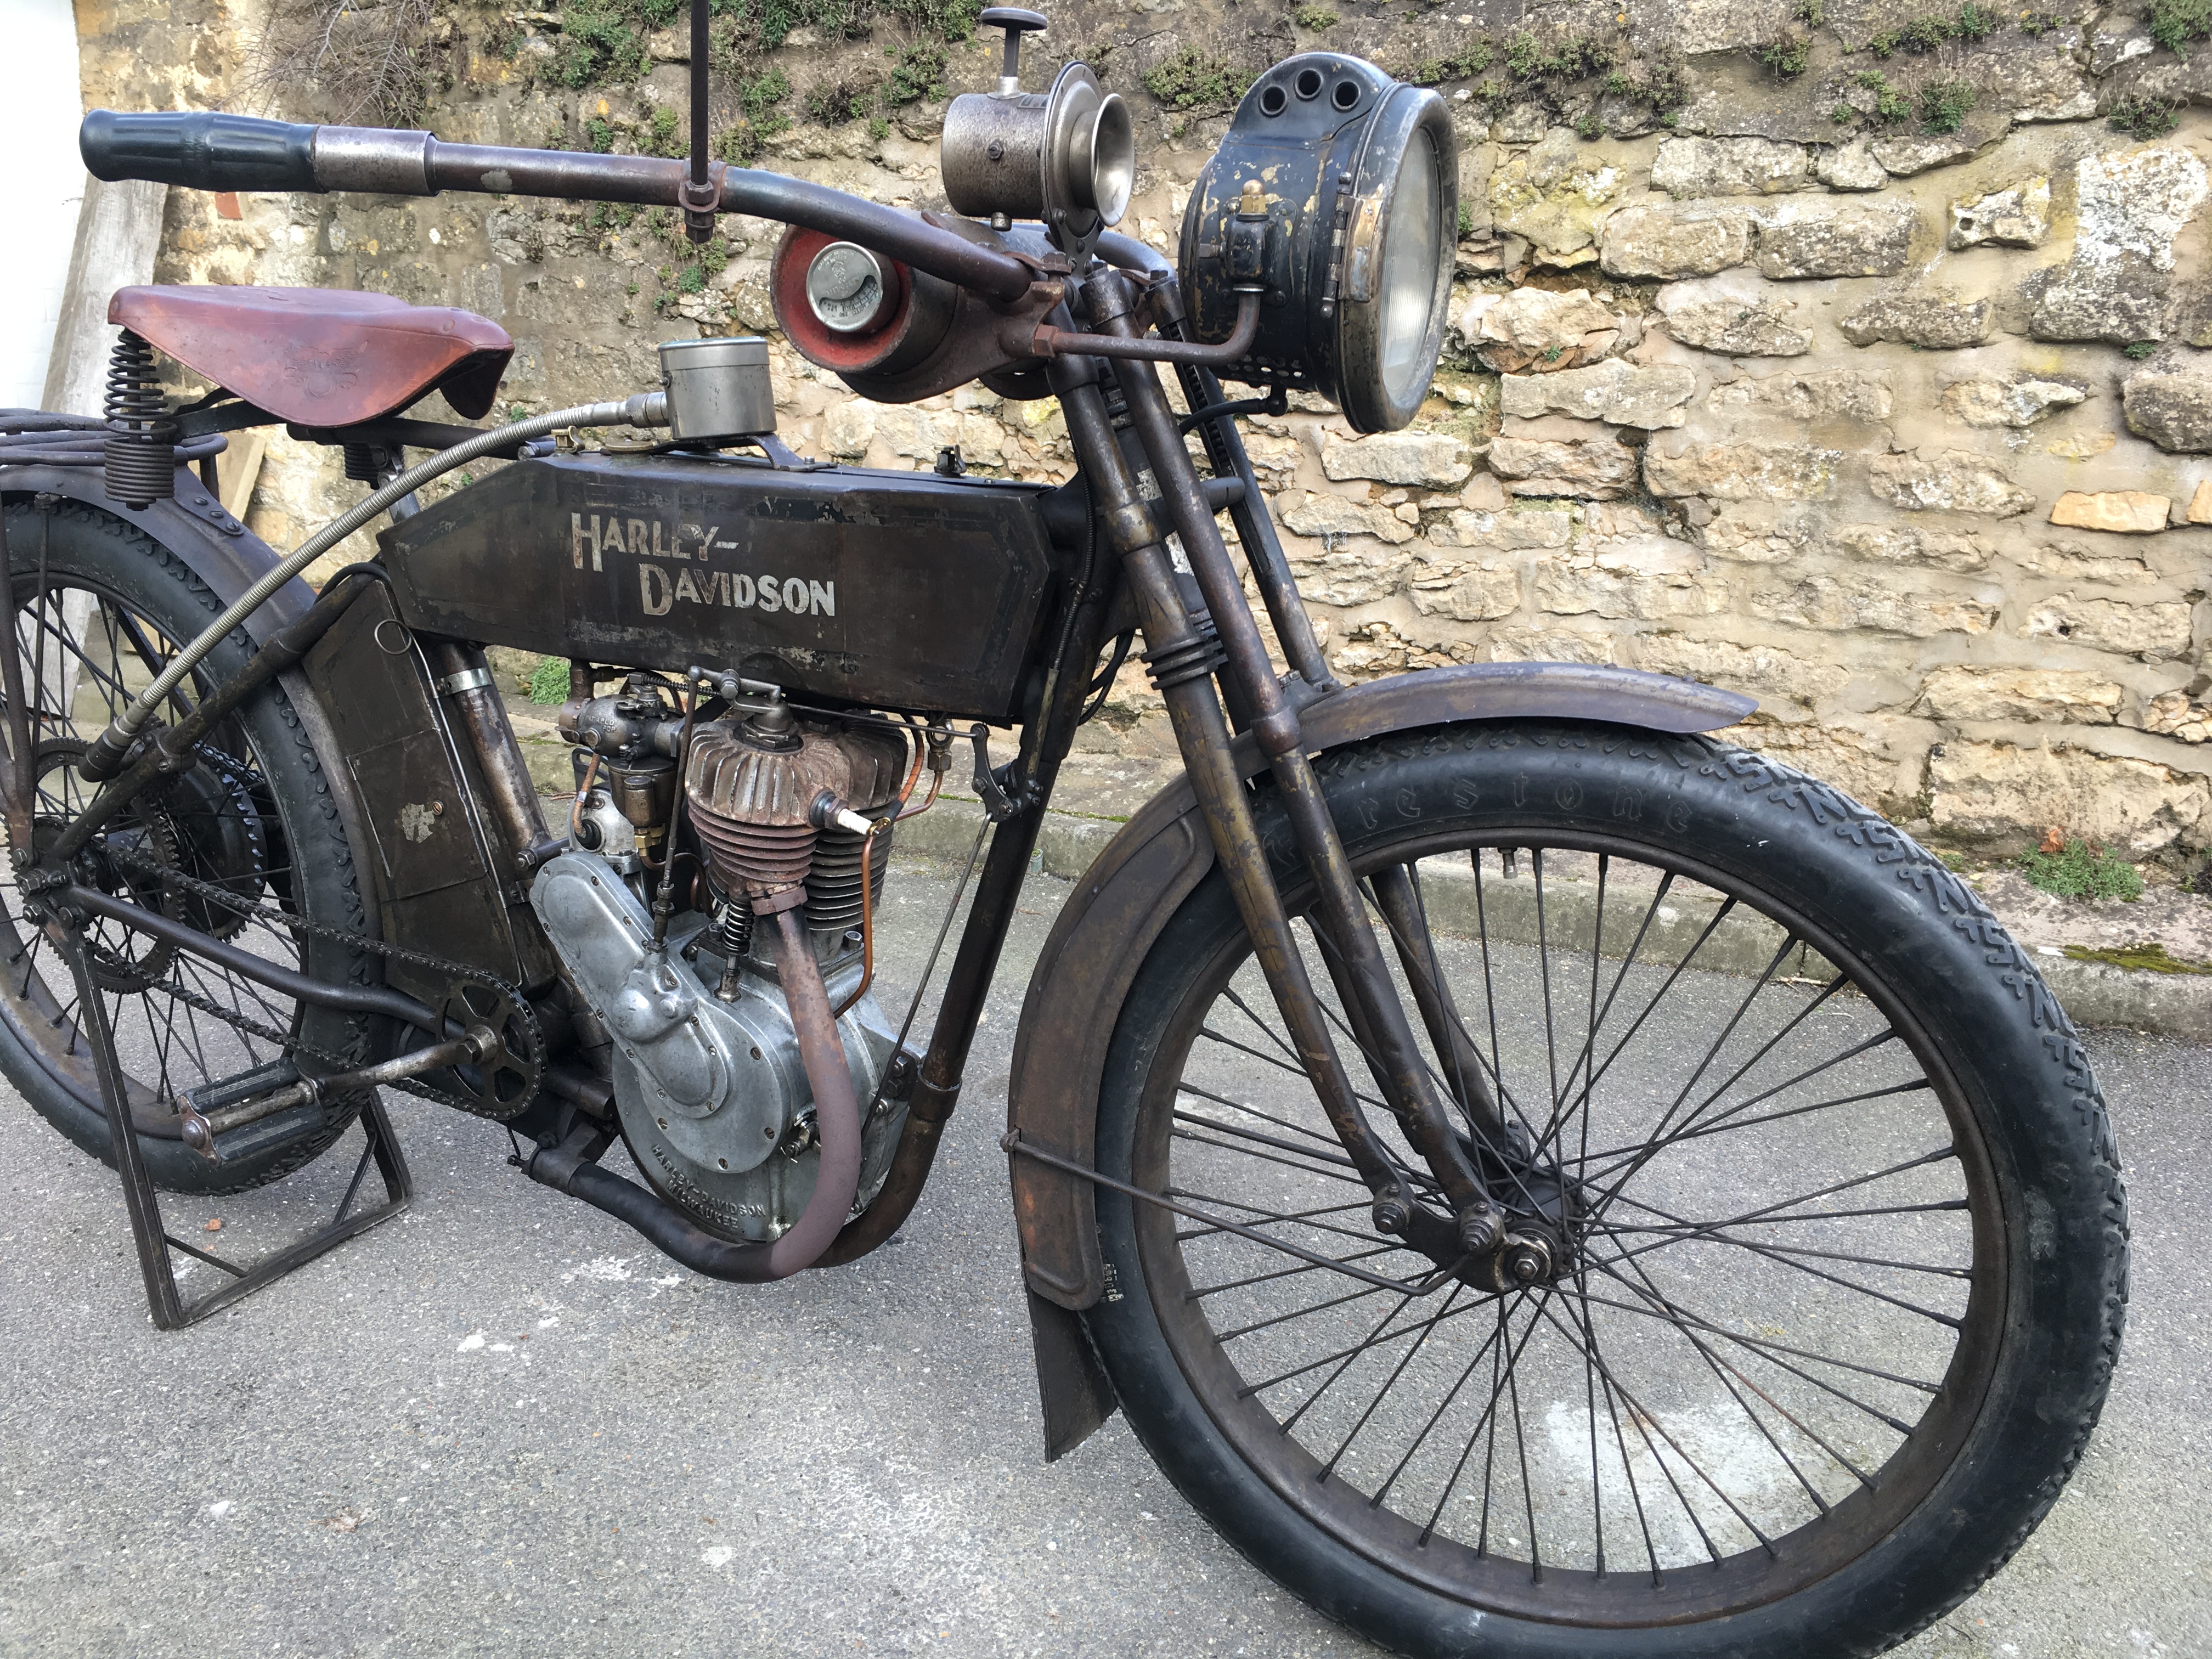
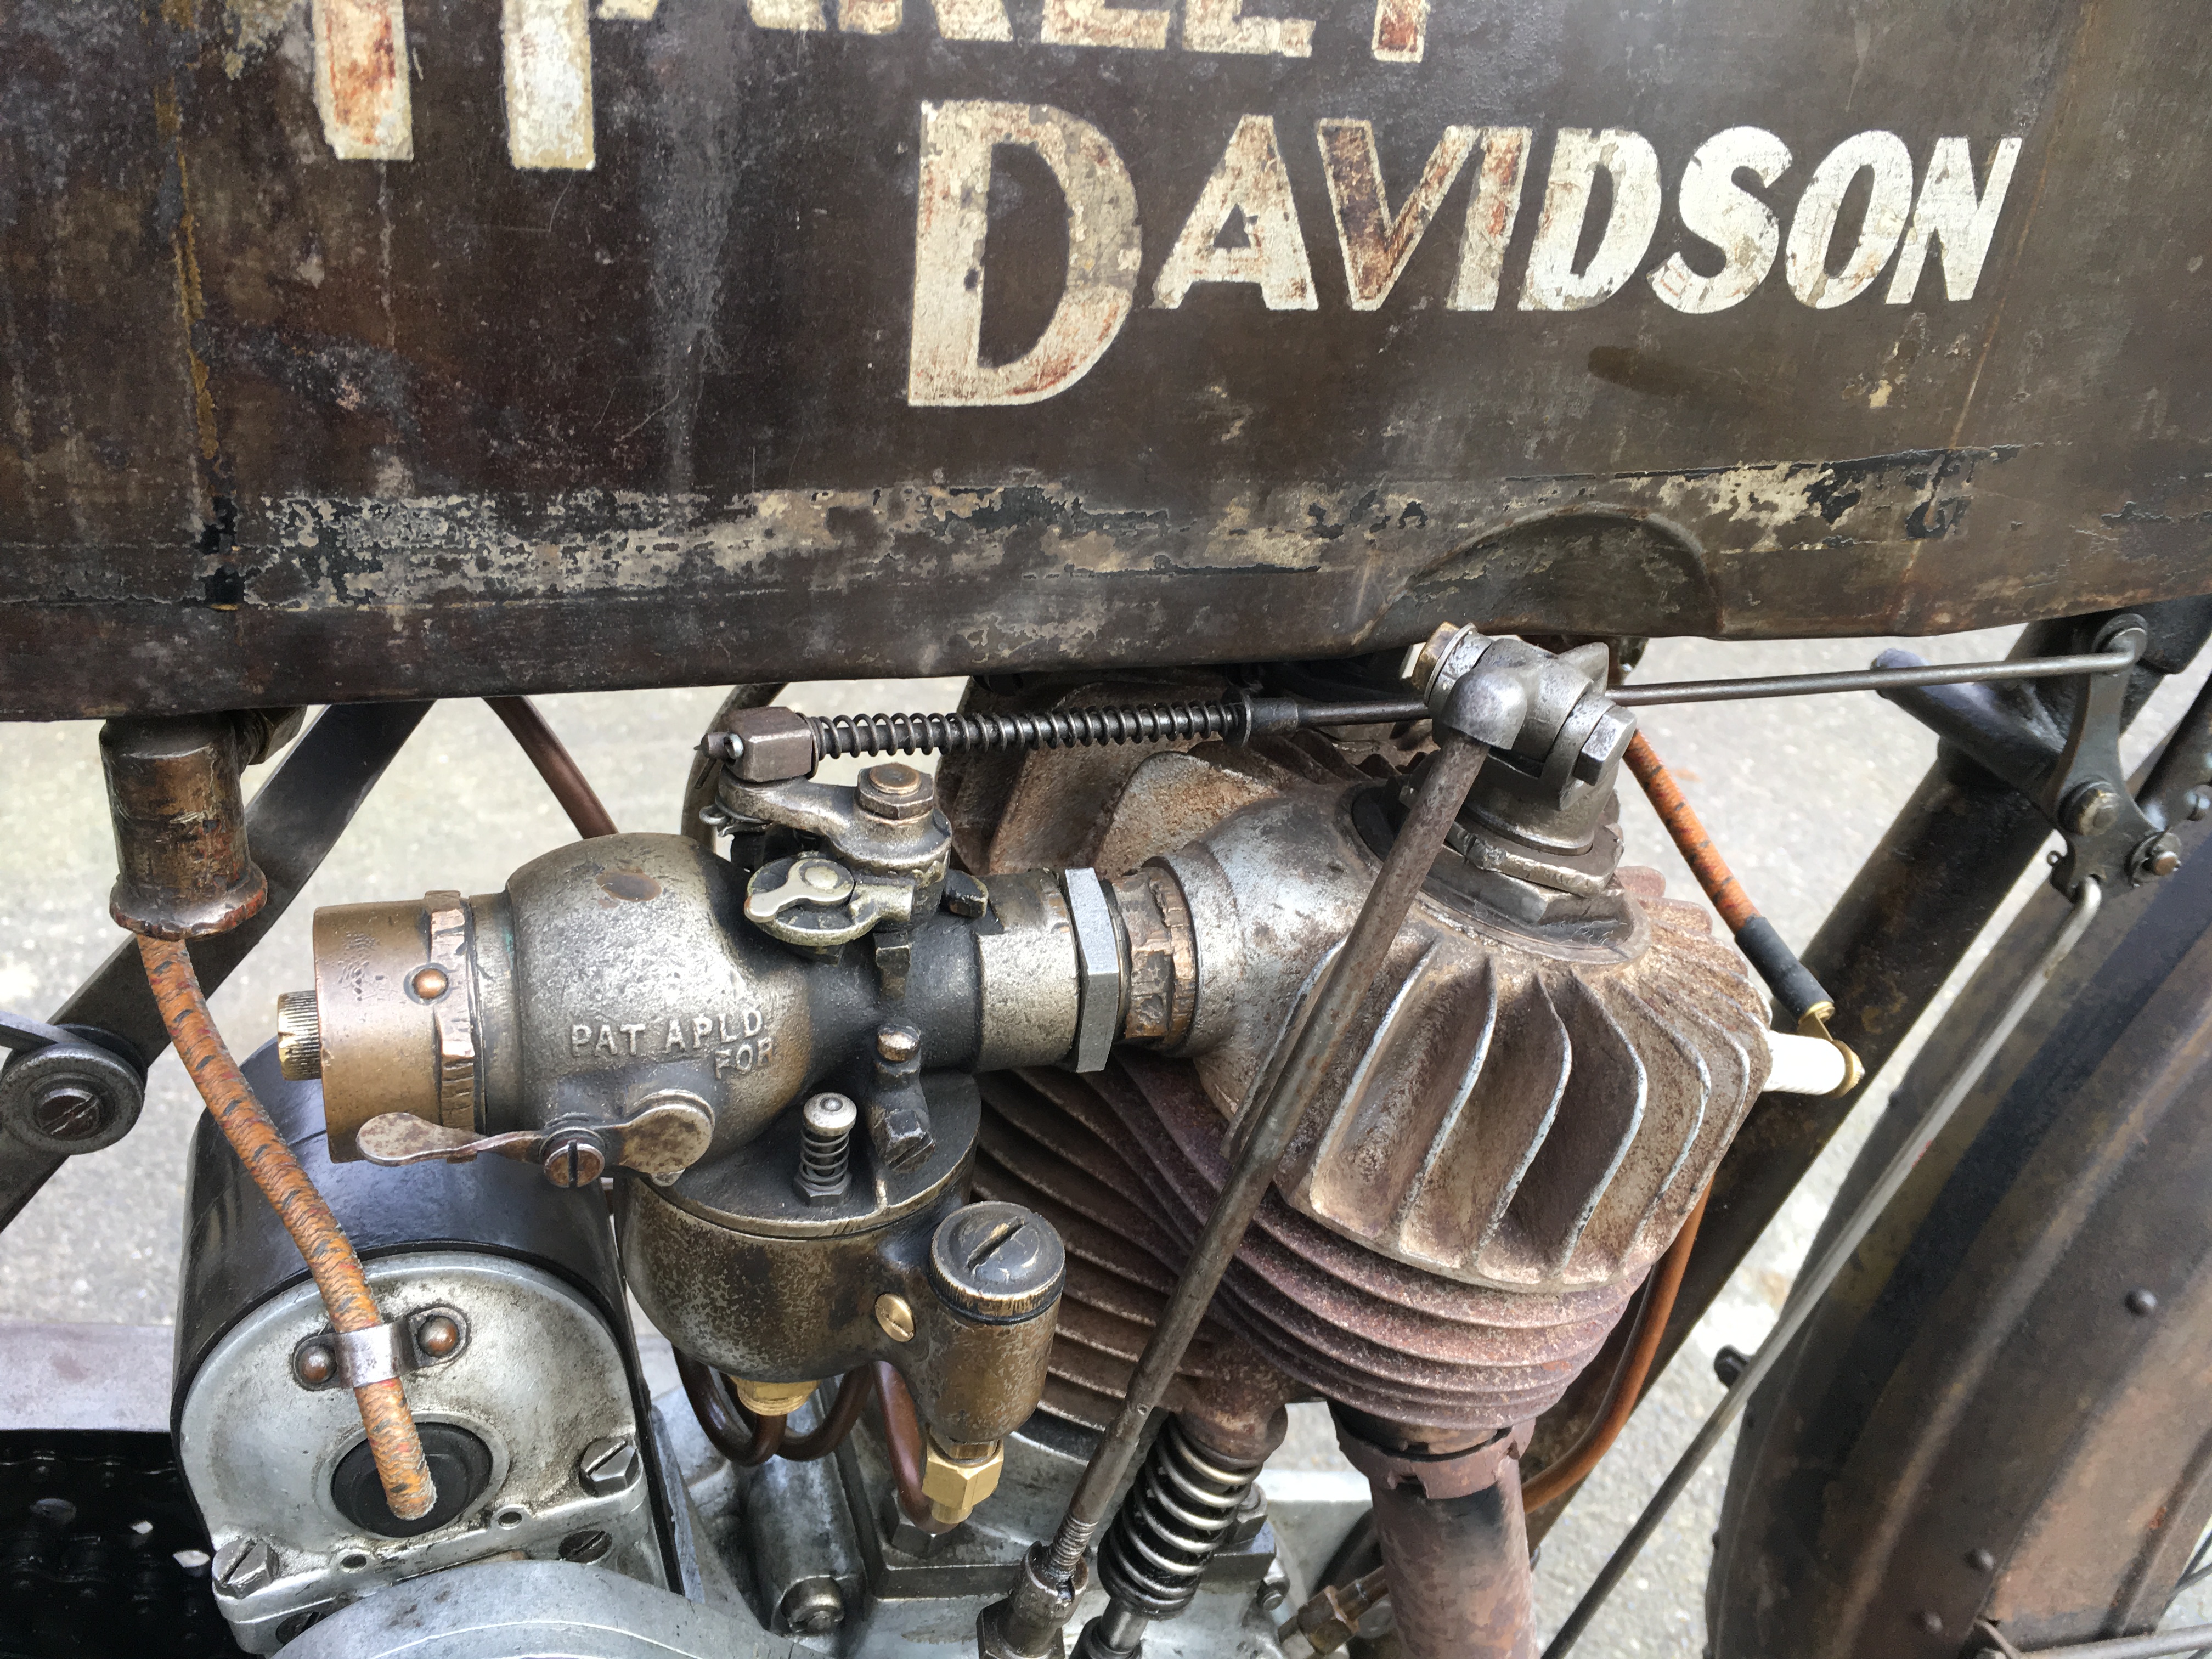
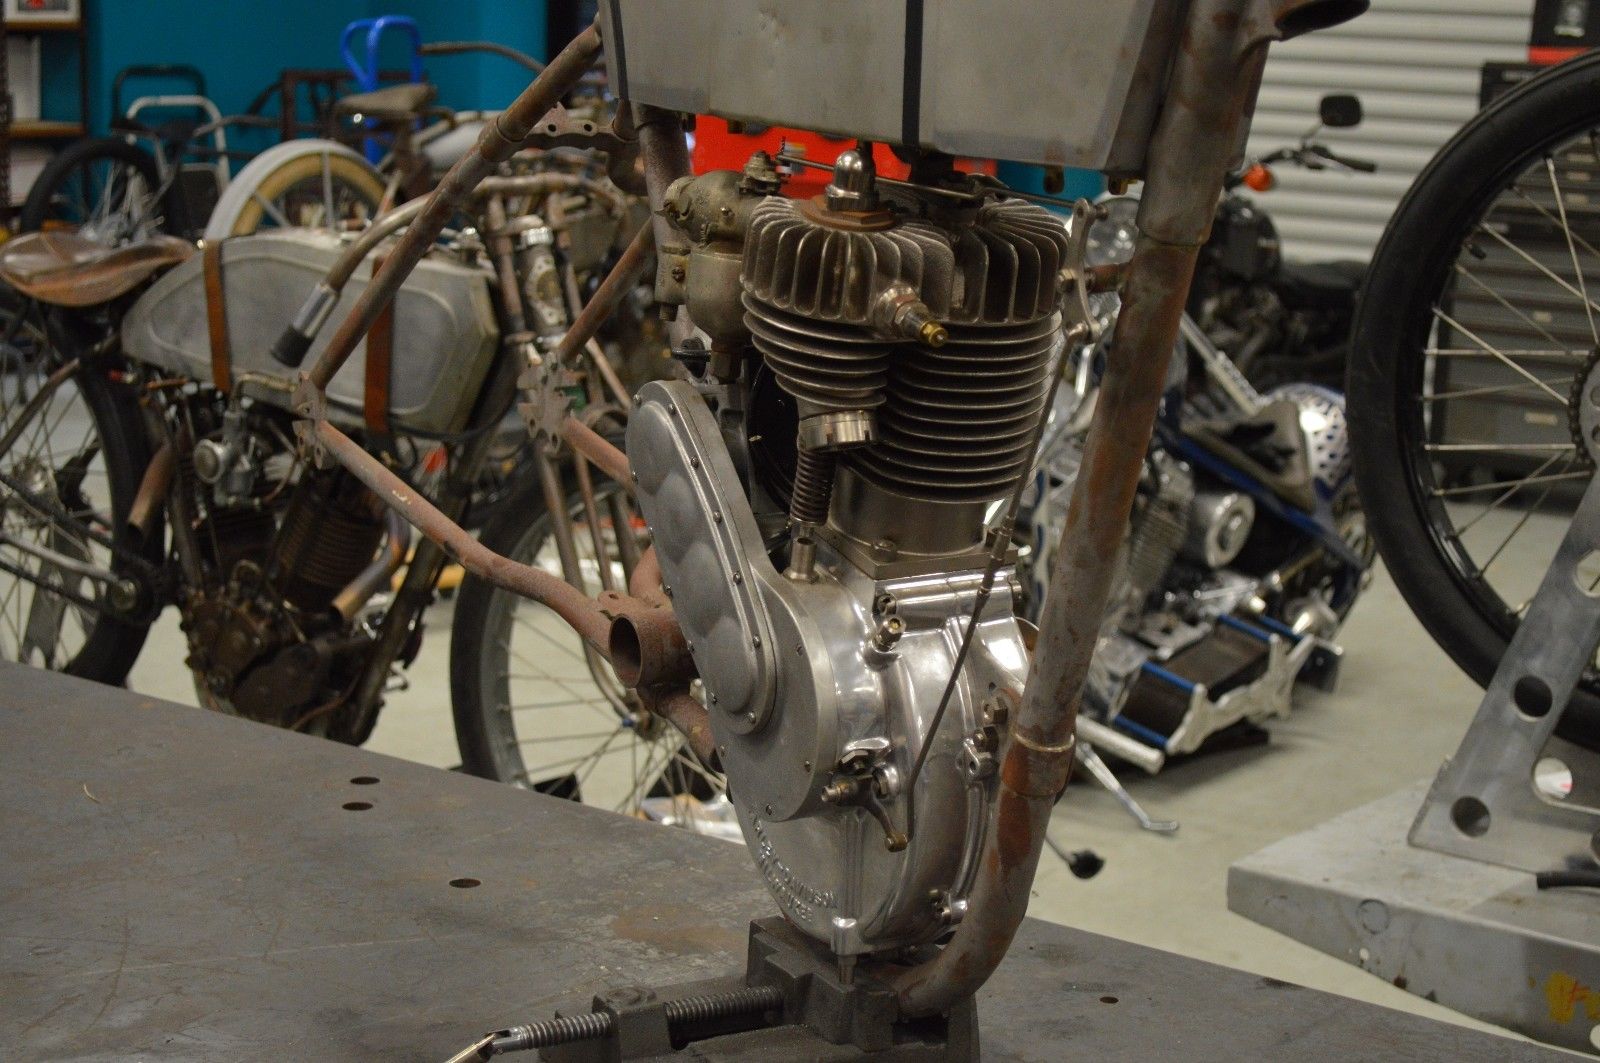
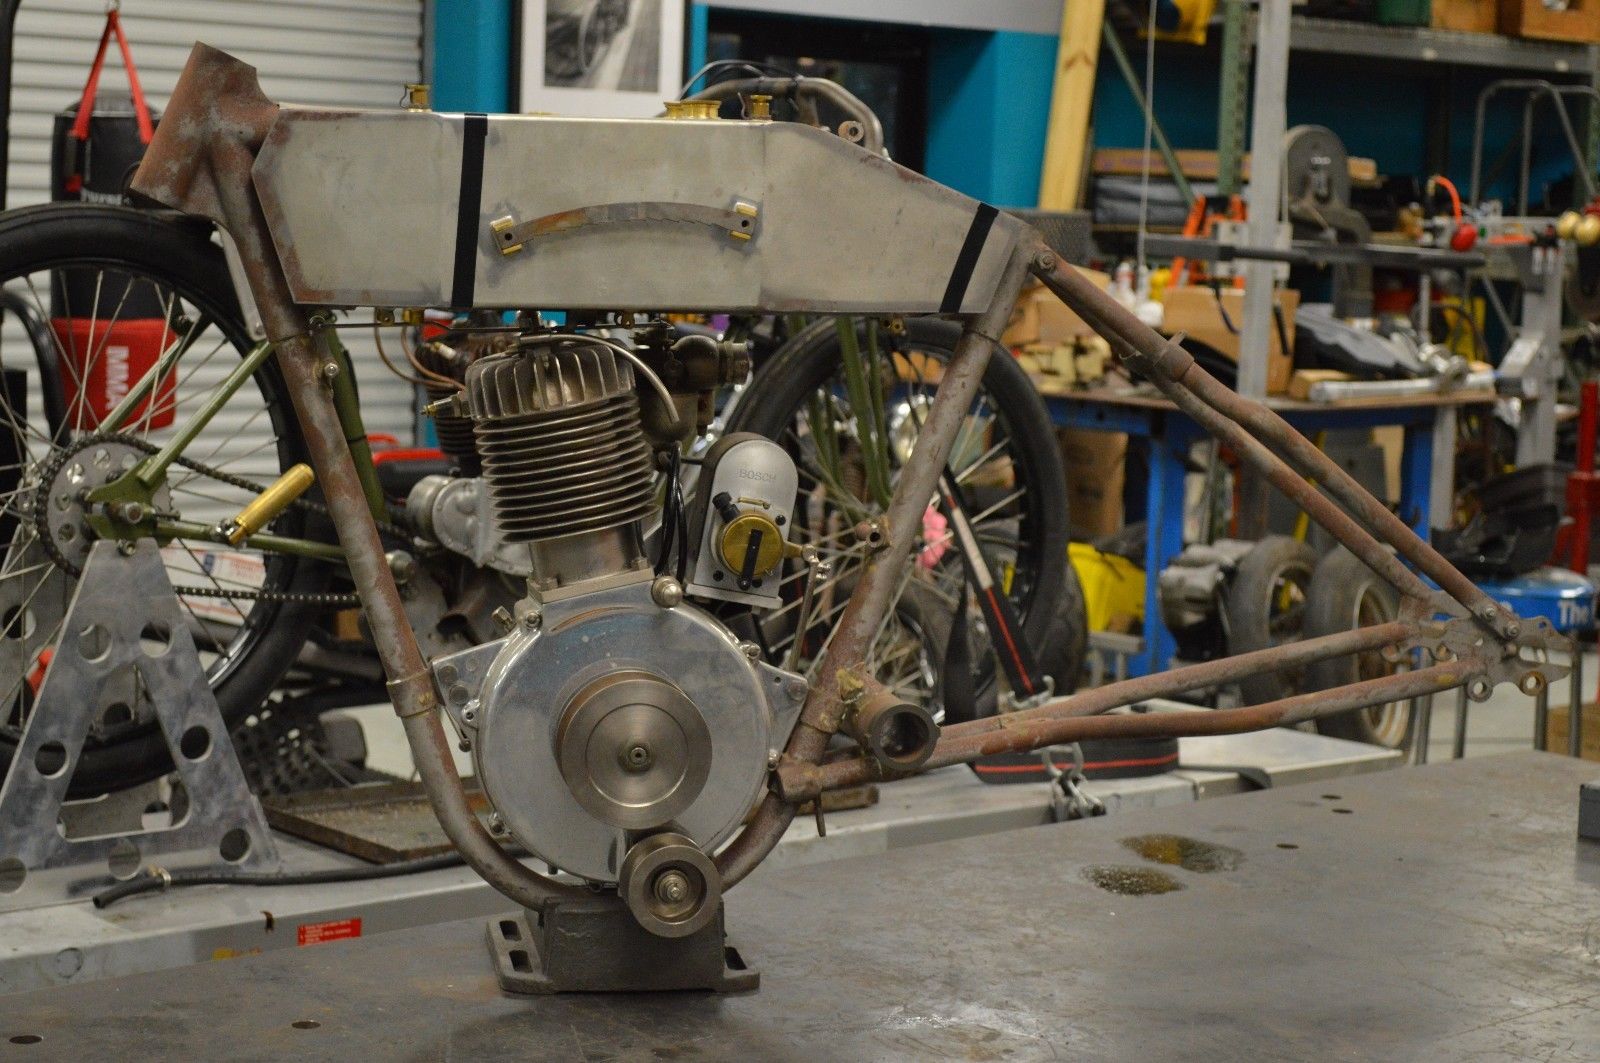
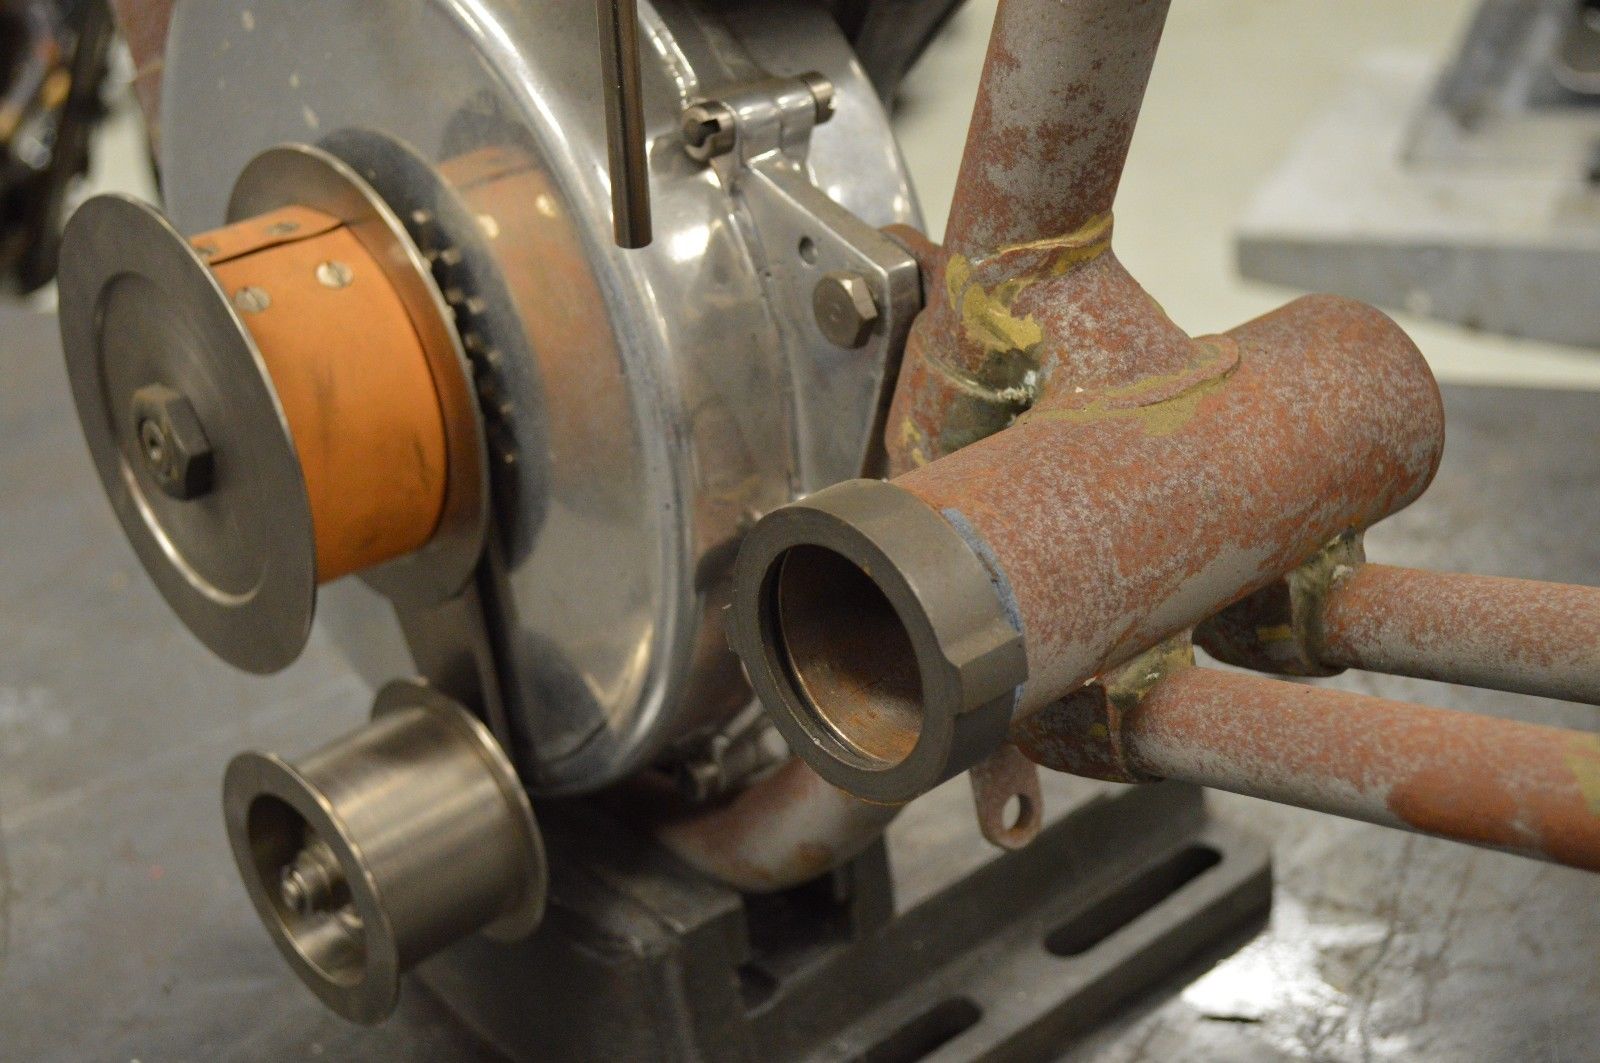
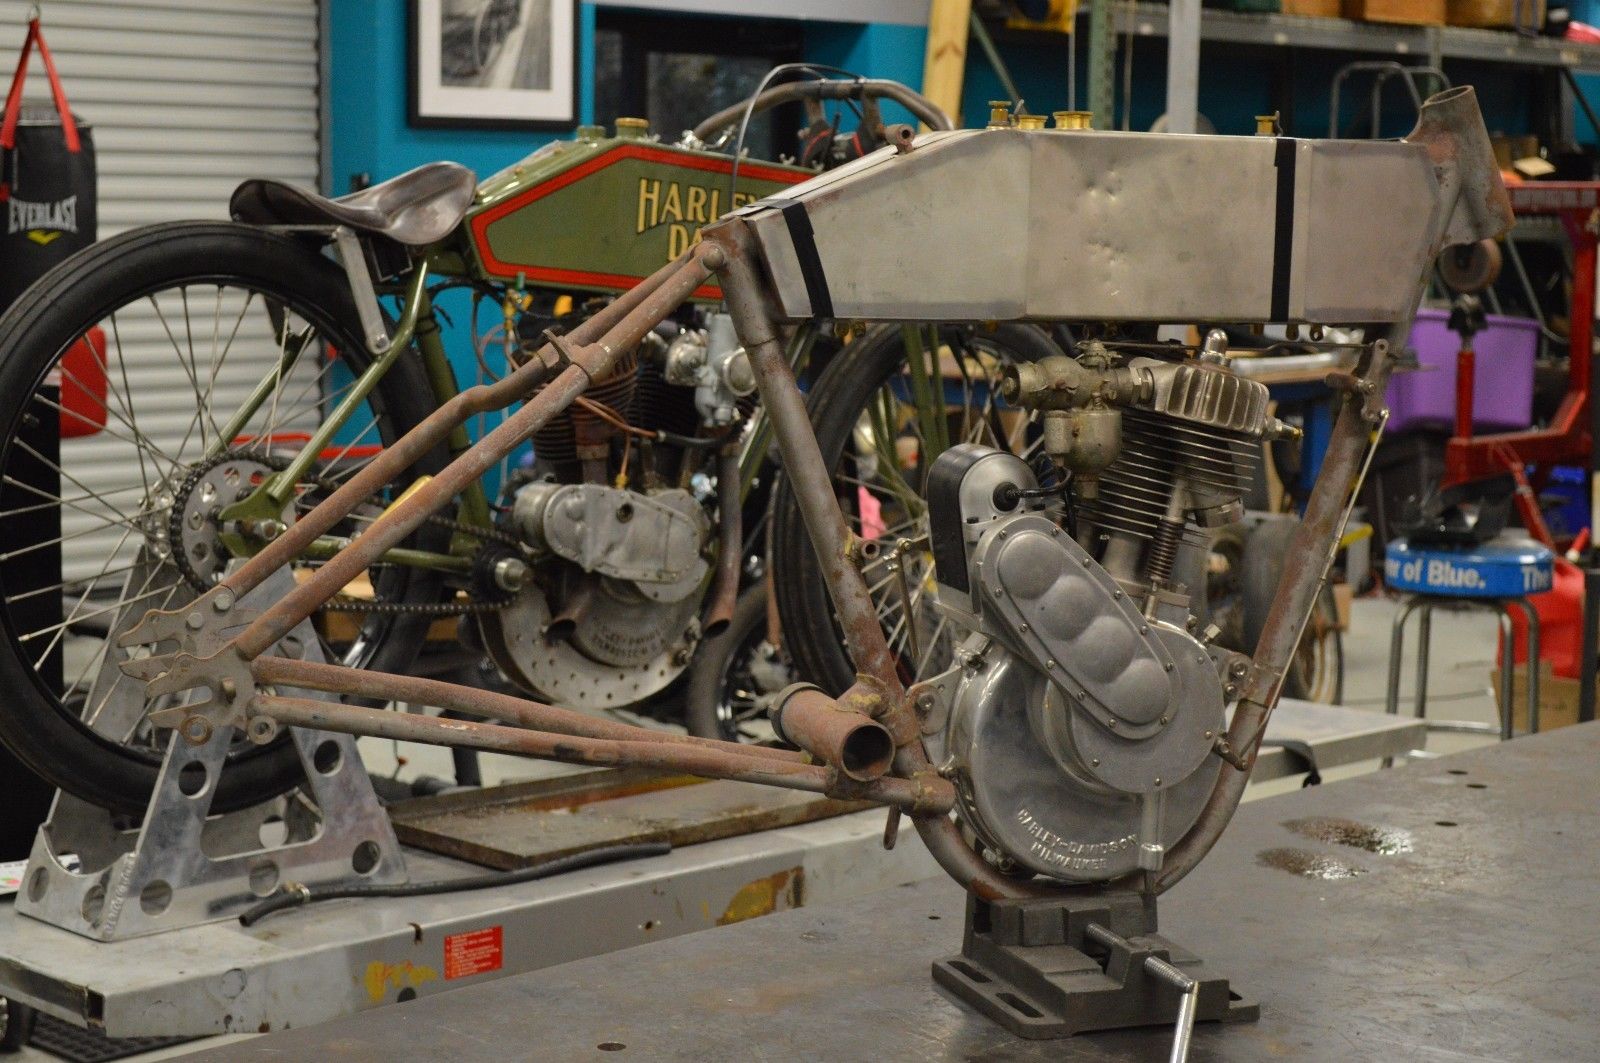
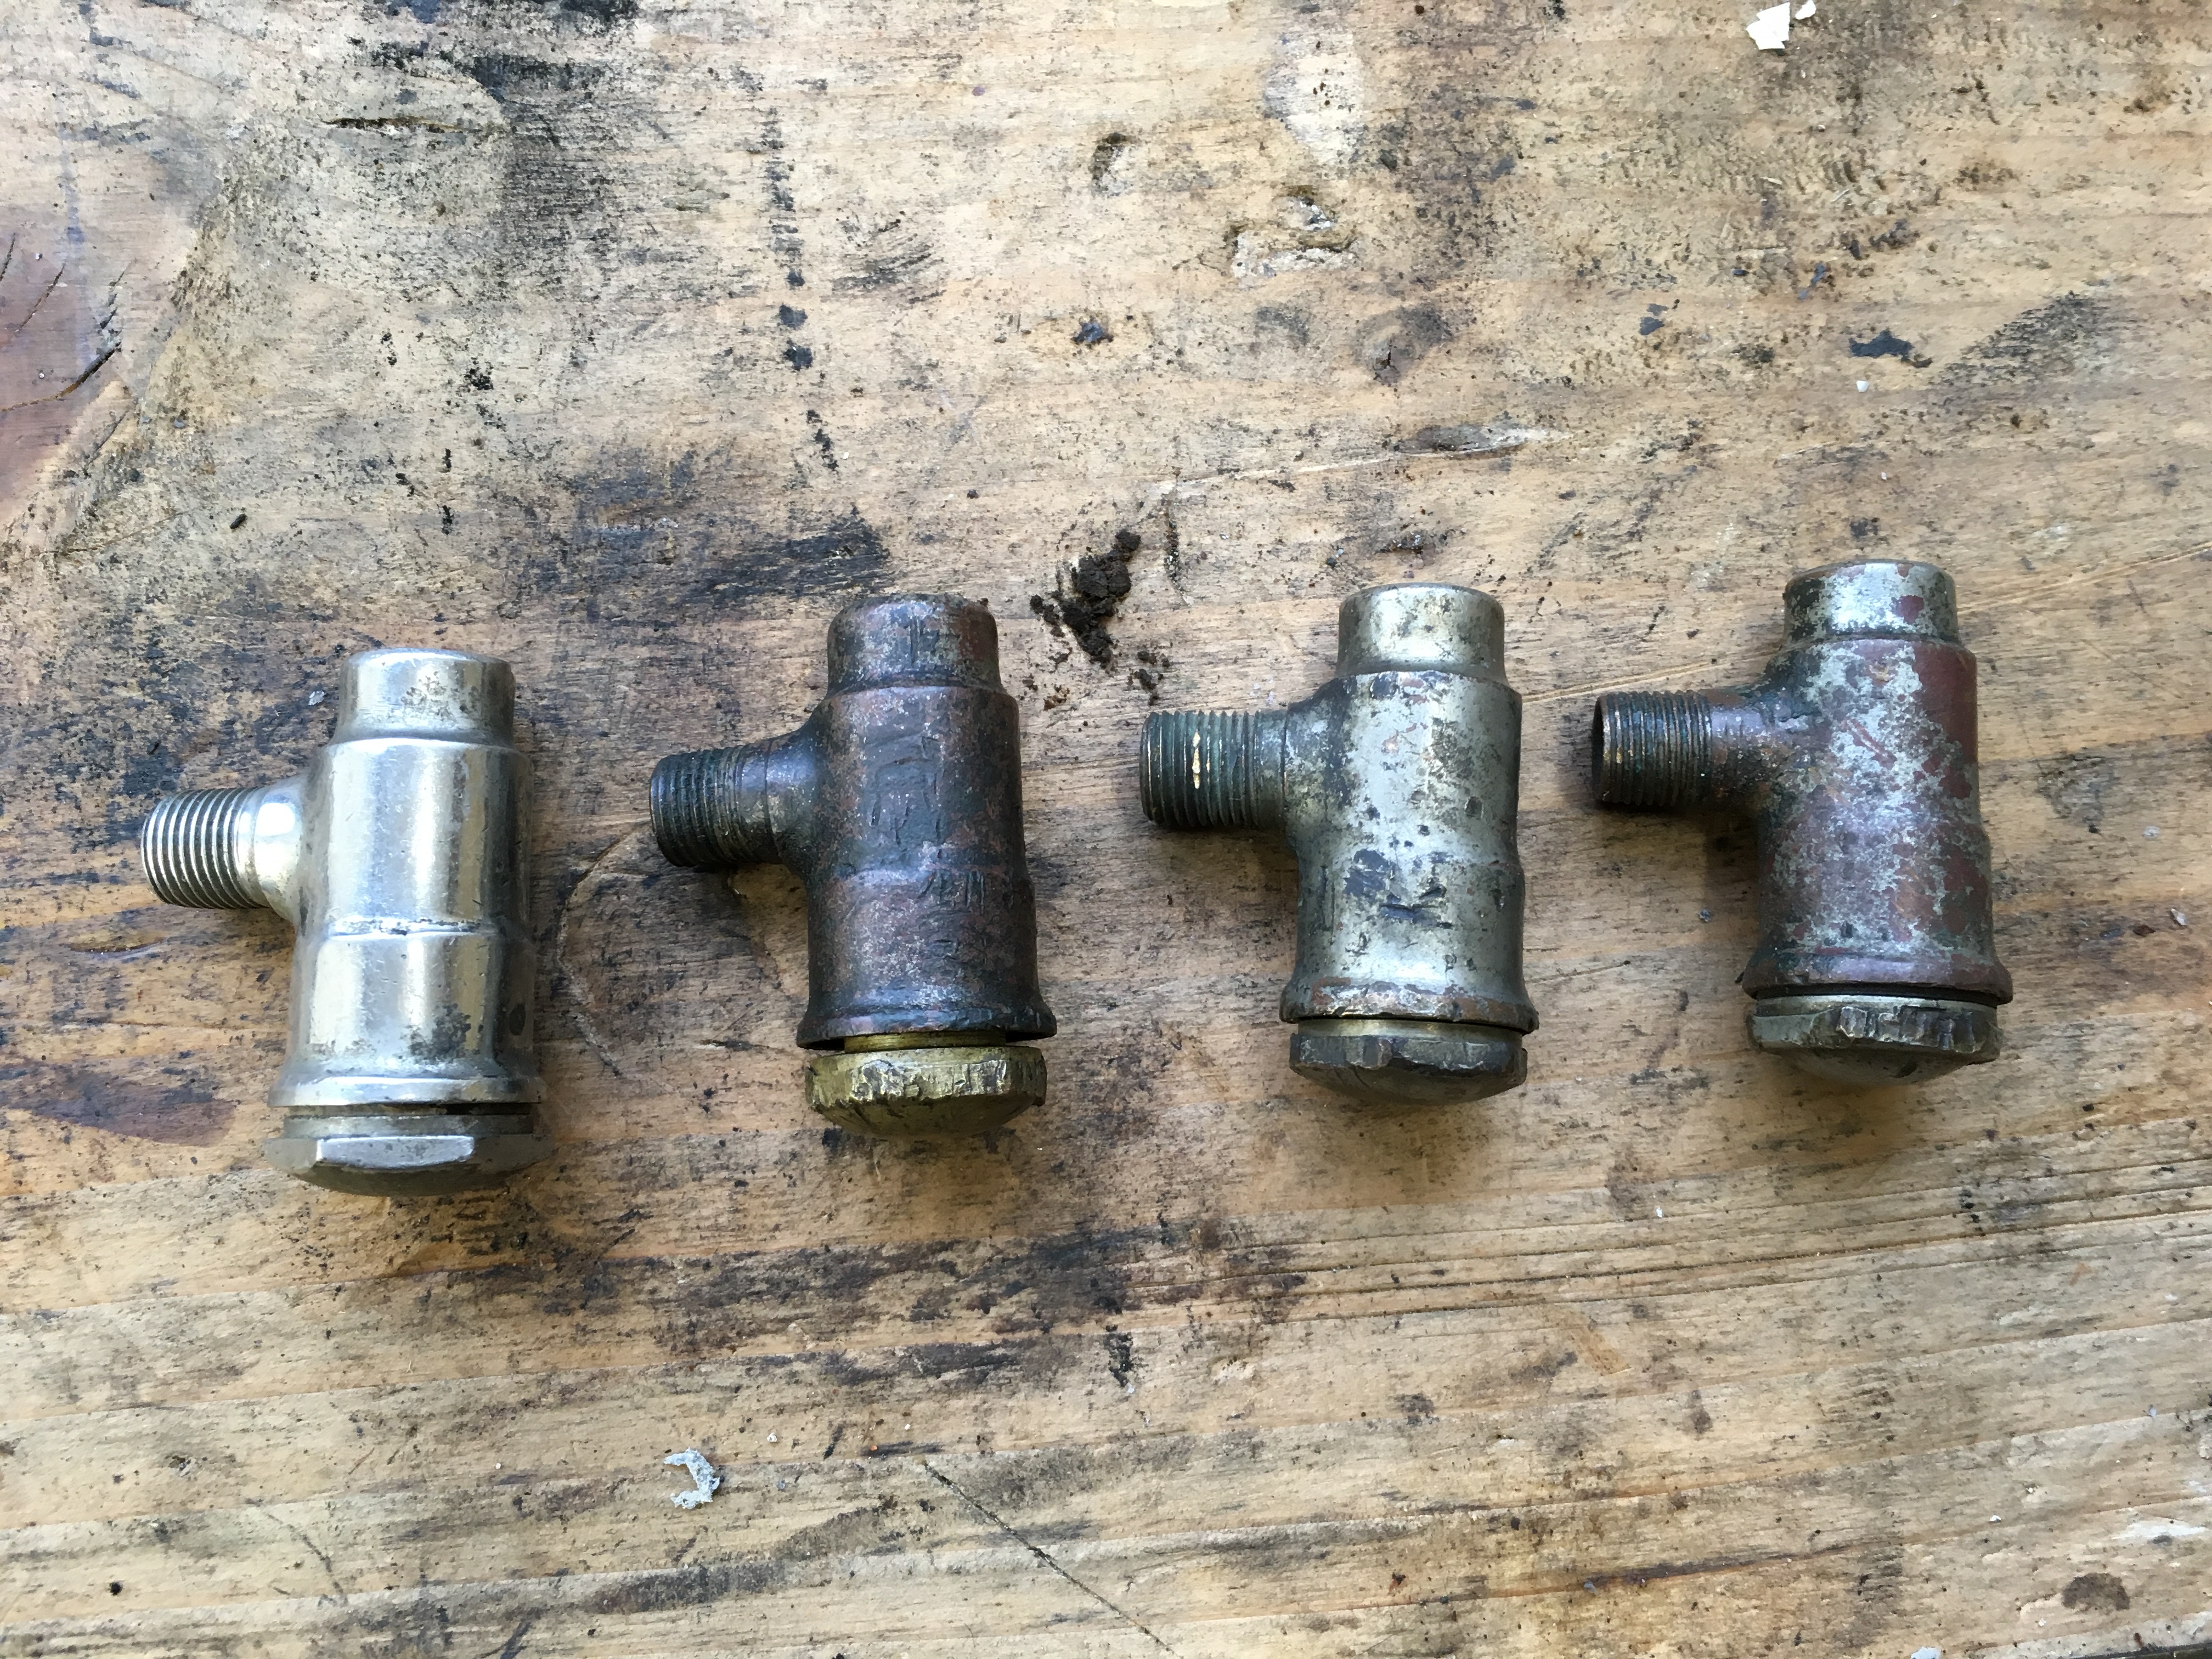
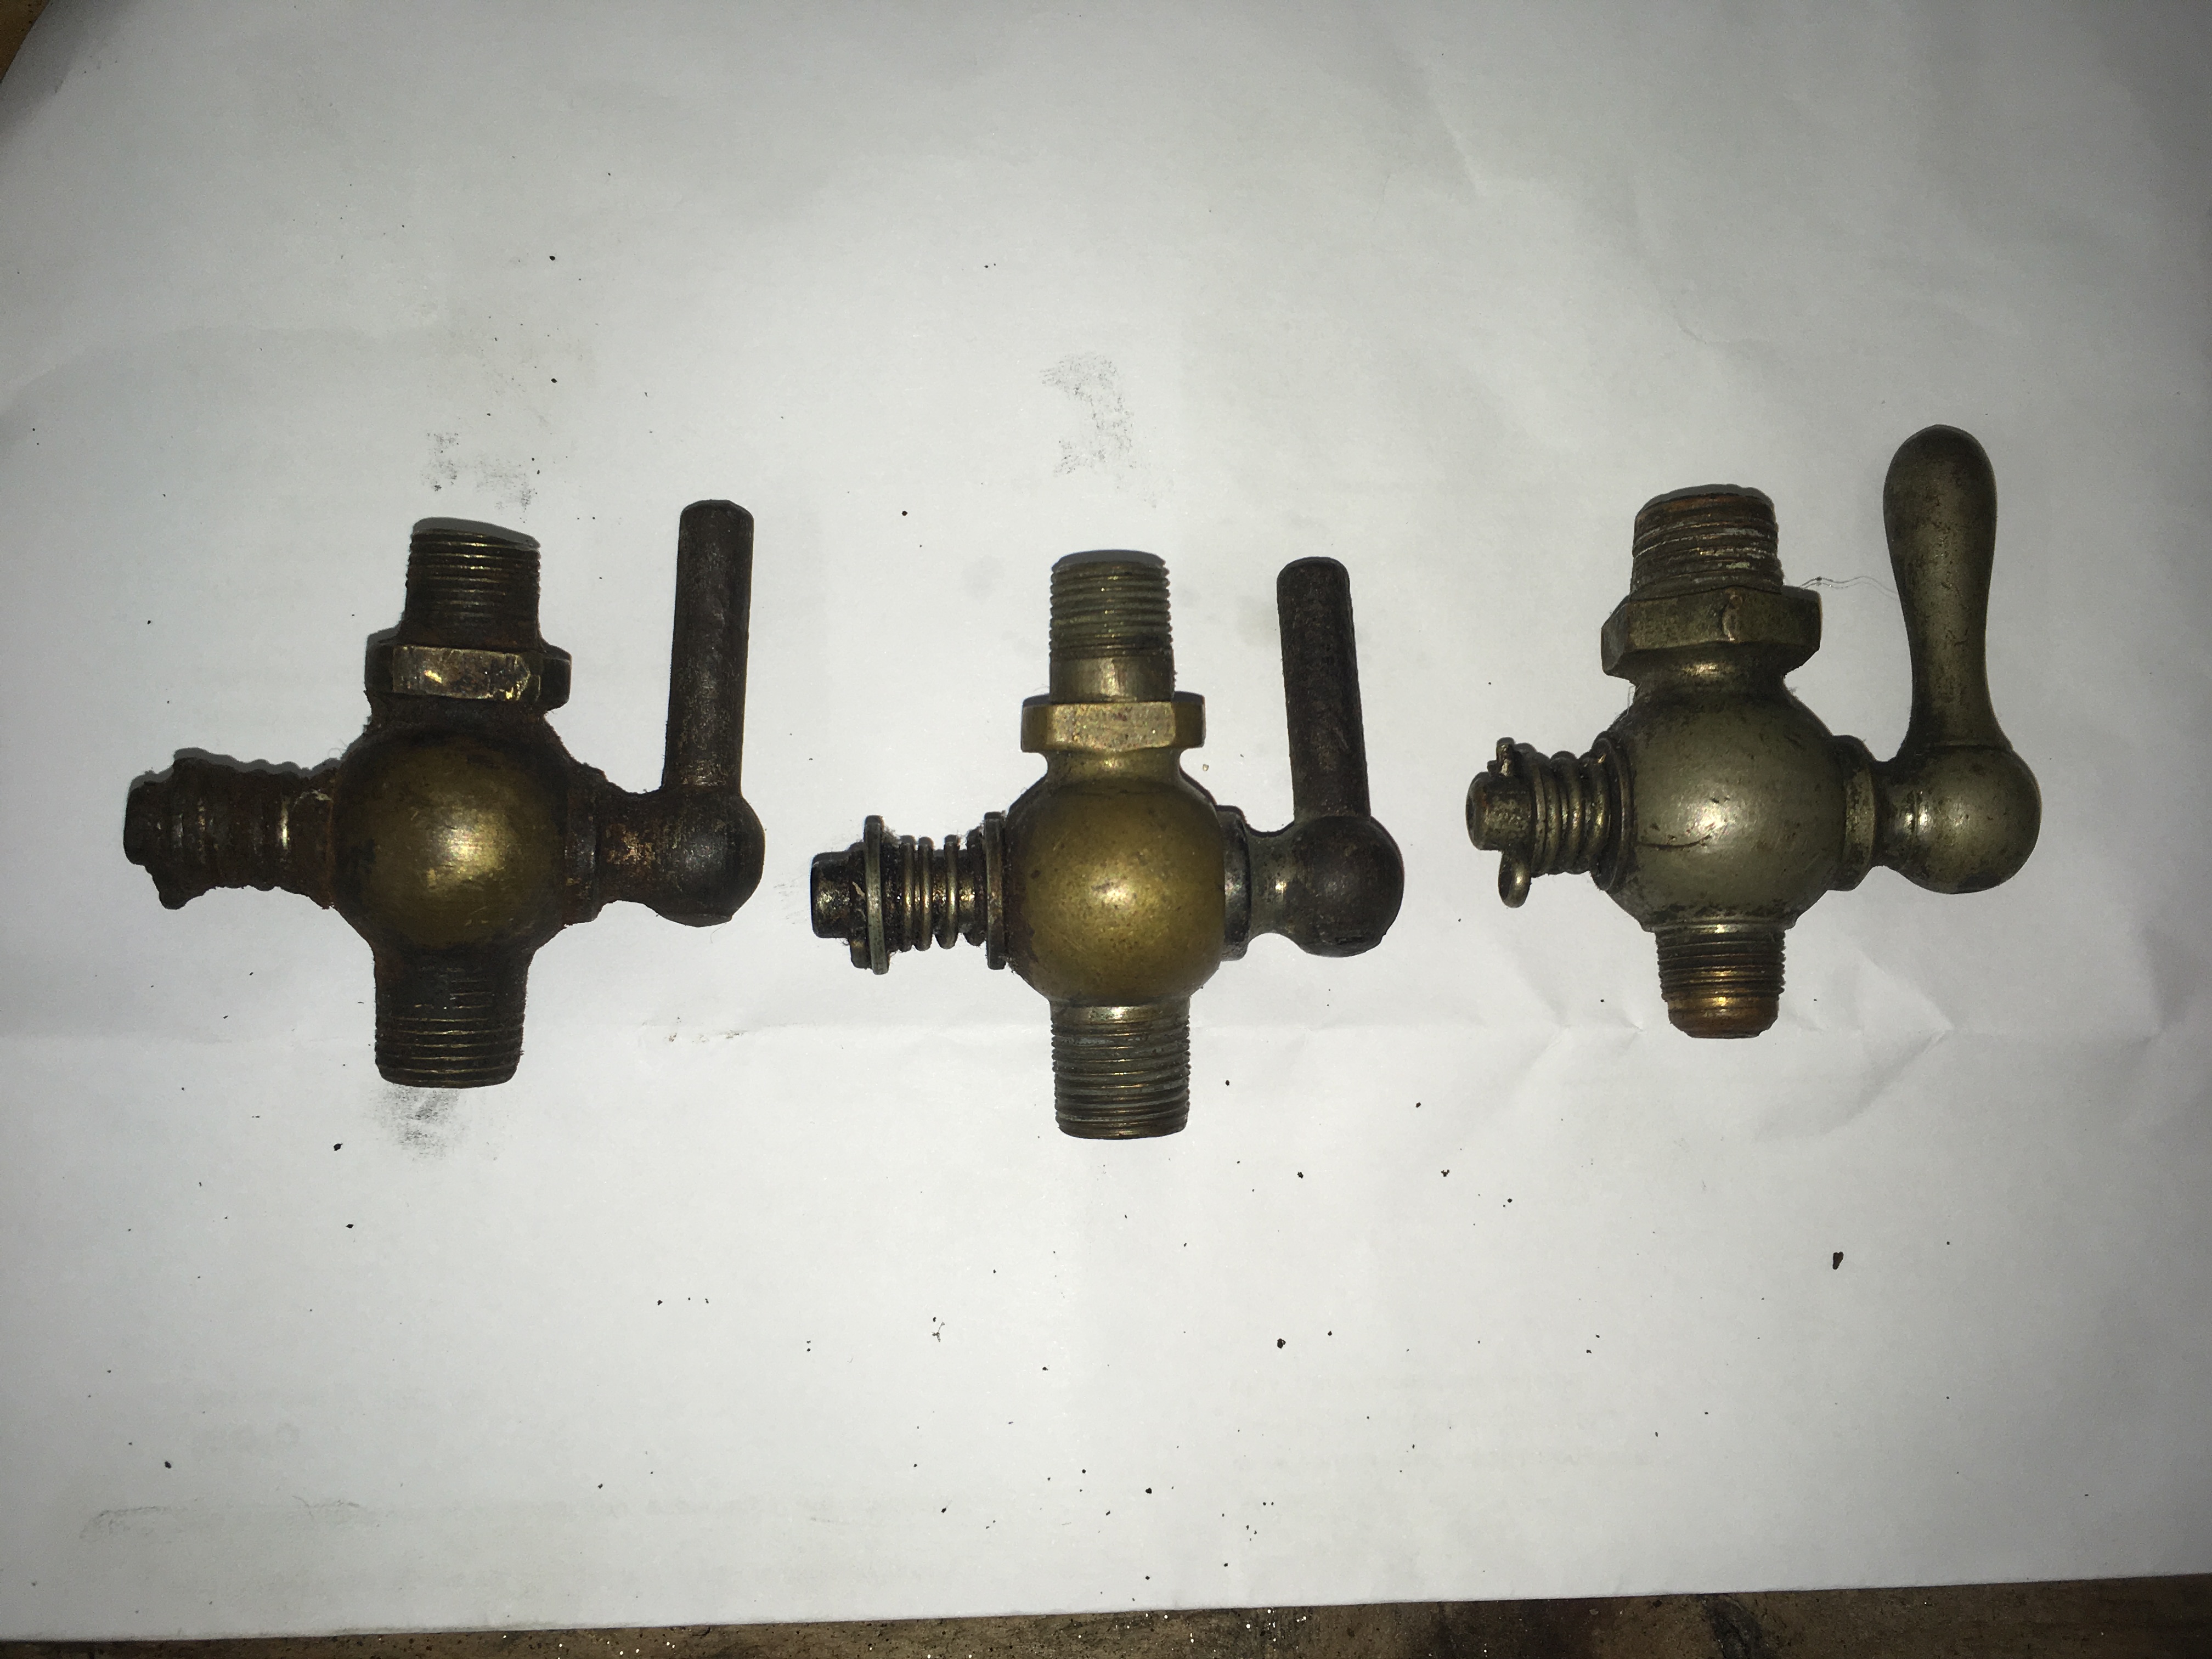
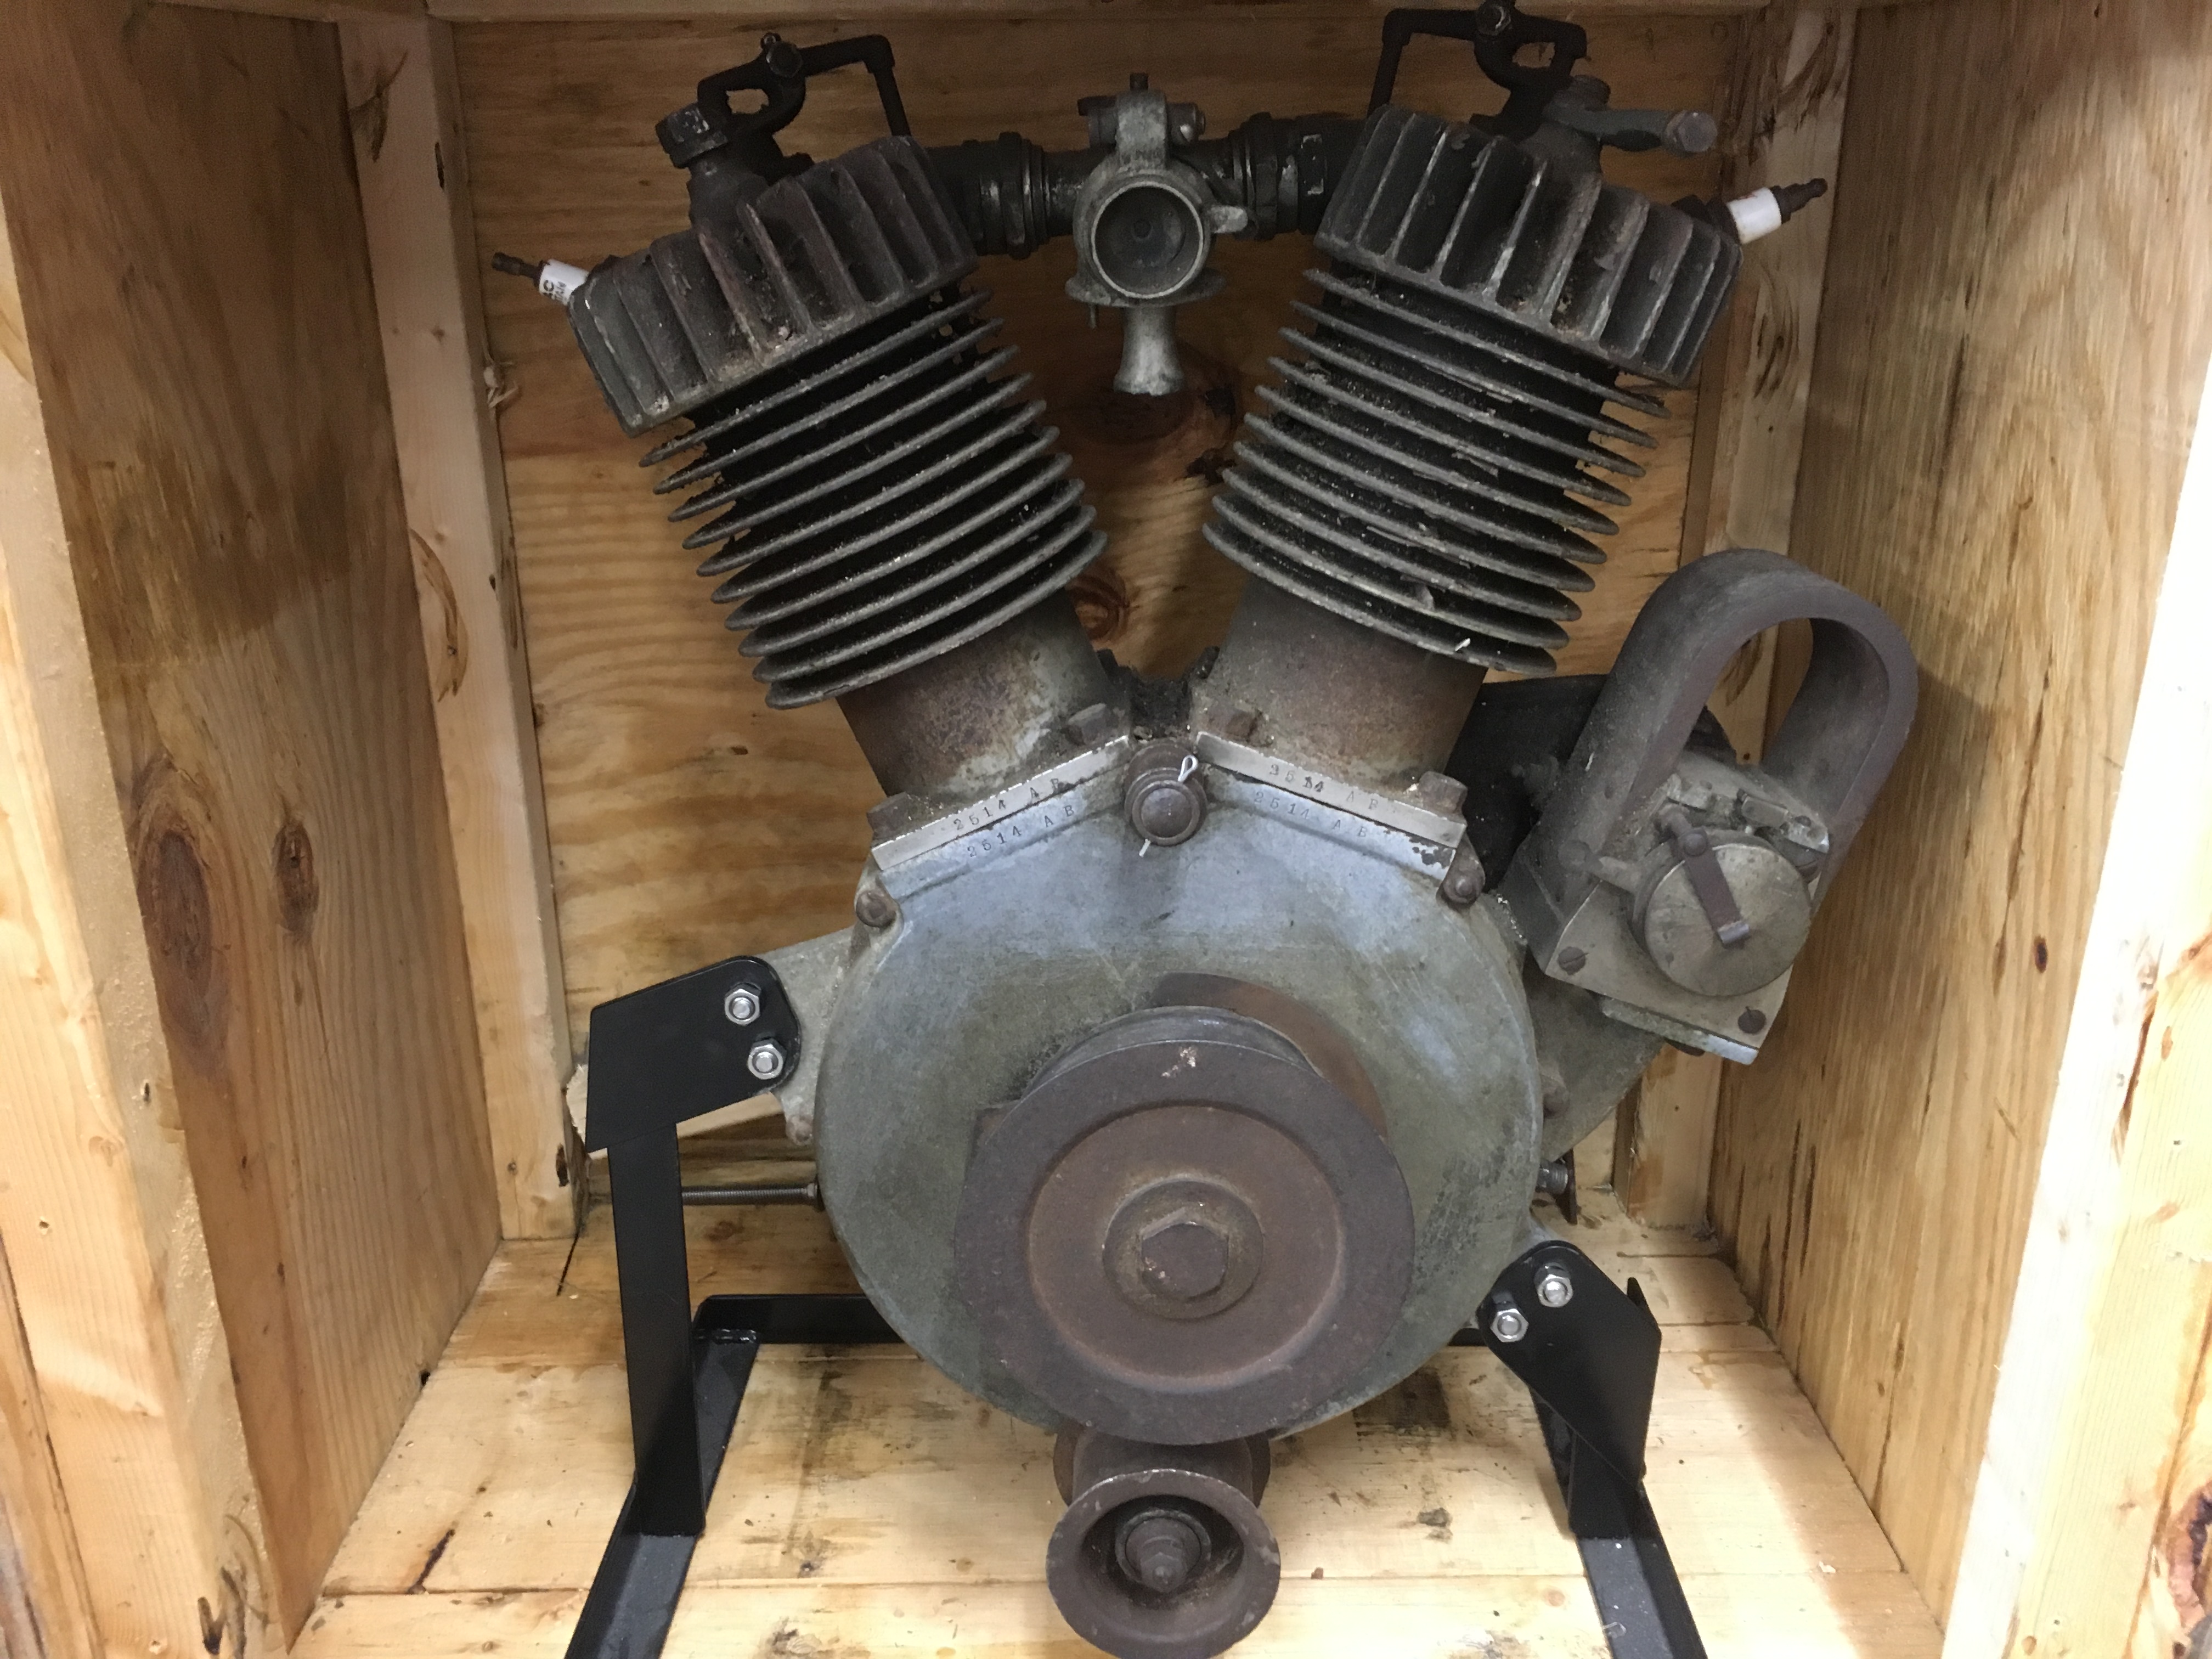
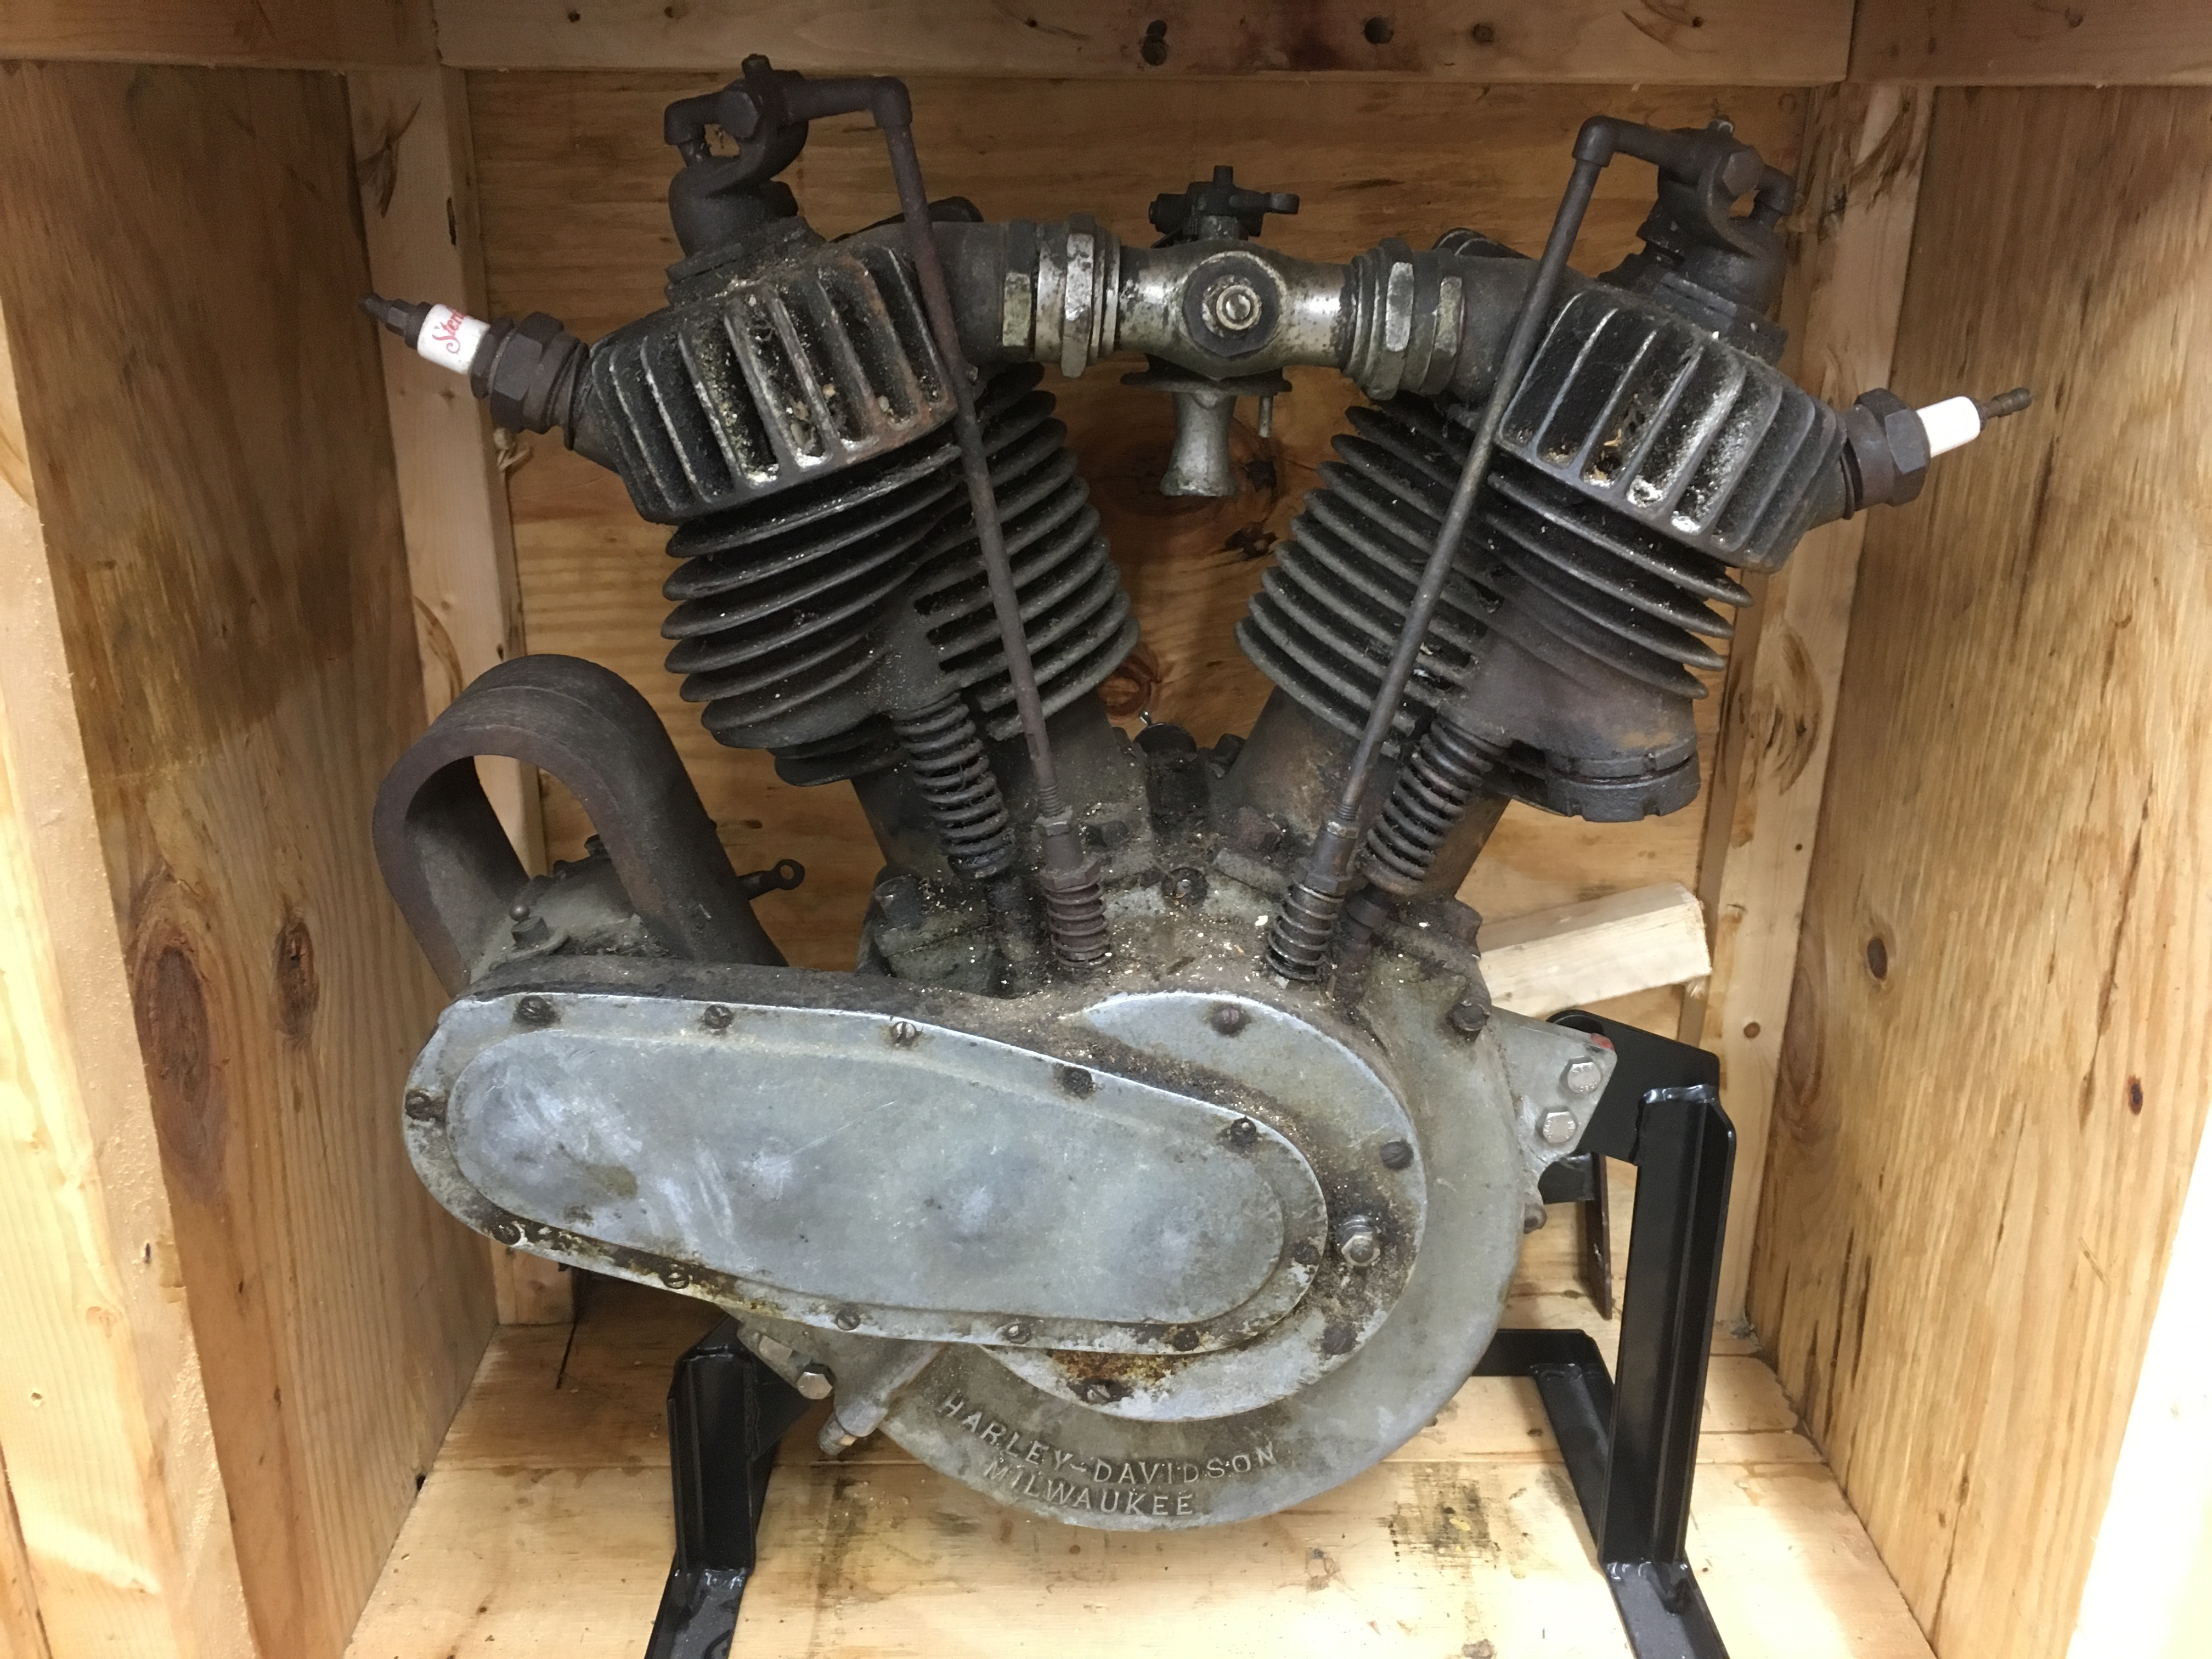
I got the motor after being approached by a guy at the start of the Pioneer Run in 2016. He told me that the Harley Davidson Club of Great Britain had identified it as a 1911 based on its VIN. Well the numbers are all good but AB denotes 1912 not 1911. I have worked hard to determine the differences between the 1911 and the early 1912 motors (50ci) but can not find any differences until the changes later in the year which became the E model (61ci). It has the wider 2″ belt and an open magneto.


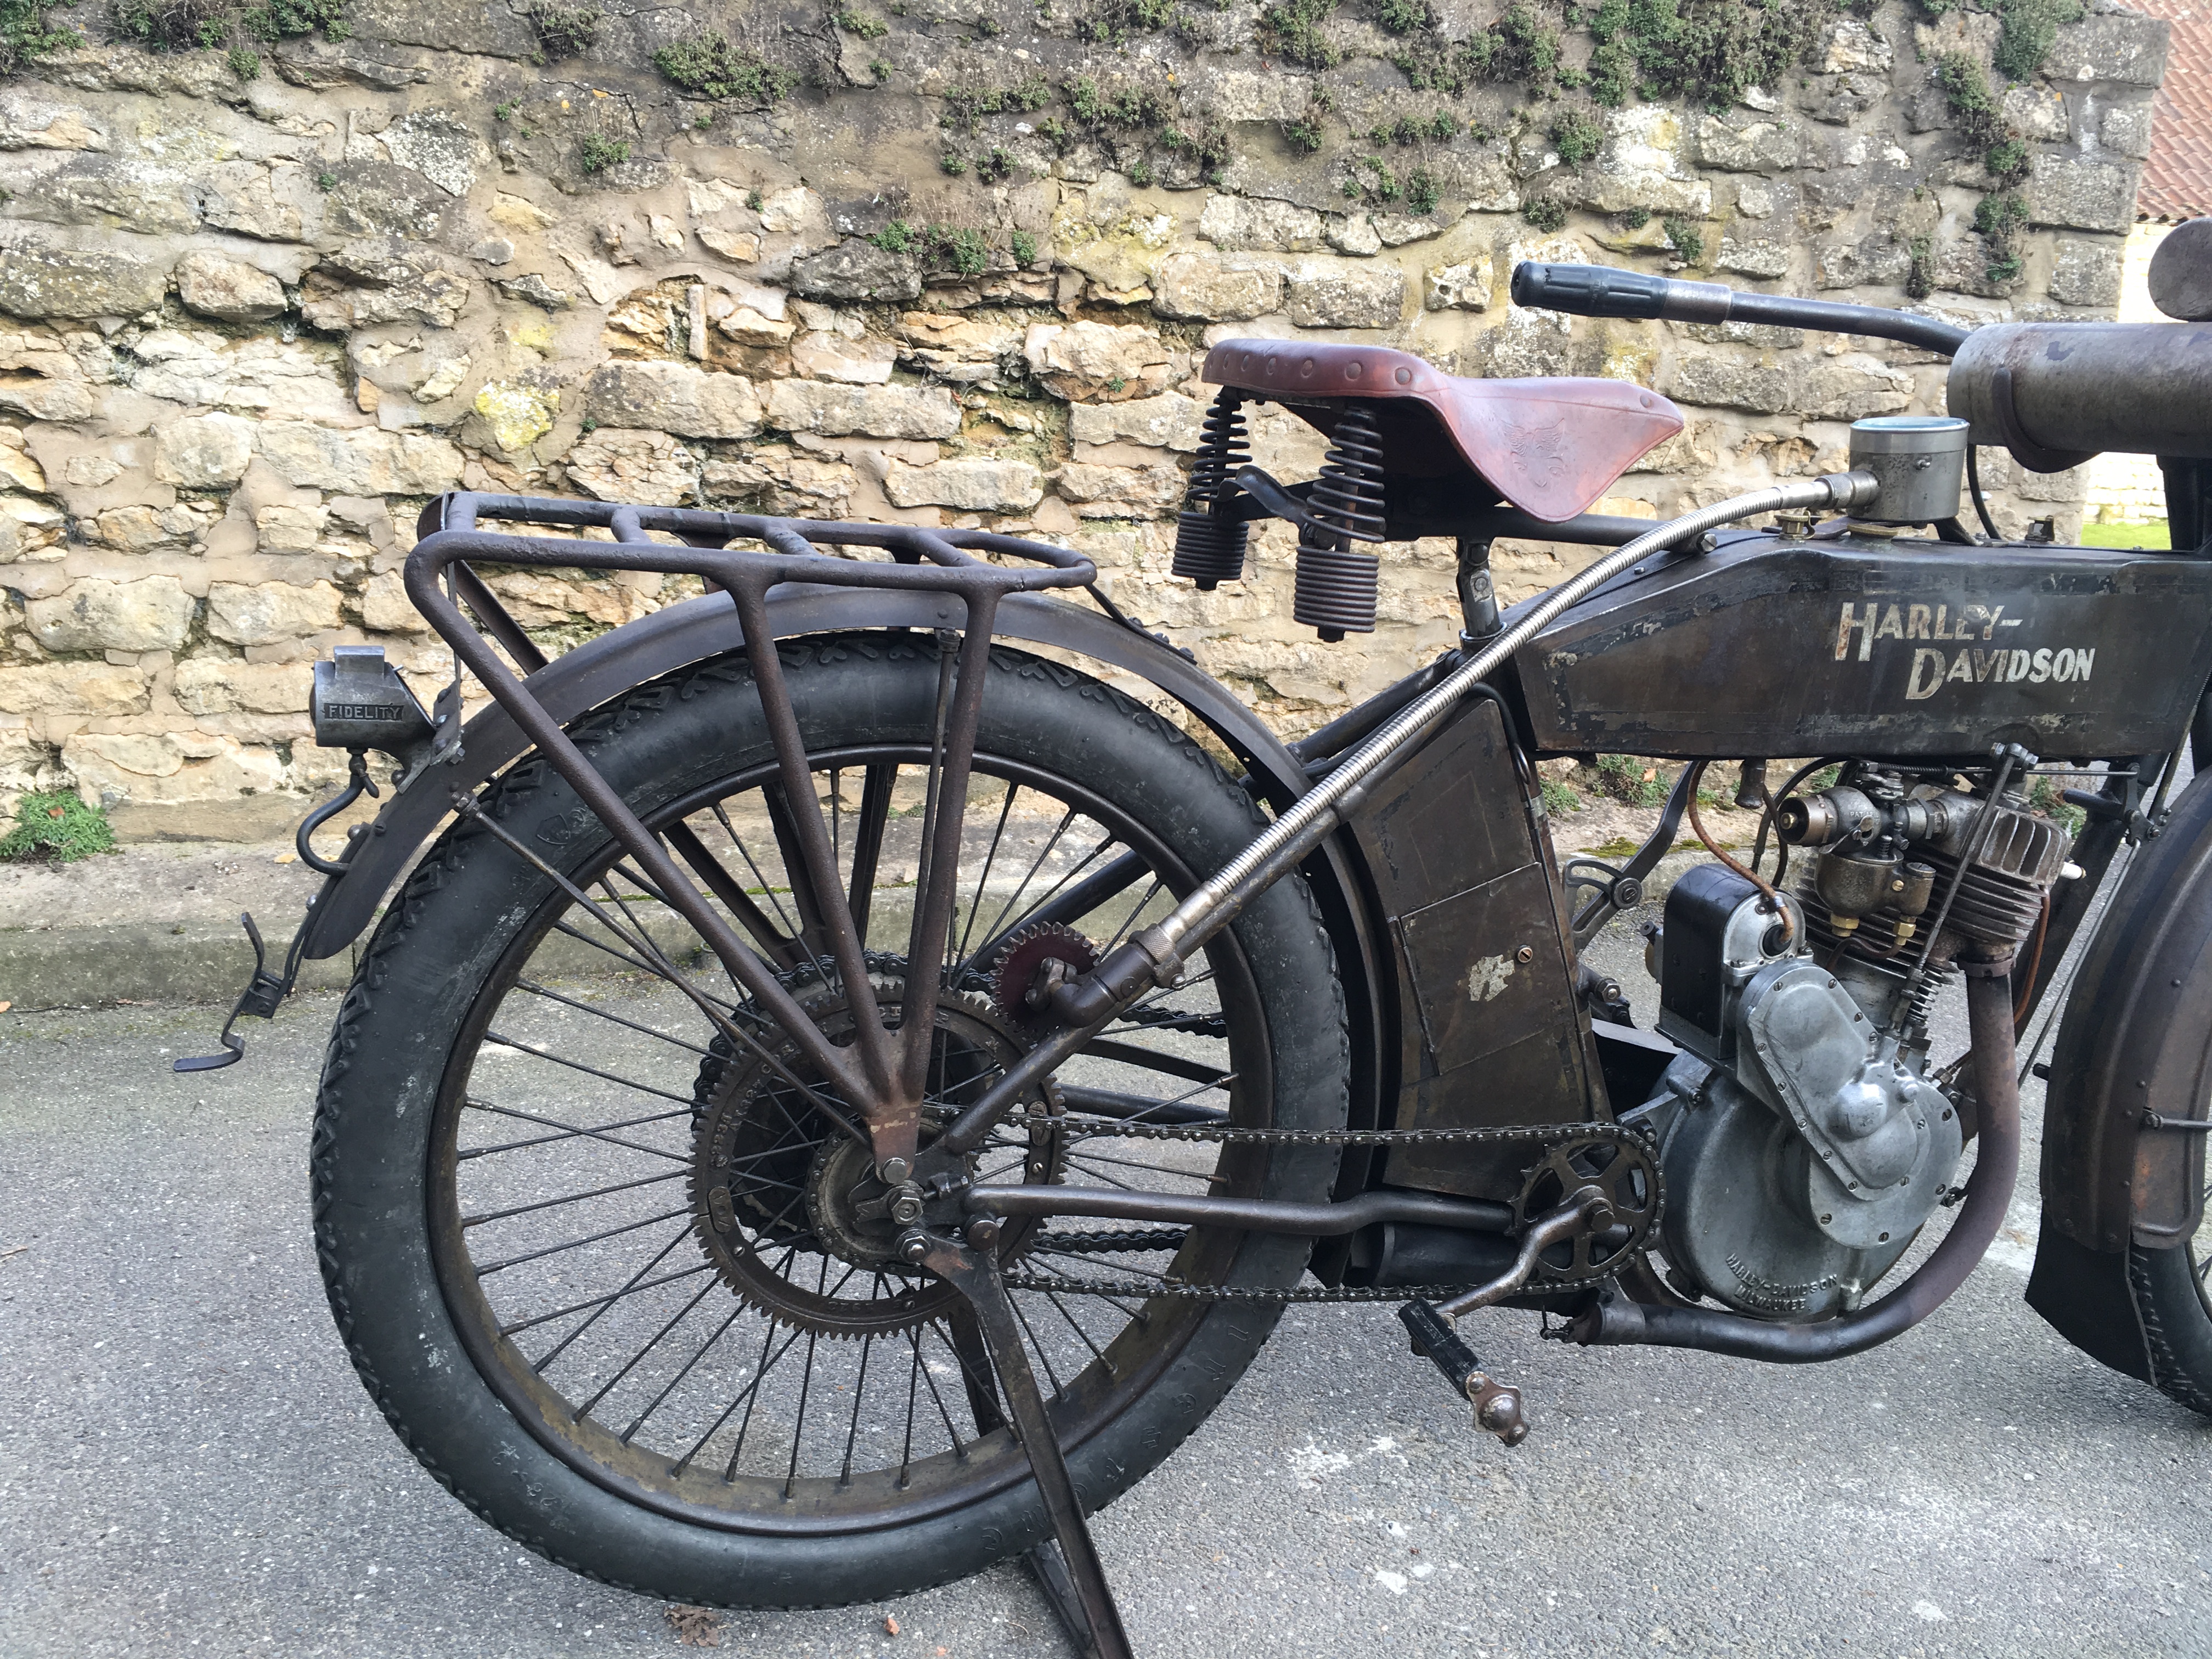
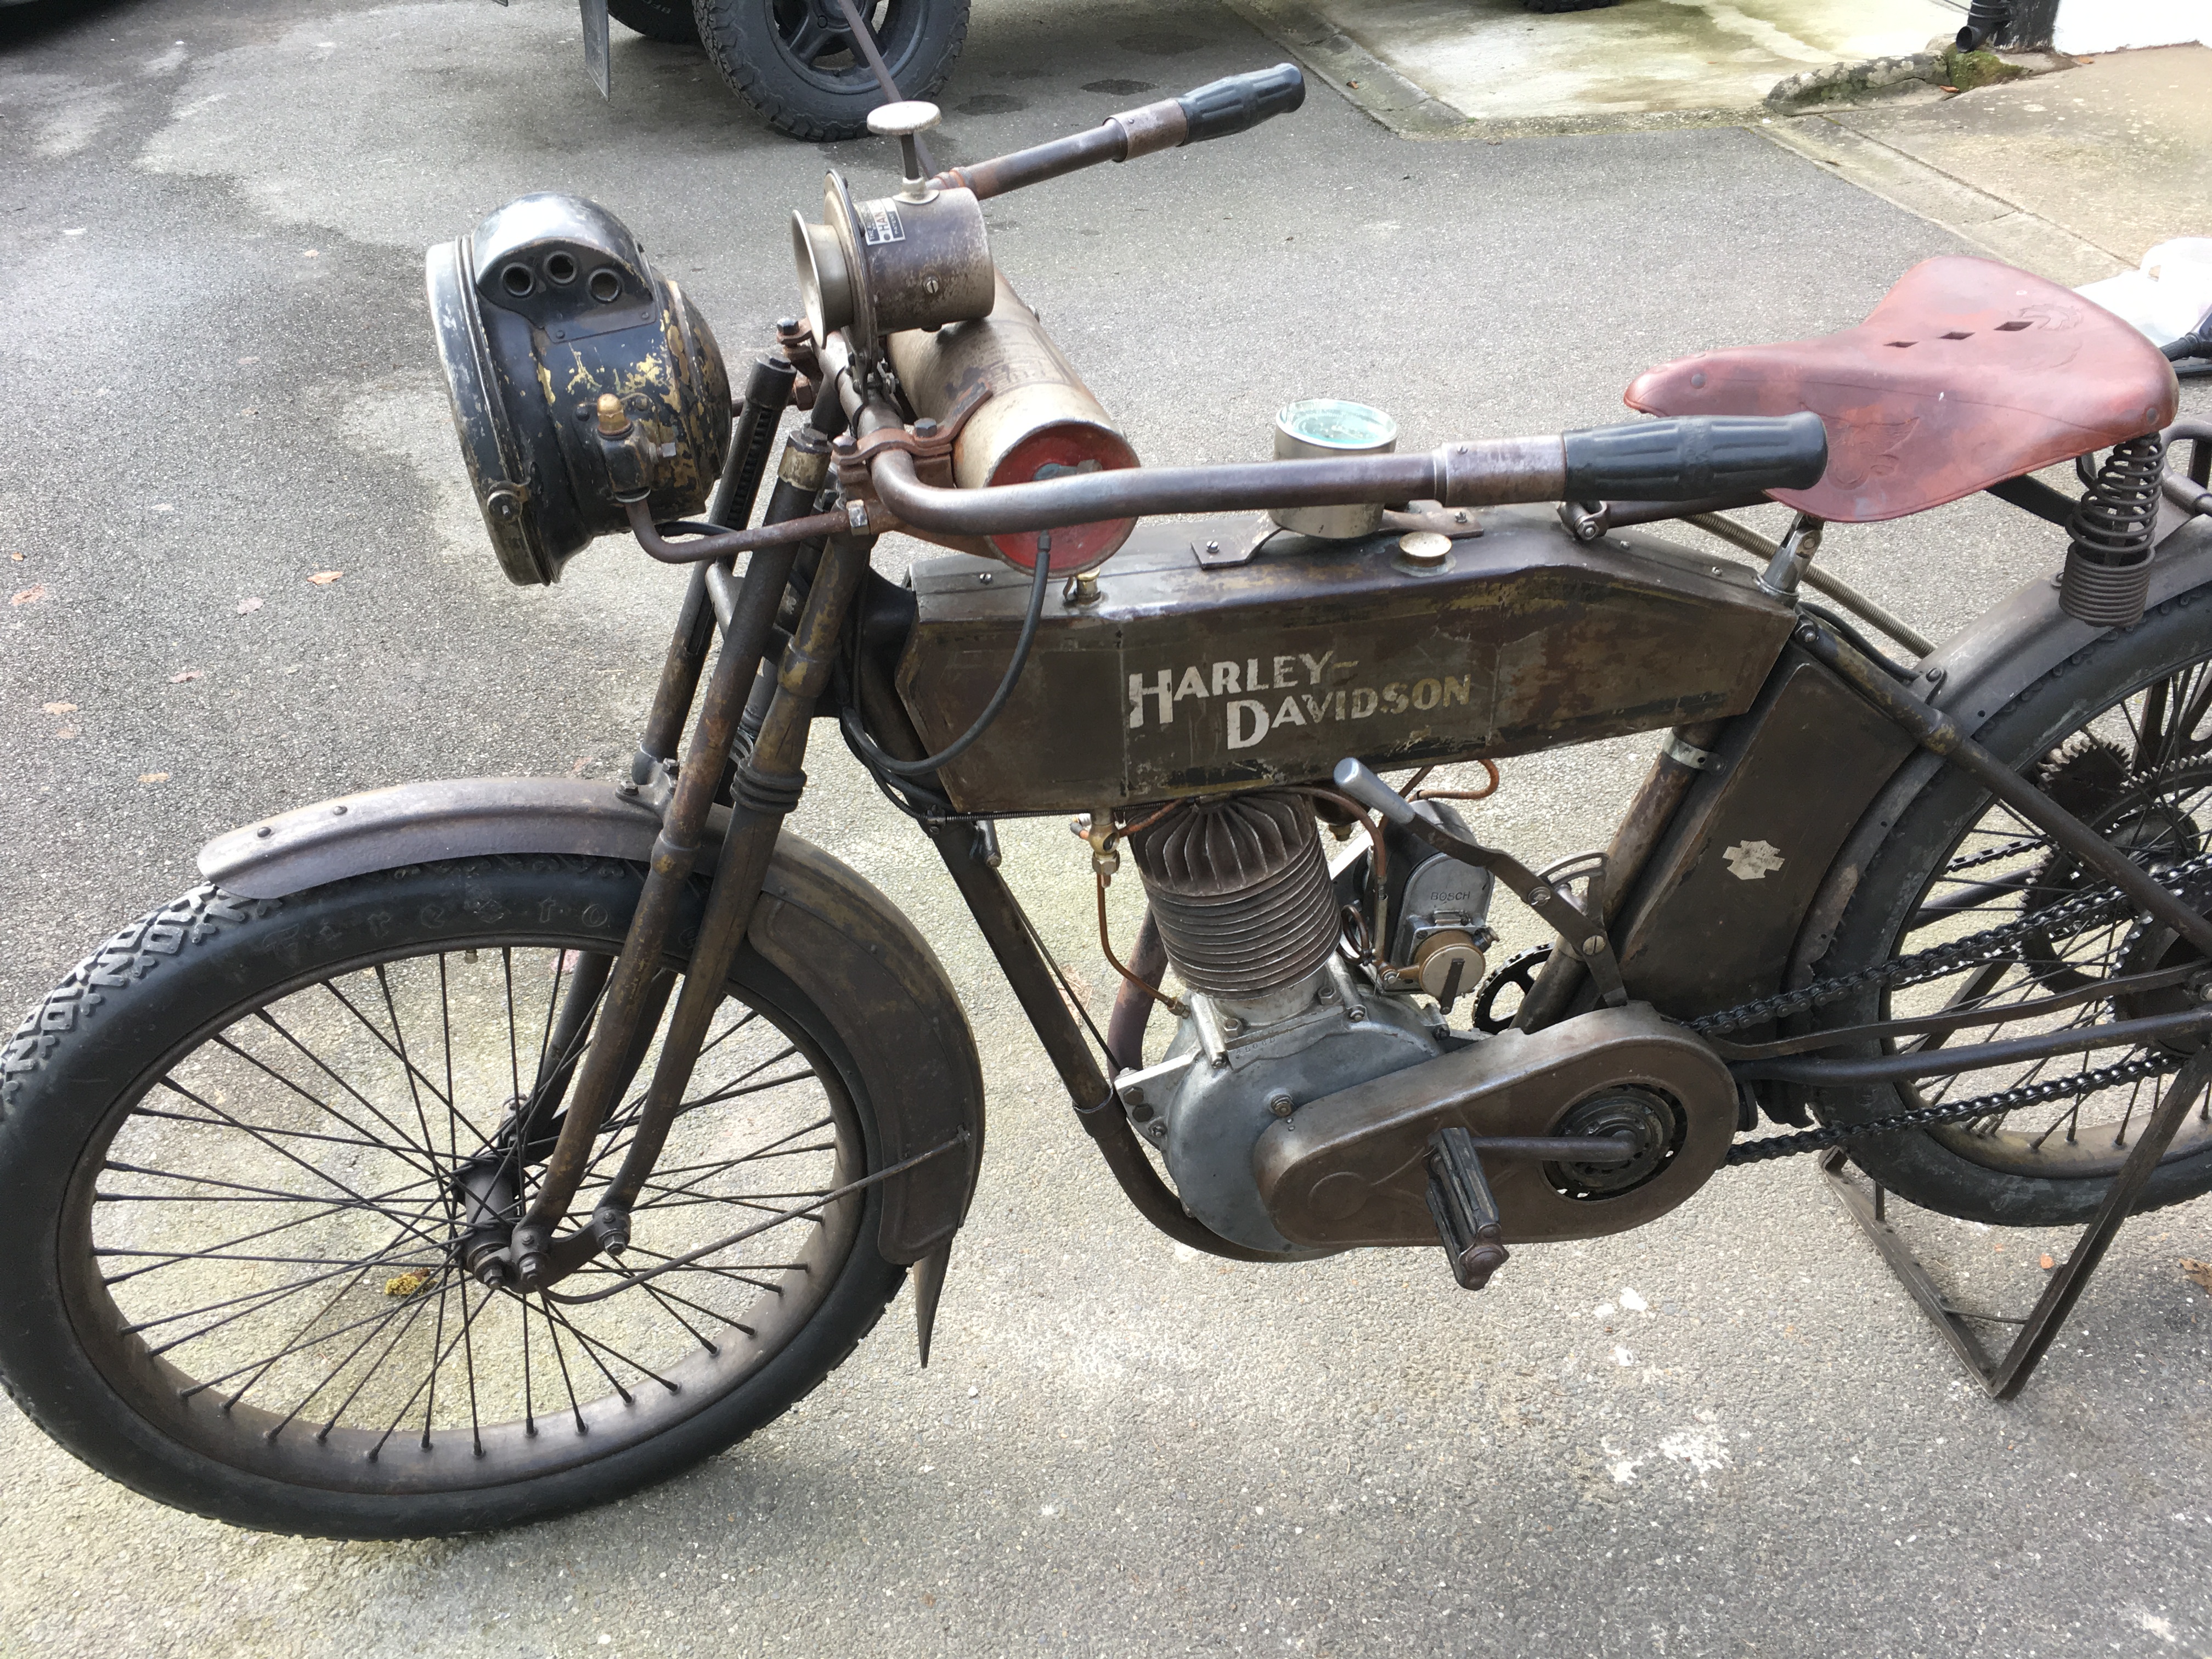
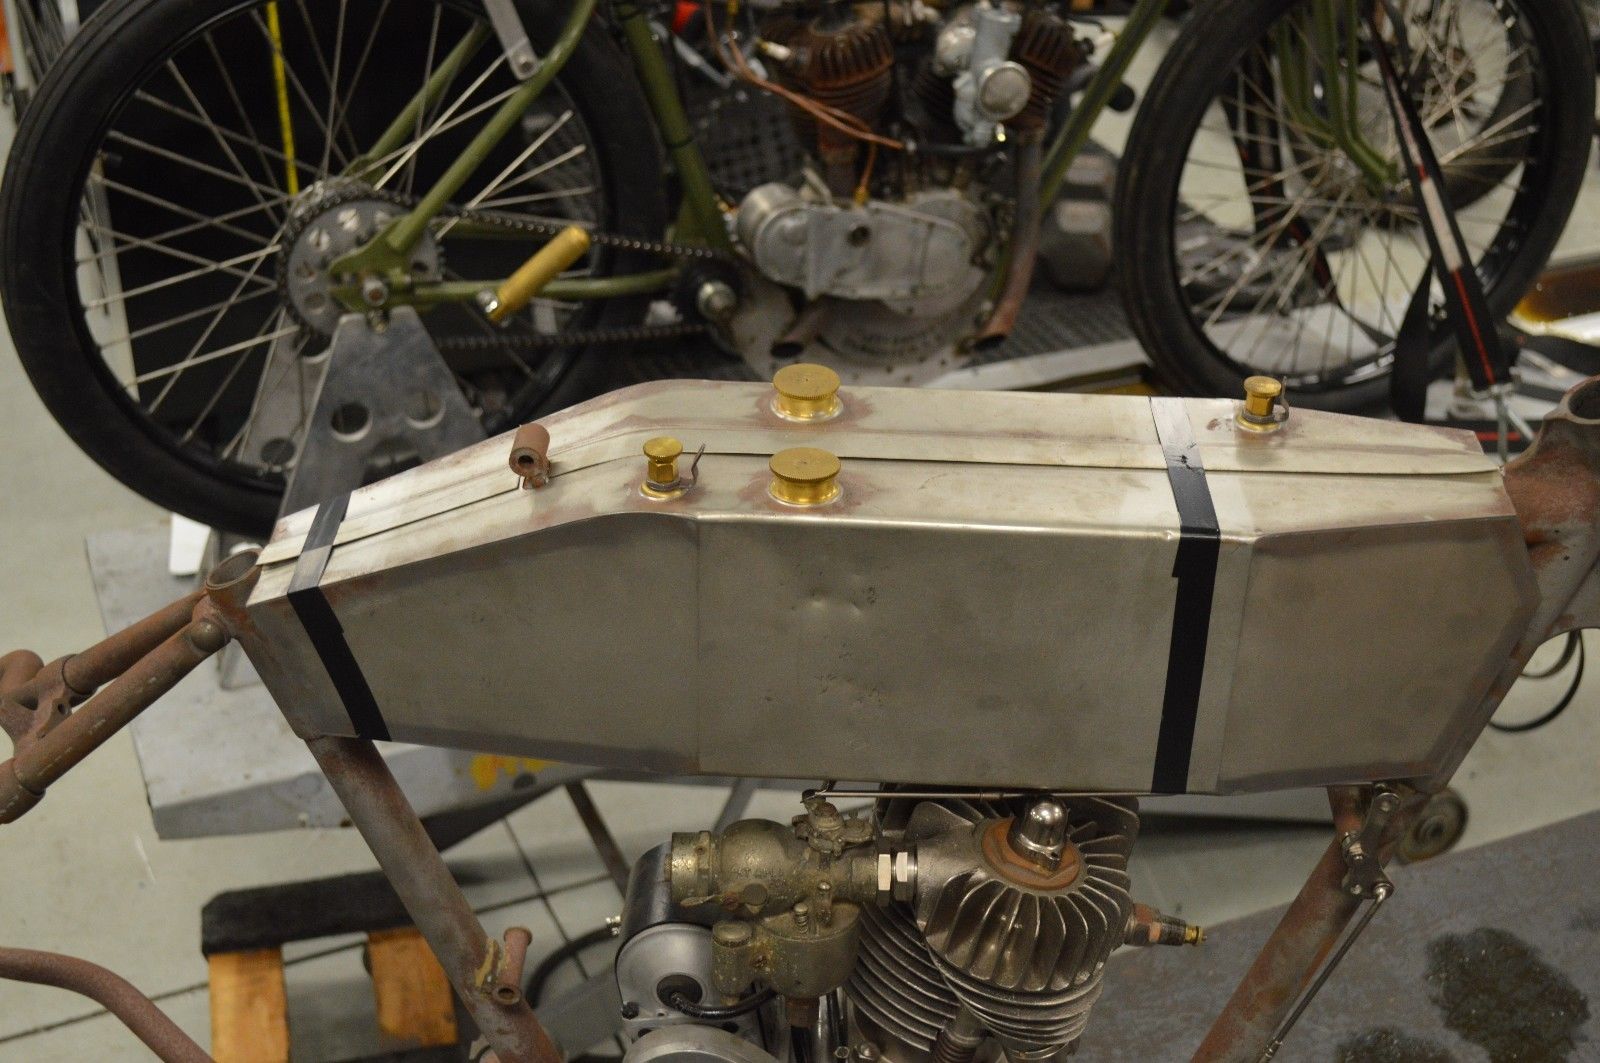
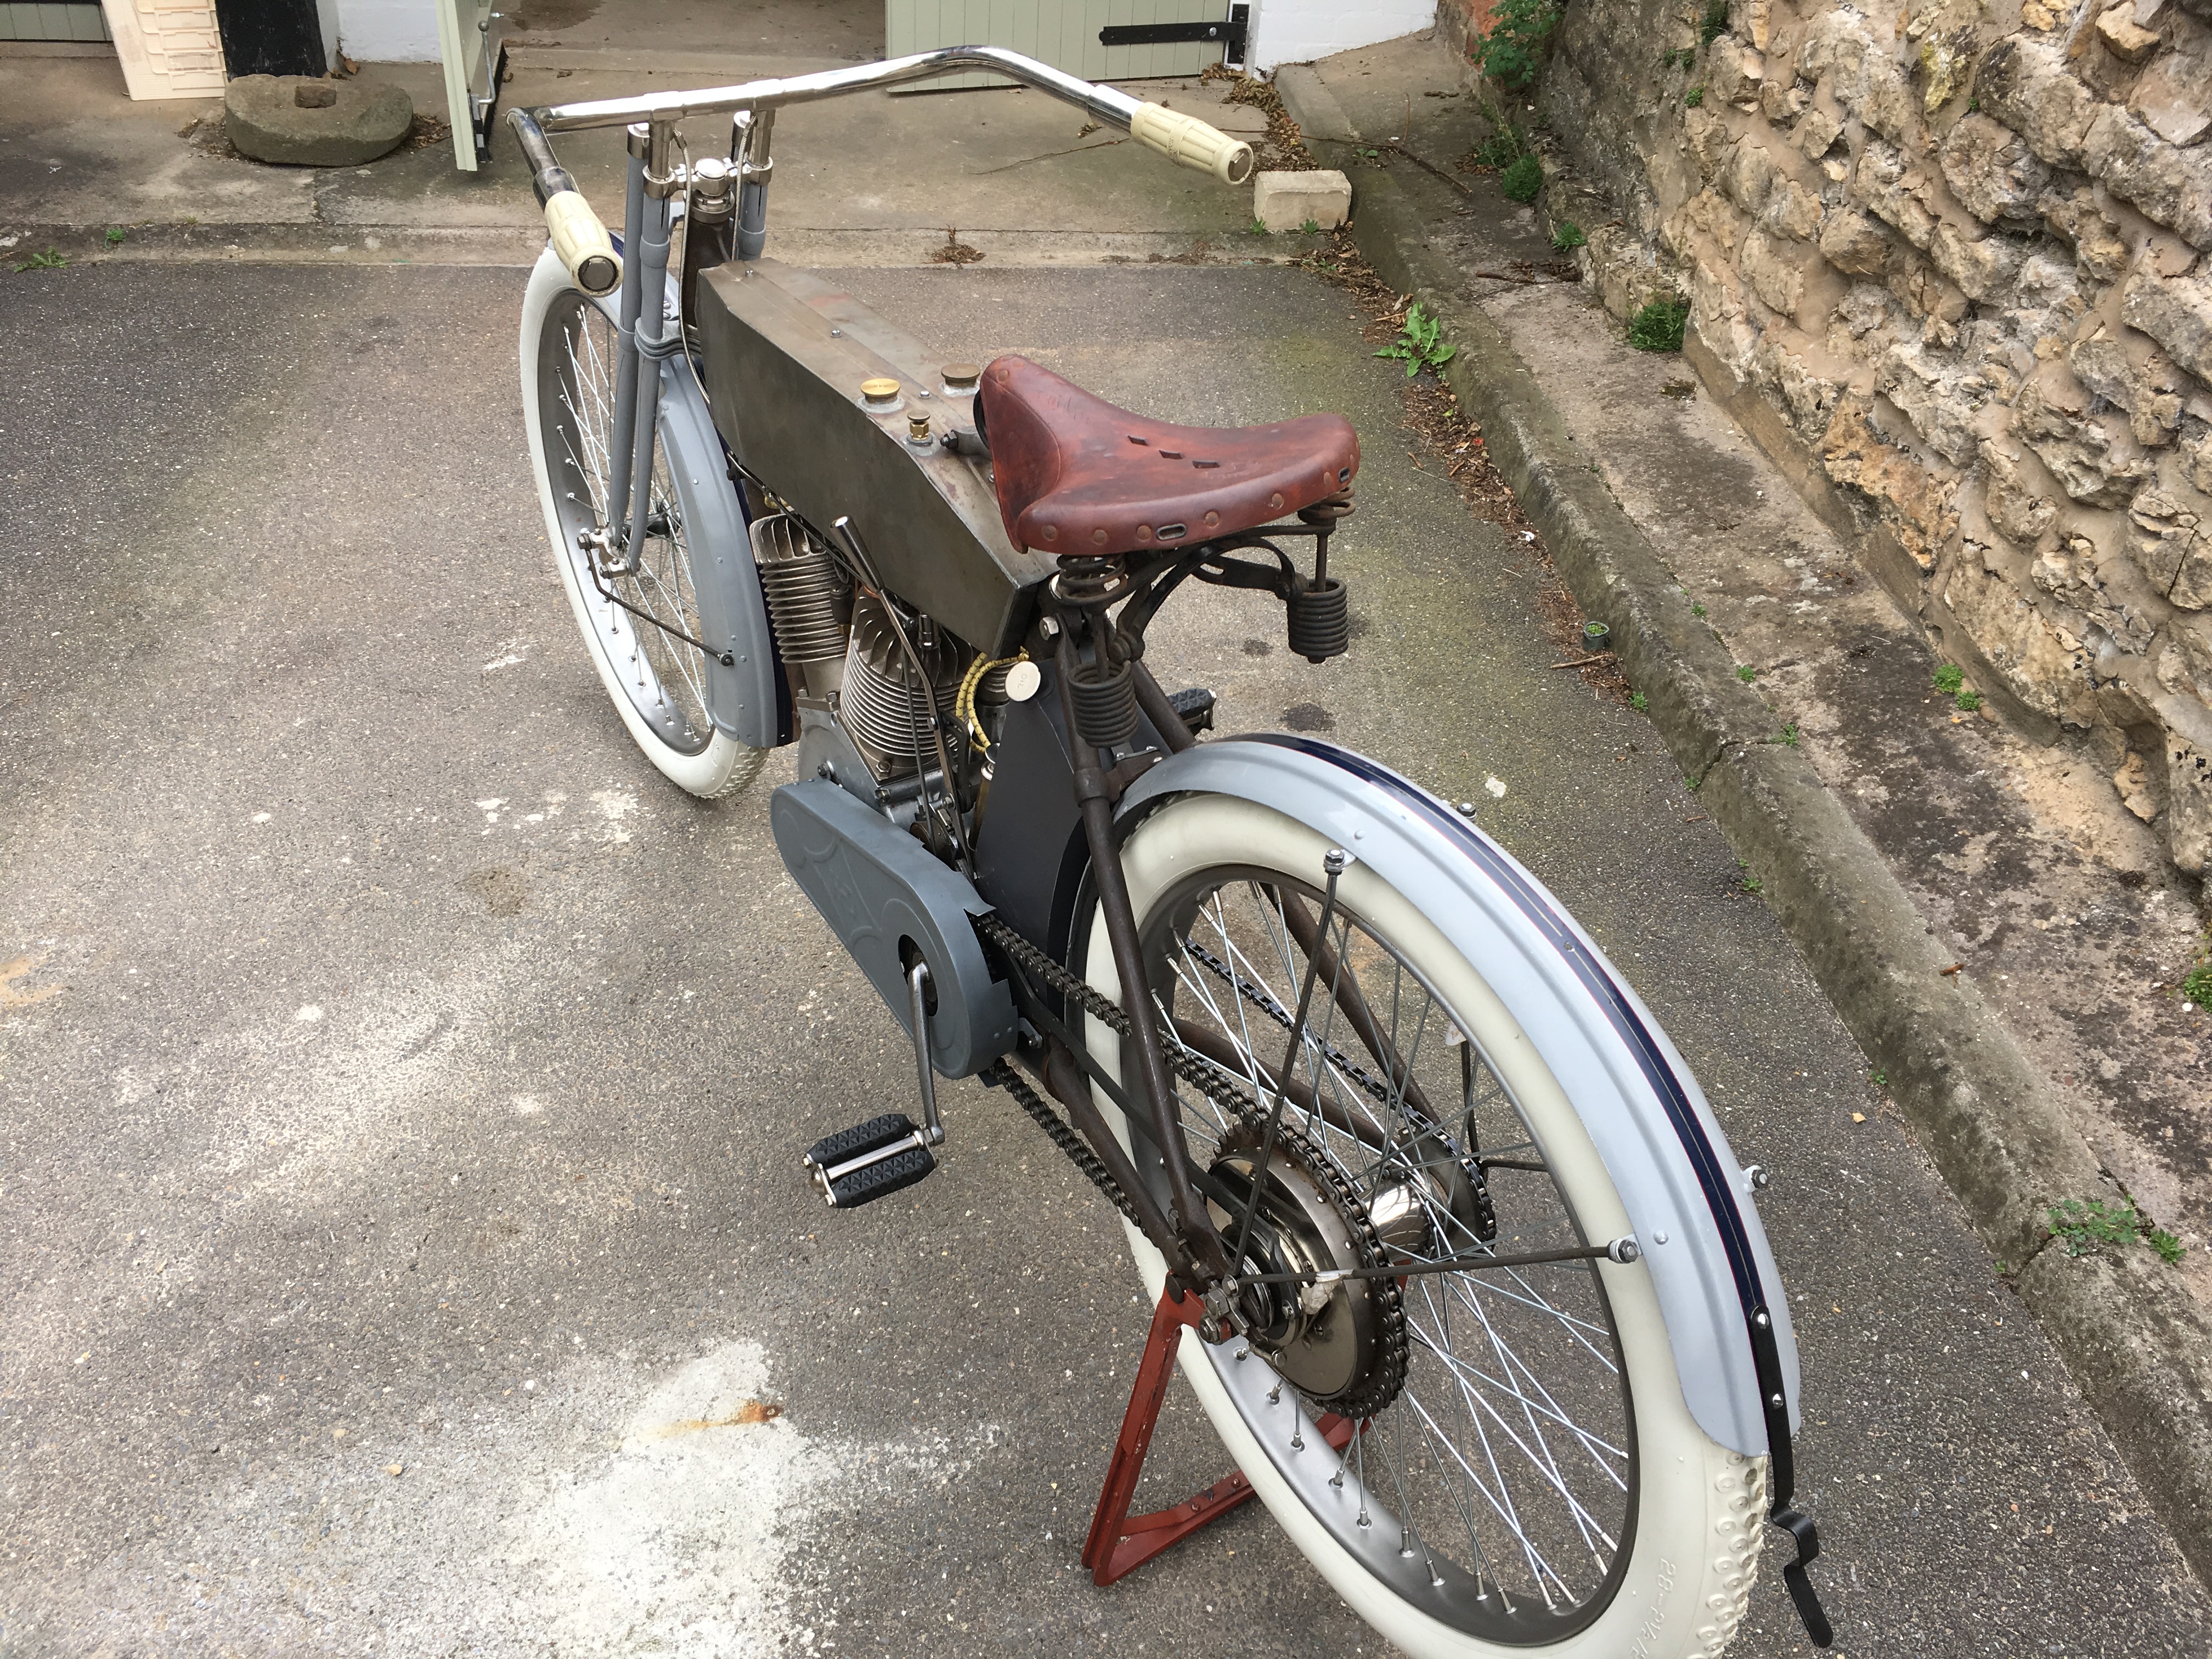
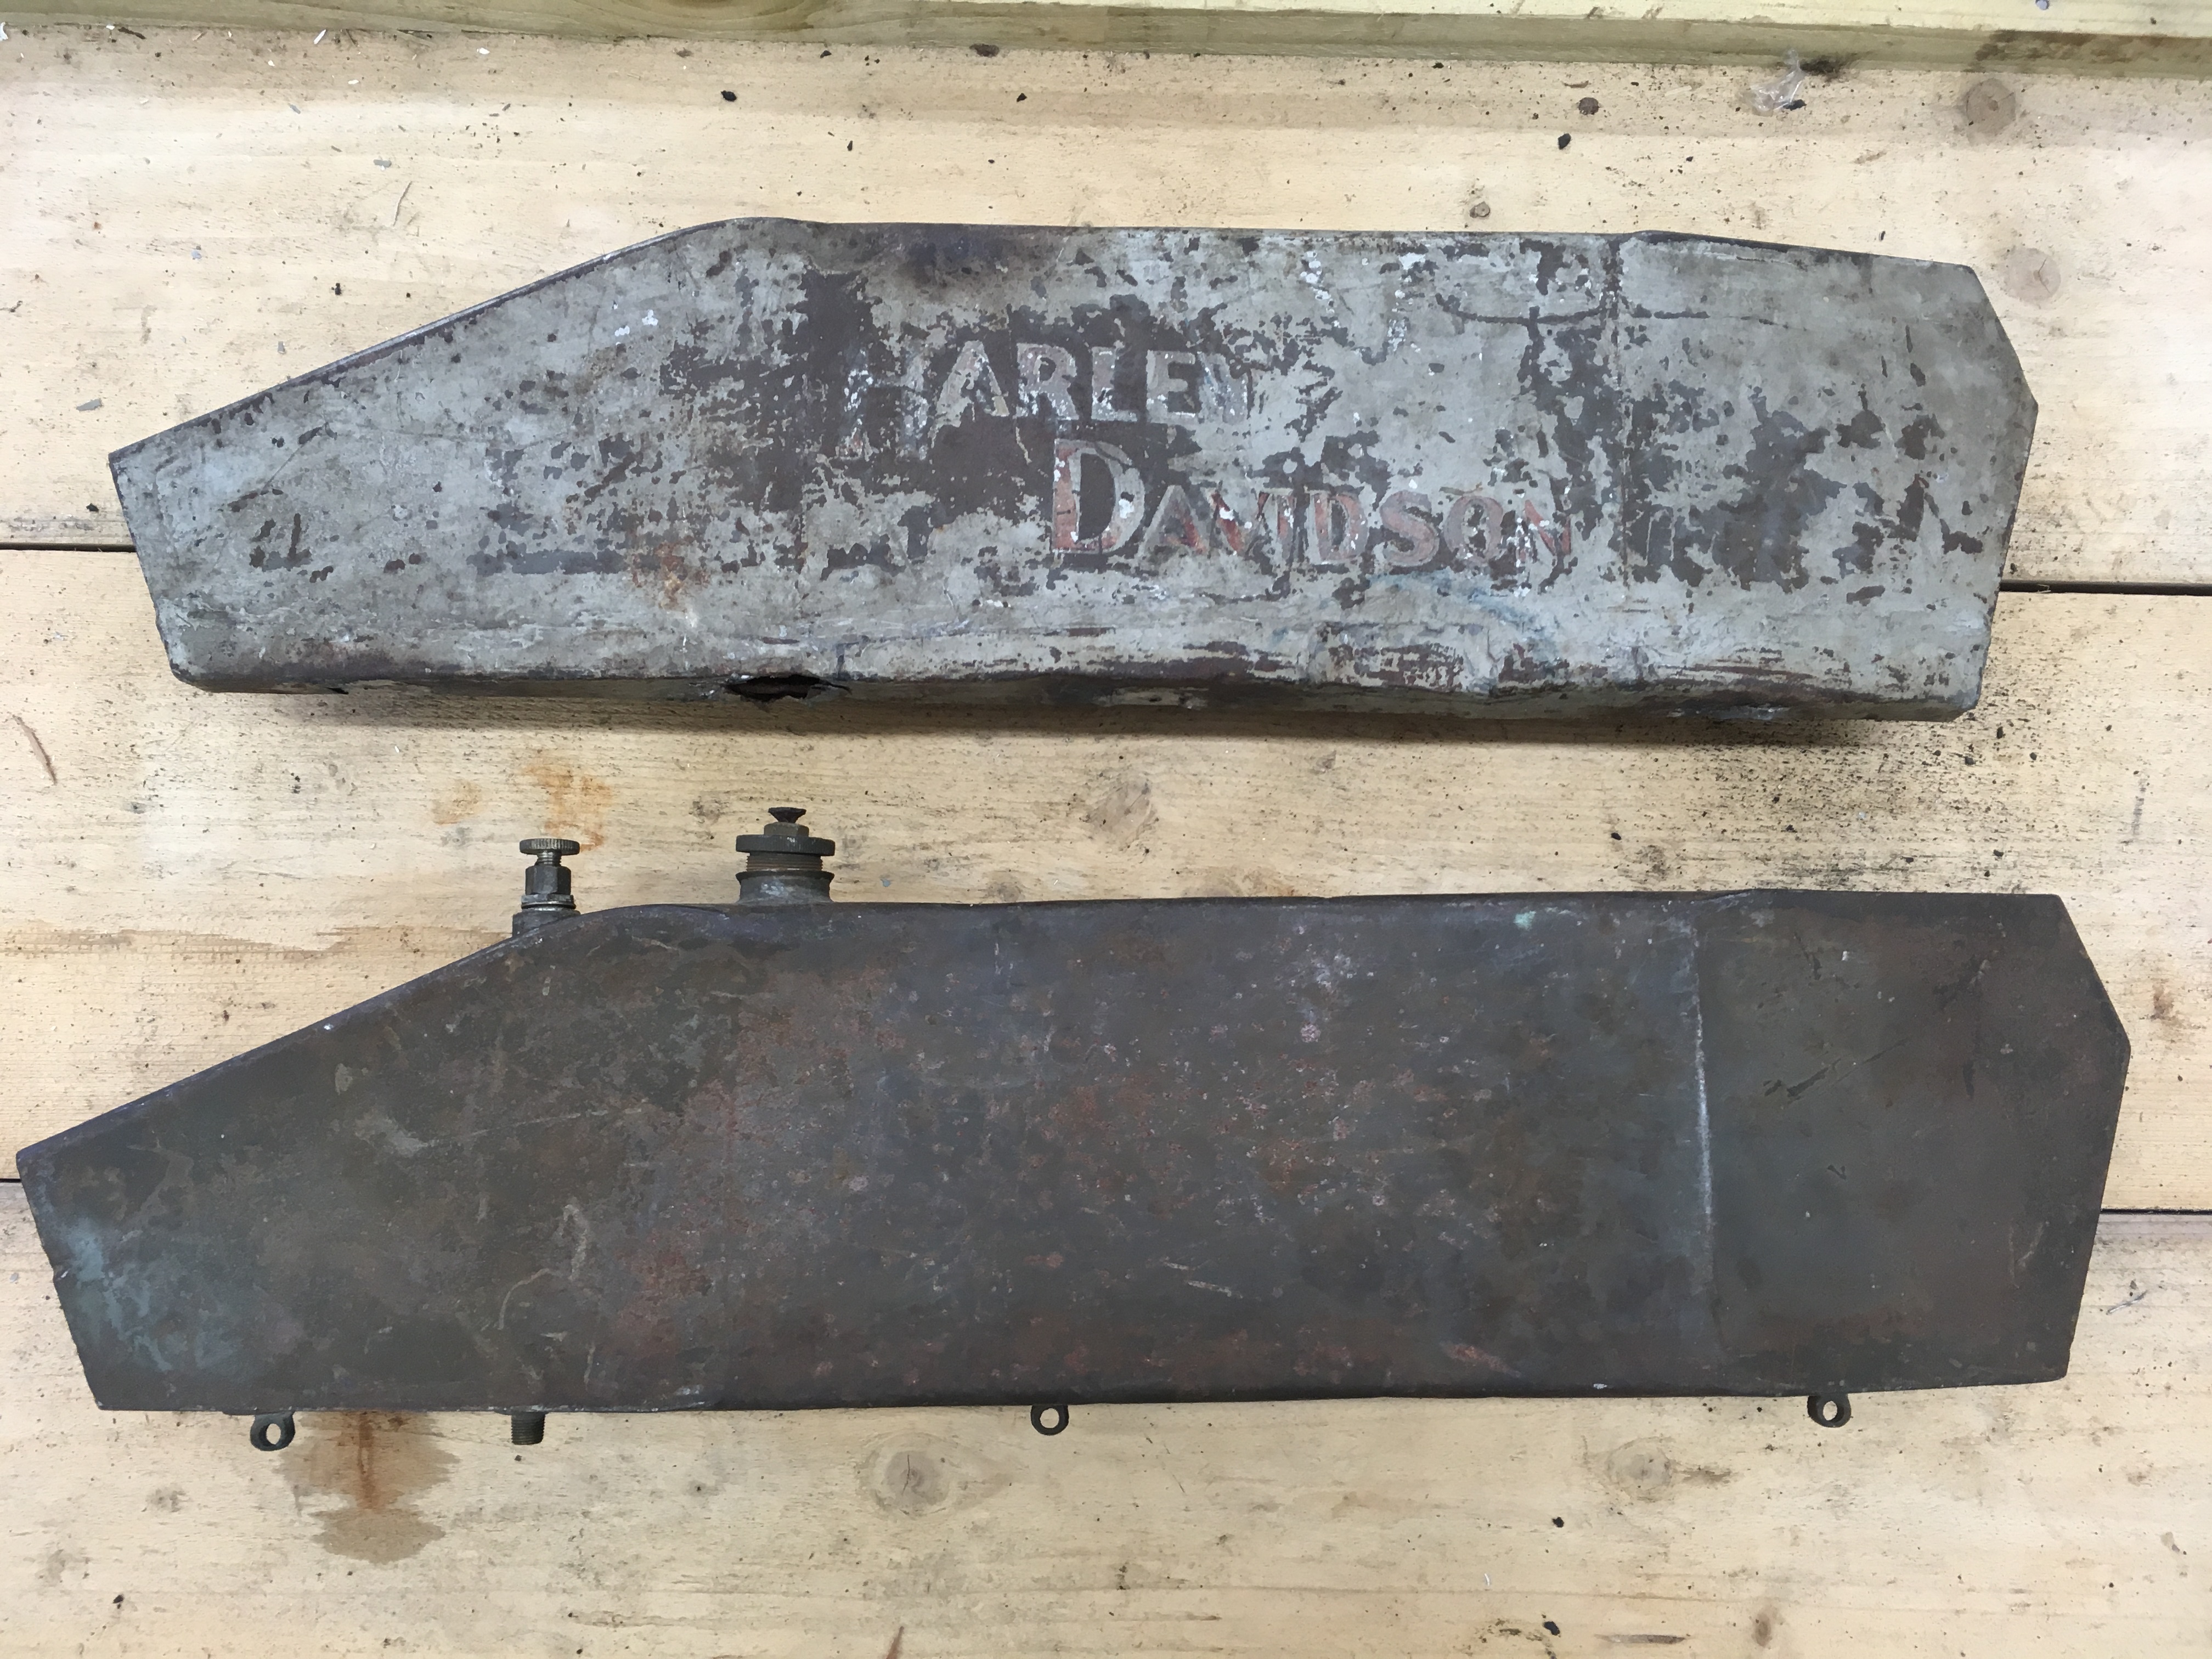
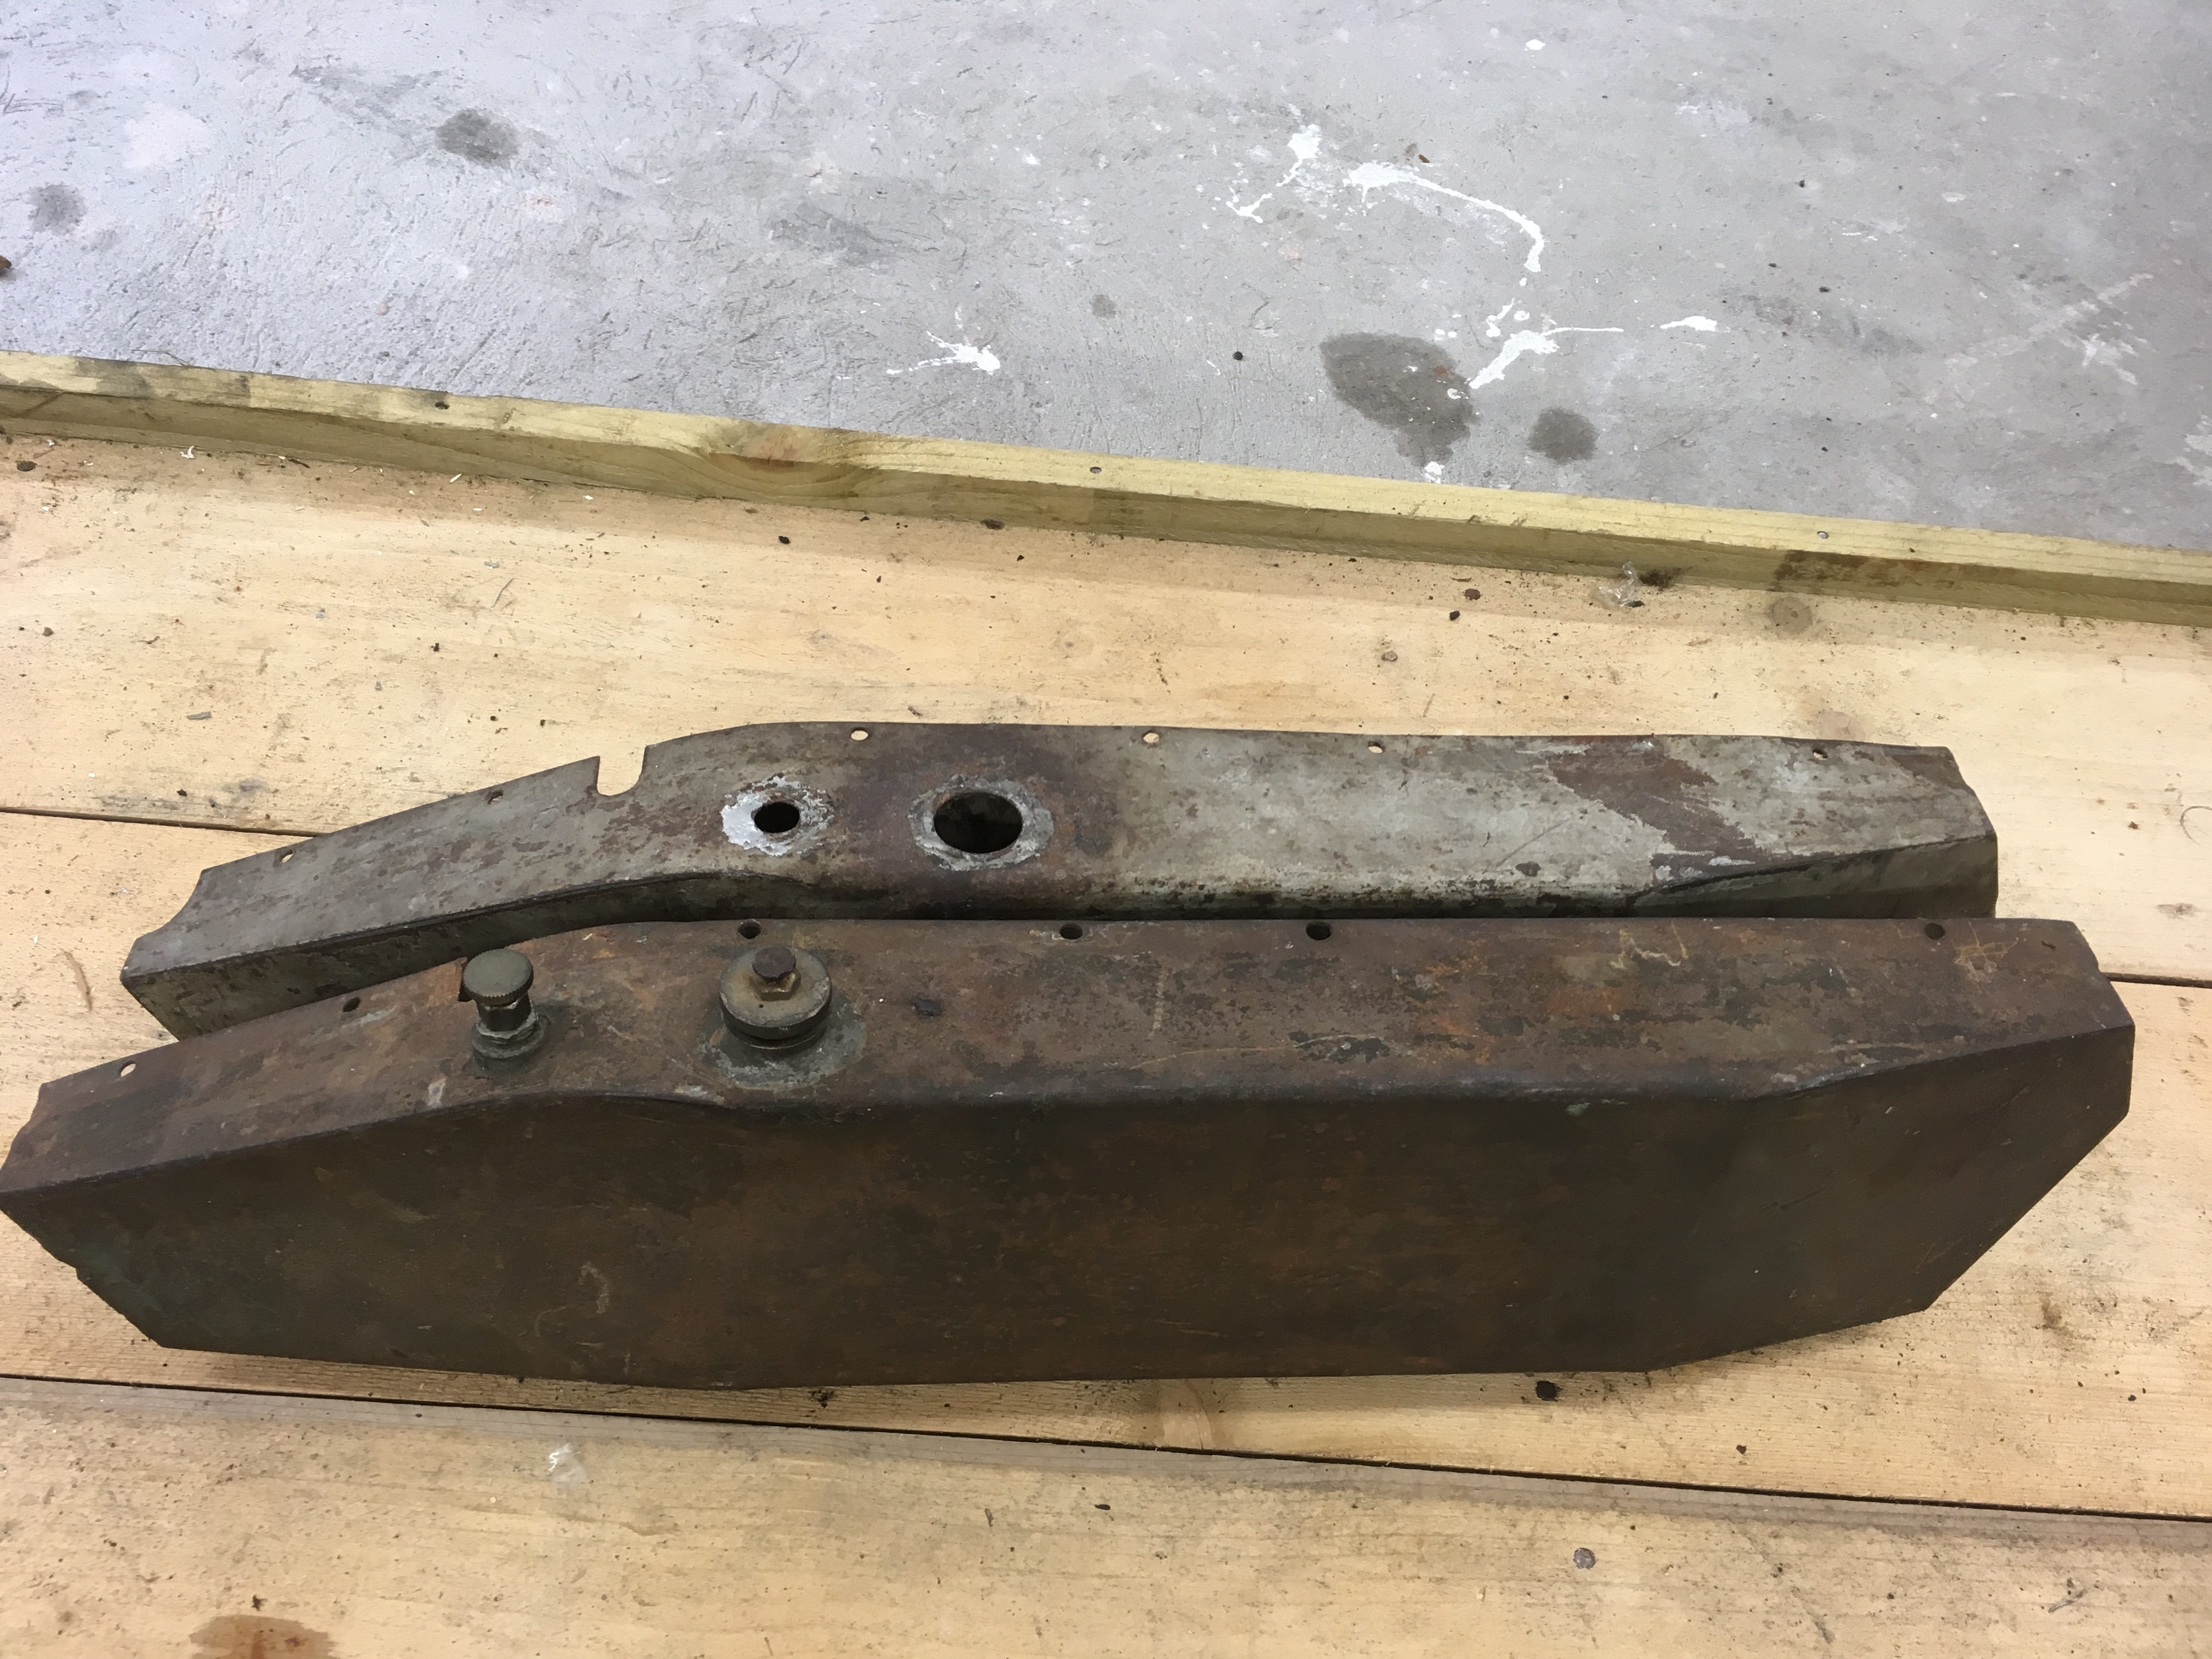
The right hand tanks is correct for 1912 and came from the Veterama Swap Meet in Mannheim. The other tank is also a right hand and but from a single cylinder model. I am hoping I can use the incorrect part to fashion a left hand replacement part, hopefully keeping the name decal section.


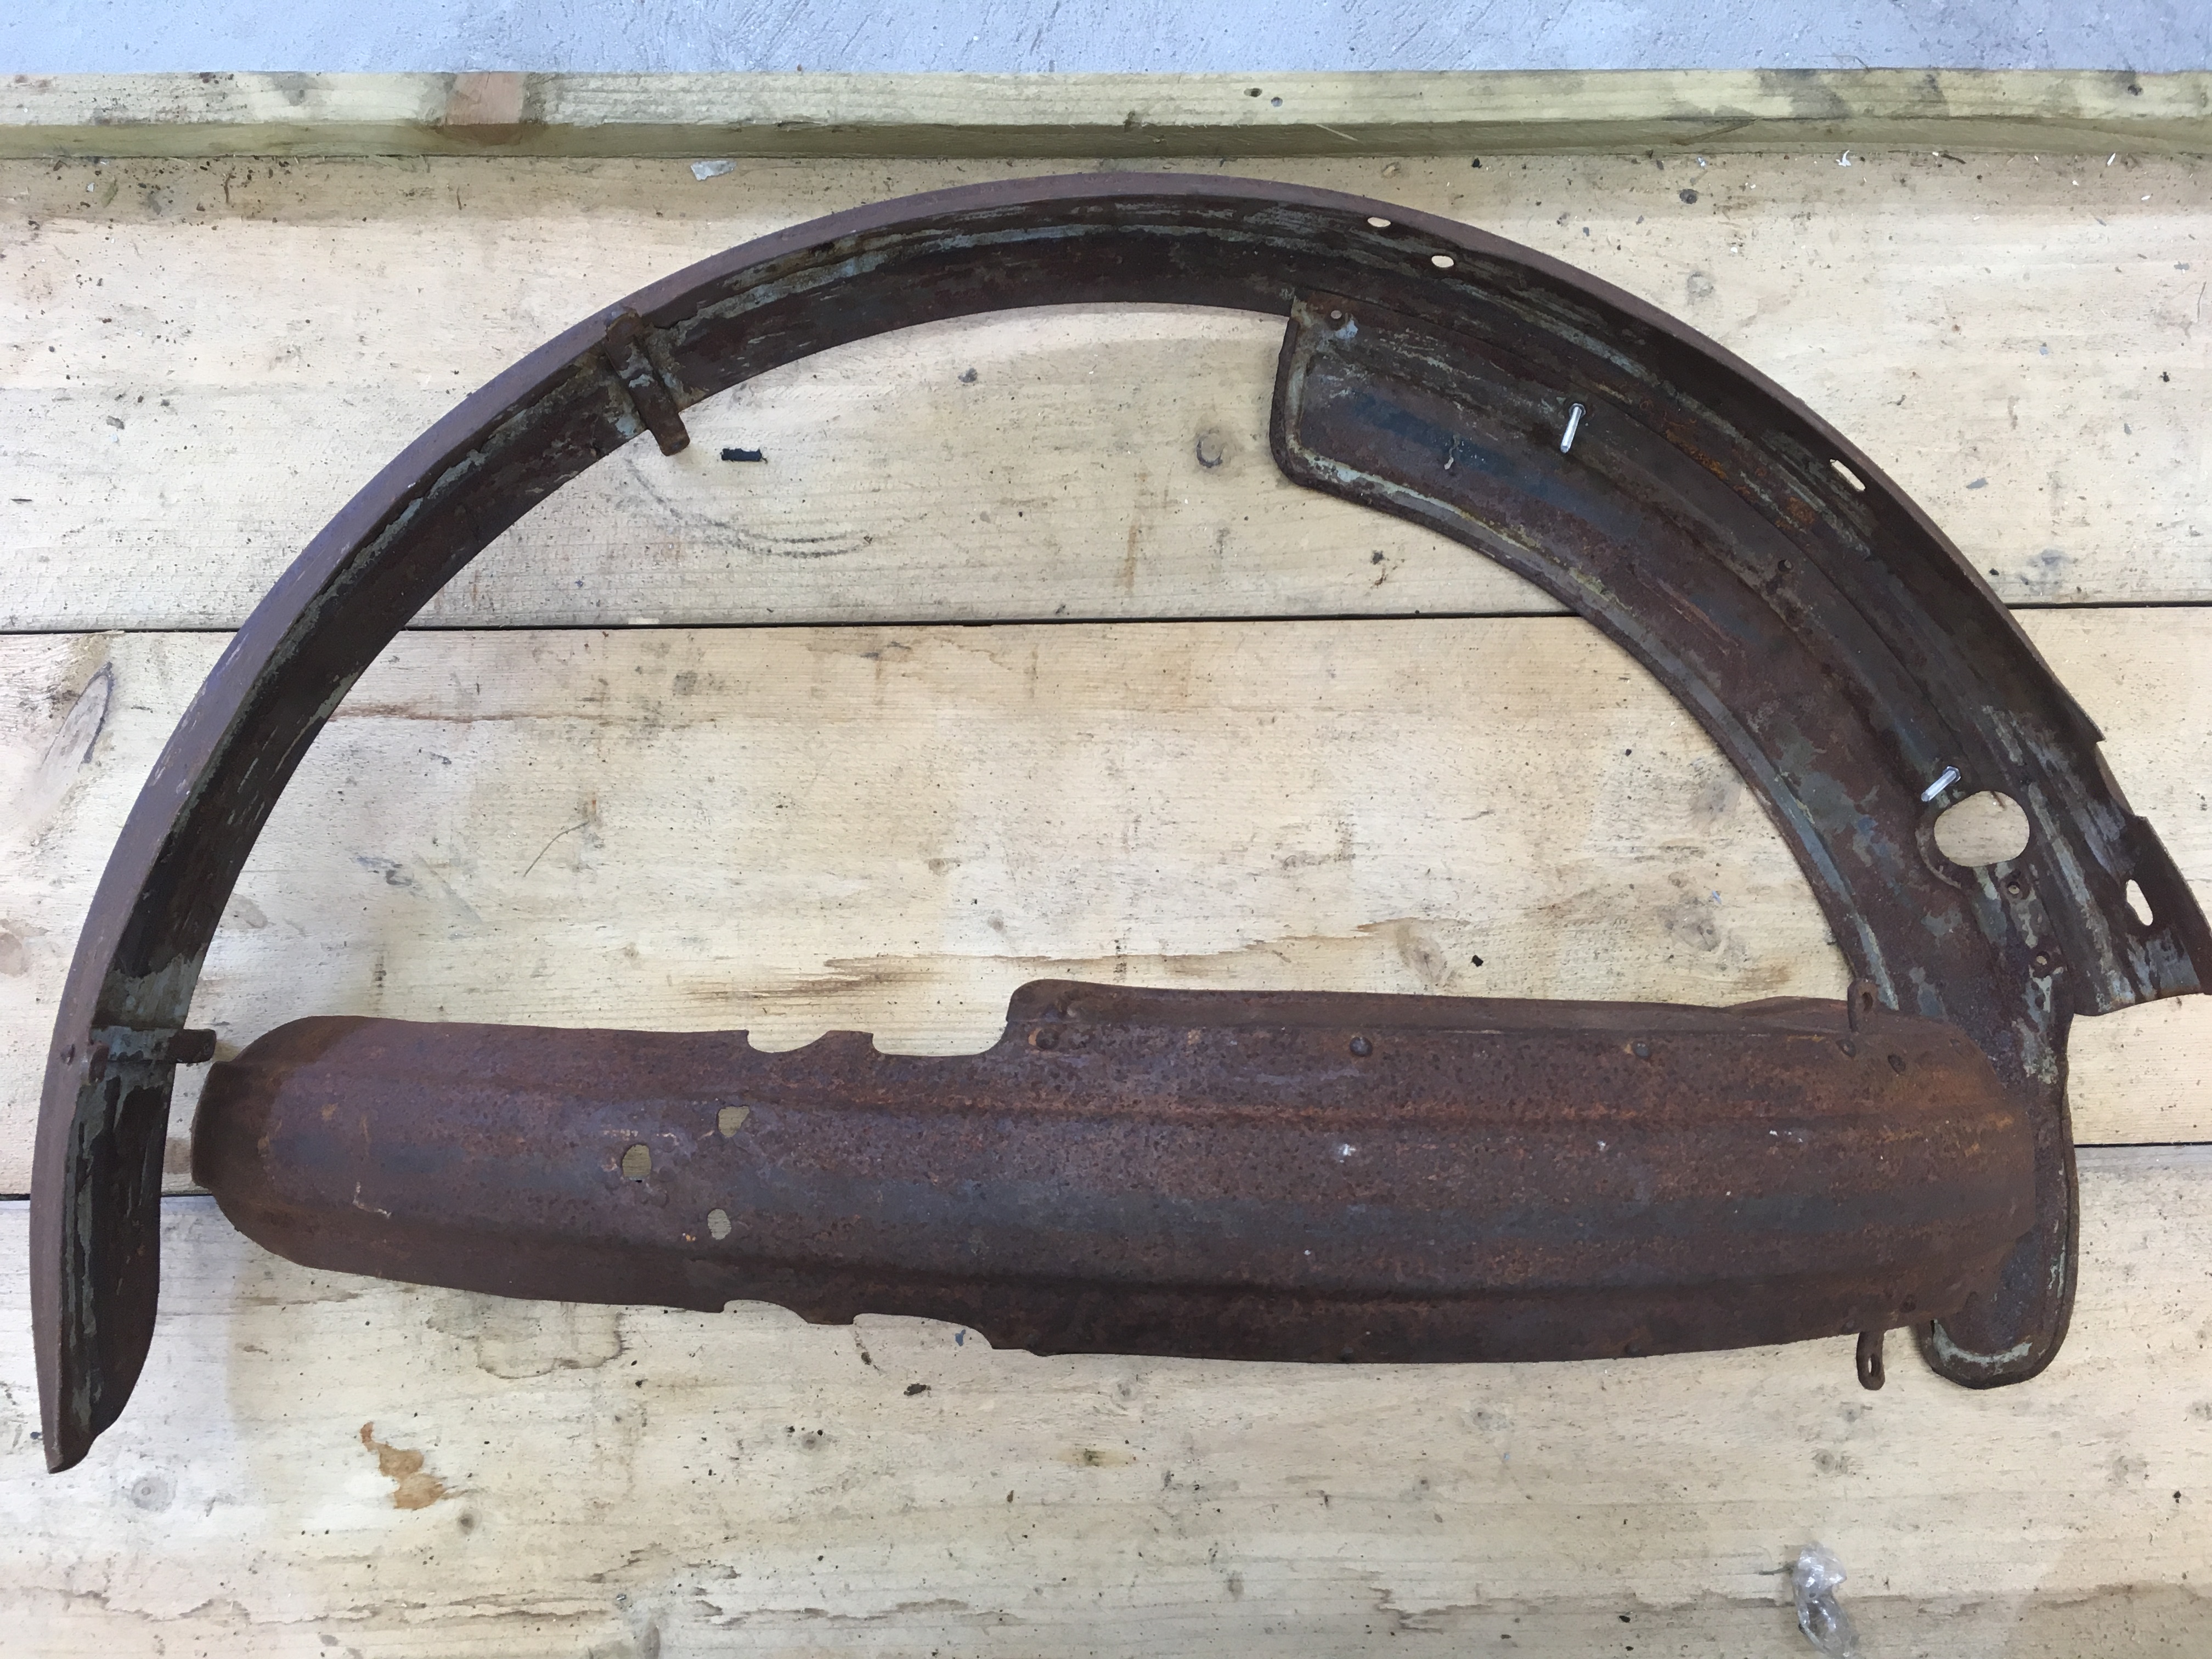
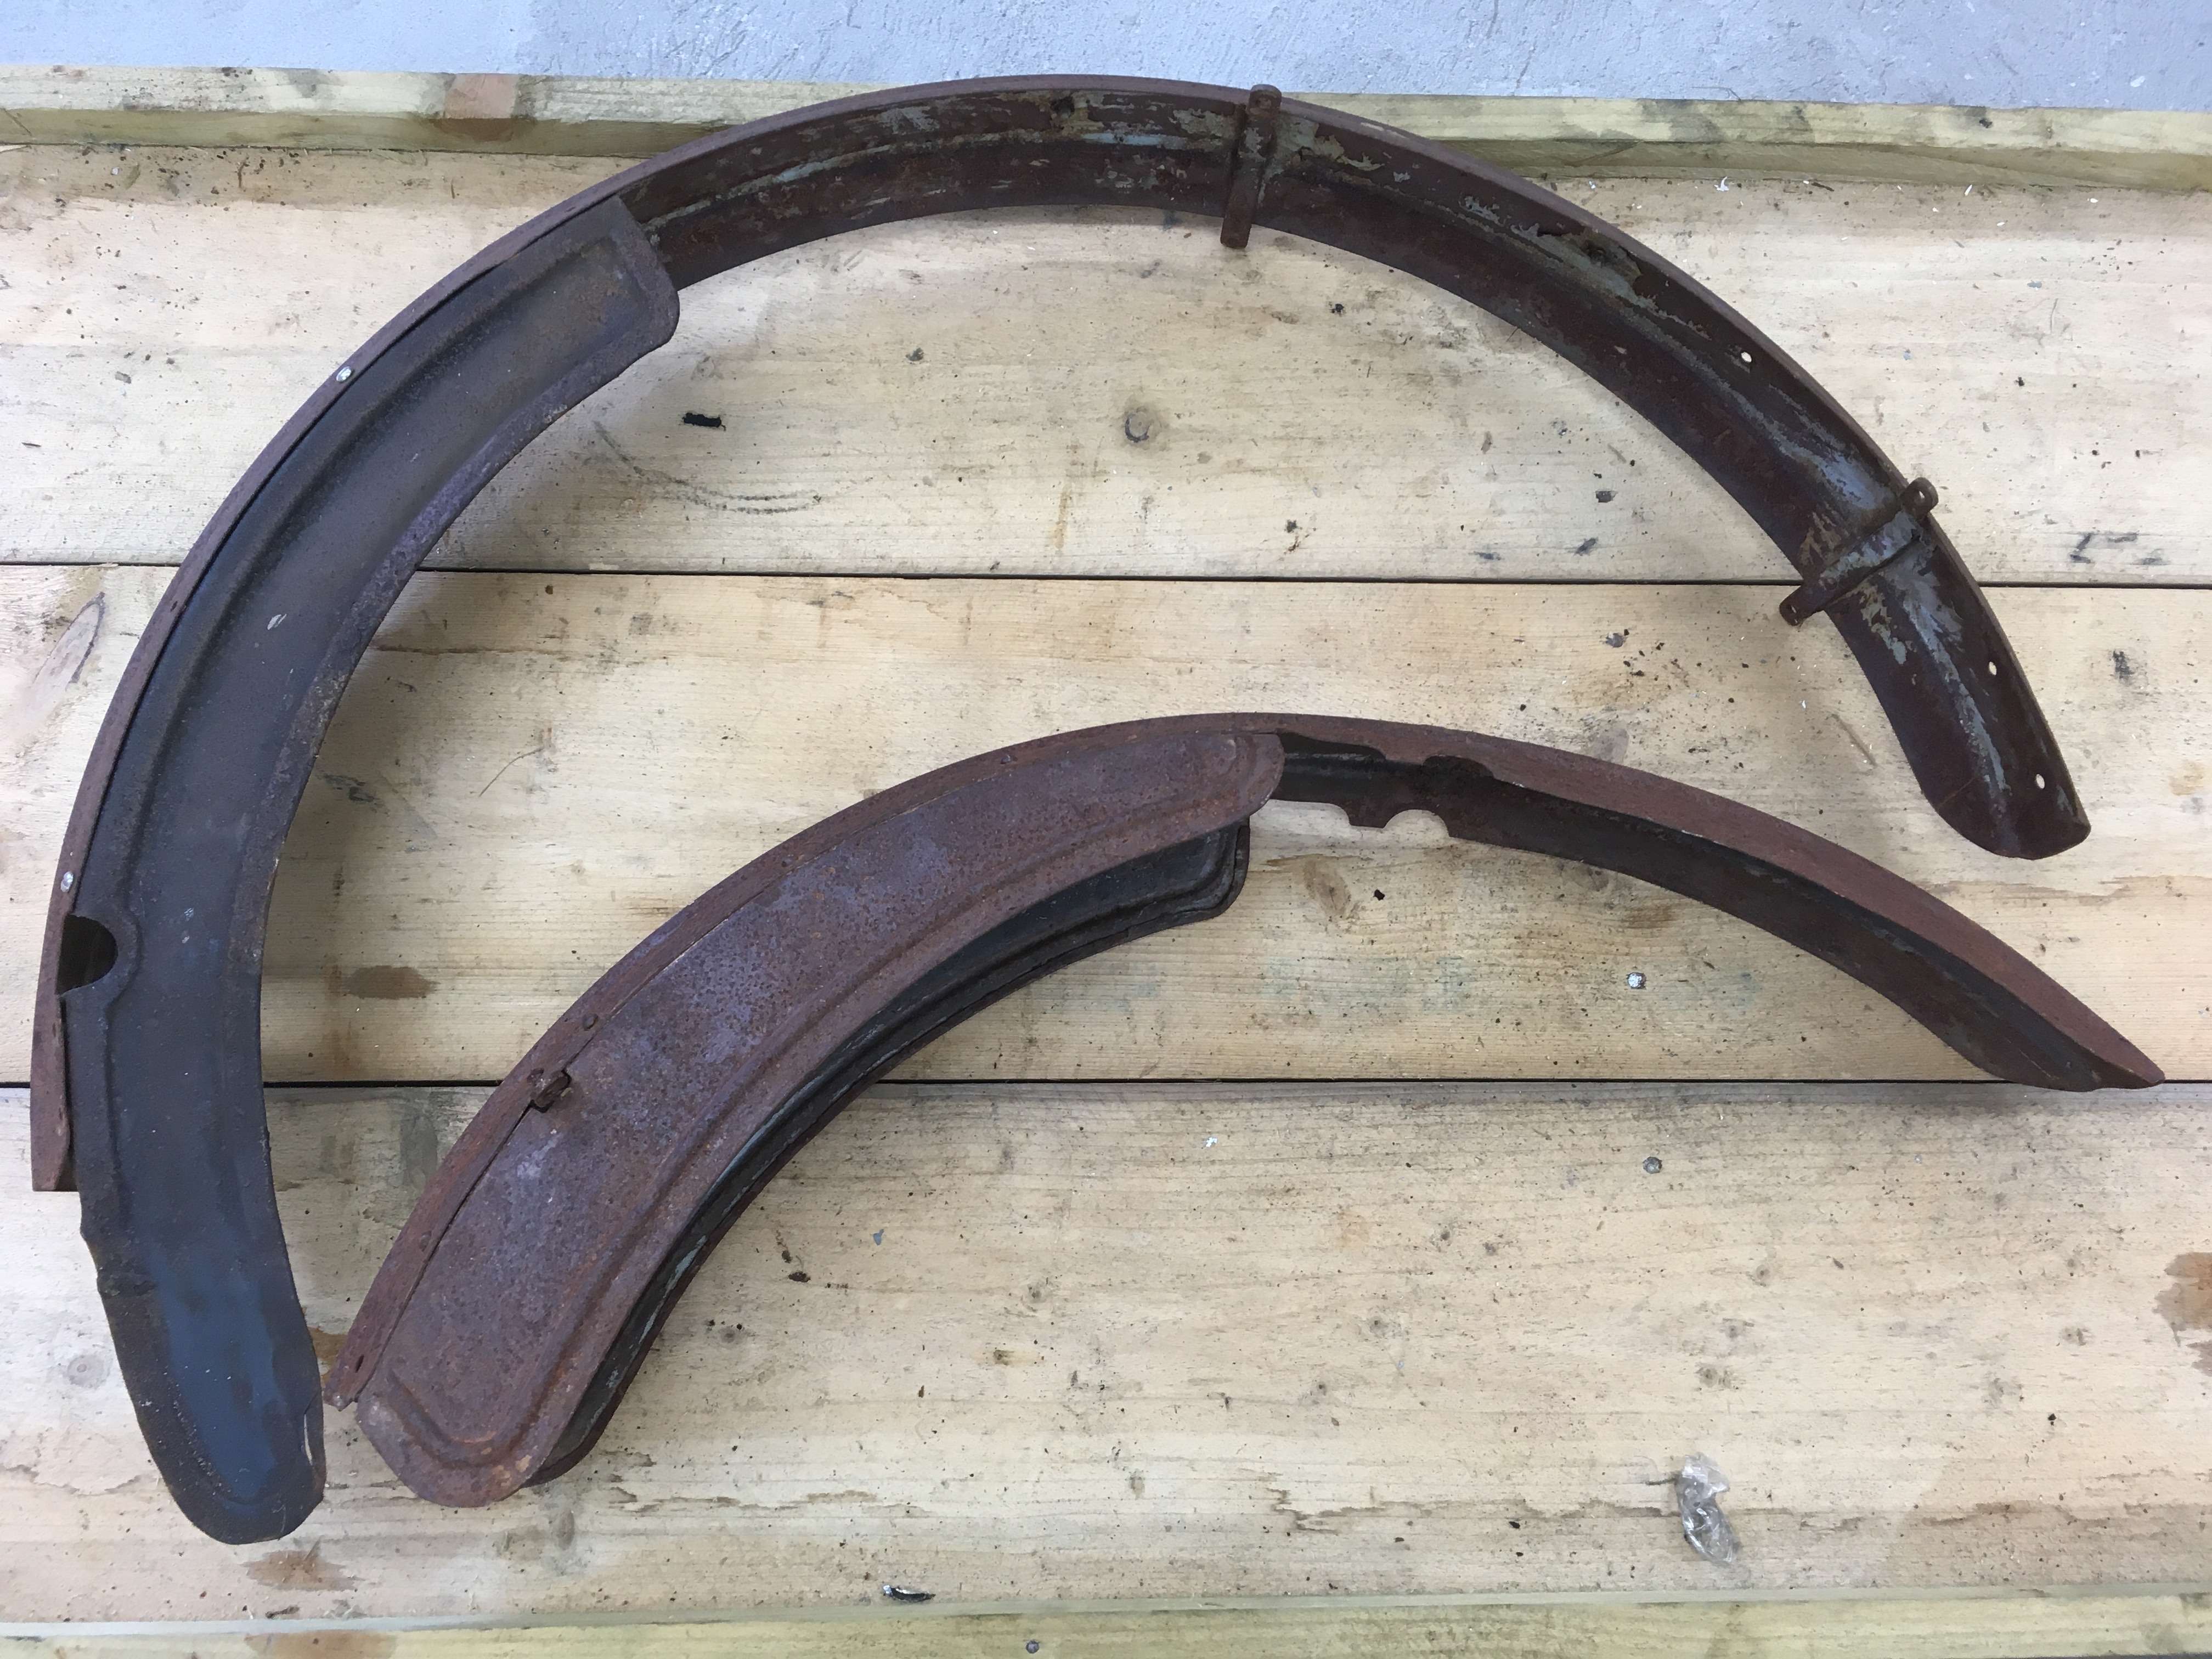
The fenders are also original pieces and also came from Germany. They are correct parts but may need a little massaging.

8XE teardown

Well with everything else that’s been going on I just haven’t looked at this ’12 in a while so I thought I should make a start. I pulled her apart yesterday and will now send everything out for paint, plating and odd bits ready for the re-build. I think the motor should come apart as well for a polish and to plate the smaller parts.

1914 model 10C

I just got this little 10C single cylinder with two speed rear hub. She was restored in the early 1990’s in Yorkshire at a time when reproduction parts were not so readily available. It was also pre-internet so if parts were missing from a machine and the owner didn’t have access to another model or a reference book, it was very difficult to know what the correct parts looked like.

But of course the owners needed to get their bikes running and often fabricated some quite imaginative solutions. The magneto control on this bike is such an example, cleverly constructed but overly complicated. Should it stay on the bike for the sake of history and ‘quirkiness’ or should it be corrected? Other linkages are wrong and some of the parts are for the wrong year model. The more you look the more you see. But the first job is to fit new tyres and tubes and get her running.


Knuckle knews

I haven’t looked at a teens bike since before Christmas; I’ve just been so busy with other things. I’ve been buying and selling bikes and parts to ‘fund the habit’ and have been working on this pair of knuckles.


I will be selling the 9B soon and am looking for an interesting 1914 model. The 9B is my ride-around bike and runs very well, I will post some photos when the sun comes out.

Fork assembly.

I have been asked how to assemble the forks on an early Harley and check if you have all the parts, if you have bought everything as reproduction and do not have an original set-up to follow. This should work for all 1910-14 models (and presumably some years just before that).

My example below is on a 1914 twin using all original parts. If you buy pattern springs from Competition or others, you will need to cut then to size as they are supplied long enough to cover all eventualities.

I happen to have the forks loosely set up in the frame but you can do this using a bench vice or even standing free. Image two shows the two fork plungers and the plunger coupling that joins them together.


The coupler has a right hand and a left hand thread. Turn one end into one of the plungers just about a half or one turn just so it grips. Then slide the coupler through the rear fork boss and hold the other coupler at the other end. In the middle of the boss is a small cut-out and you will be able to see a small hole drilled into the centre of the coupler. Use a thin screwdriver or bar and rotate the coupler. This will have the effect of screwing both threads (lh & rh) into the two plungers as in photo 3.

Insert the lower fork springs into the front fork legs as in photo 4.

Next slide the tubes upwards so that they slip over the plungers. Use the plunger coupler to adjust the width of the plungers so they fit into the tubes. The longer end of the plungers face downwards.

Then slide the forks up as far as they will go until you can drop the top springs into the top of the fork tubes. Then place the two spring guide rods into the top of the springs as in photo 6. Then fit the fork tube caps (I forgot to take a photo).

The fork rockers will not align as in photo 7. The best method for ‘one man’ operation is to use a ratchet strap as in photo 8 to pull the front fork upward until they align. If you need to add extra spring length to adjust the ride then using the ratchet straps to undo everything is an easy option.

Like most things, it’s easy when you know.

Another 1912 for sale

Another 1912 single for sale on eBay (from a very well known seller) at the moment. A great little project and with some large repop parts just confirming that all the parts required are still available to complete these great bikes. Frame from Dewey Rice and the tanks from Jethro Smith, I also have frames and tanks from these guys. These bikes are very usable when finished and super coooool!

It’s another great little project for someone. (He also has a 14 for sale).


9B maintenance

Loose play around the head-stock from all the off-roading I’ve been doing! Bars off and it’s obviously been a while since these bearings have seen some grease. But the problem is in part the worn/broken head cone. And I have another on the shelf which has gone the same way.

Gas cocks and Dirt traps

FOR SALE. Picture one is the complete dirt trap AK72A for 1909 -1914. I have the fatter 1915 version as well but can’t find them. Picture two is the Gas cock EK1094 for 1916 -17, later part number 3601-16. The one on the very right; I’m not so sure.

8XE dry build finished.

The dry build is pretty much finished now but there is still plenty to do. The wheels need taking apart and then will be re-built with the correct spokes. I am having some issues with the sizes. The oil tank needs lifting some and the front fender sits poorly at present. There are plenty of small things that need looking at before paint and plating but she is mostly done. So far so good.

1 7 8 9 10 11 21